
SCIM provioning
SCIM provisioning lets your identity provider create, update, and deactivate Eraser accounts, and control team membership and roles from your directory groups. Once it's running, your directory is the source of truth: admins stop sending team invites, and removing someone from the directory removes their Eraser access.
This guide covers Microsoft Entra ID.
Availability: SCIM provisioning is only available on the Enterprise Plan, and only for organizations that already have SAML SSO configured.
Quick overview
- Set up SAML SSO for your organization (prerequisite)
- Enable provisioning in Eraser and copy the SCIM base URL and bearer token
- Enable SCIM provisioning on MS Entra
- Add users and groups on Microsoft Entra
- Turn on and start provisioning
- Map your directory groups to Eraser teams
- Verify provisioning is working
What SCIM controls
Your directory controls whether an Eraser account exists, which teams the person belongs to, whether they are an Admin or a Member of each, their name and email, and whether their access is active.
It doesn't touch teams with no group mapping, guests, billing, or any content – deactivating a user never deletes their work. Organization Admins are protected from sync-driven removal and demotion.
Sync is one-way, directory → Eraser, so membership changes made inside a managed team are overwritten on the next sync. That's why Eraser locks those teams' membership UI.
SCIM provisioning via Entra
Entra pushes your users and security groups to Eraser over SCIM, and you map each directory group to an Eraser team and role.
Prerequisites
SCIM builds on your SSO connection and can't be enabled without it. If you haven't set it up yet, follow the SSO documentation using the MS Entra instructions – you'll end up with a non-gallery enterprise application named Eraser and SSO enabled for your organization.
Note: Every team you plan to manage with SCIM must have SSO enabled. Teams without it can't be selected when you create a mapping – they appear marked "(enable SSO first)".
How to enable provisioning in Eraser
An Eraser Organization Admin does this.
Note: If you are a single-tenant customer, replace app.eraser.io with your-subdomain.eraser.io throughout this guide.
- Go to app.eraser.io/organization/dashboard.
- In the left sidebar, select Identity and settings.
- In the Provisioning section, click Set up provisioning.
- Eraser reveals a bearer token once. Copy it – it's stored only as a hash and can't be retrieved later.
- Copy the SCIM base URL from the field above it.
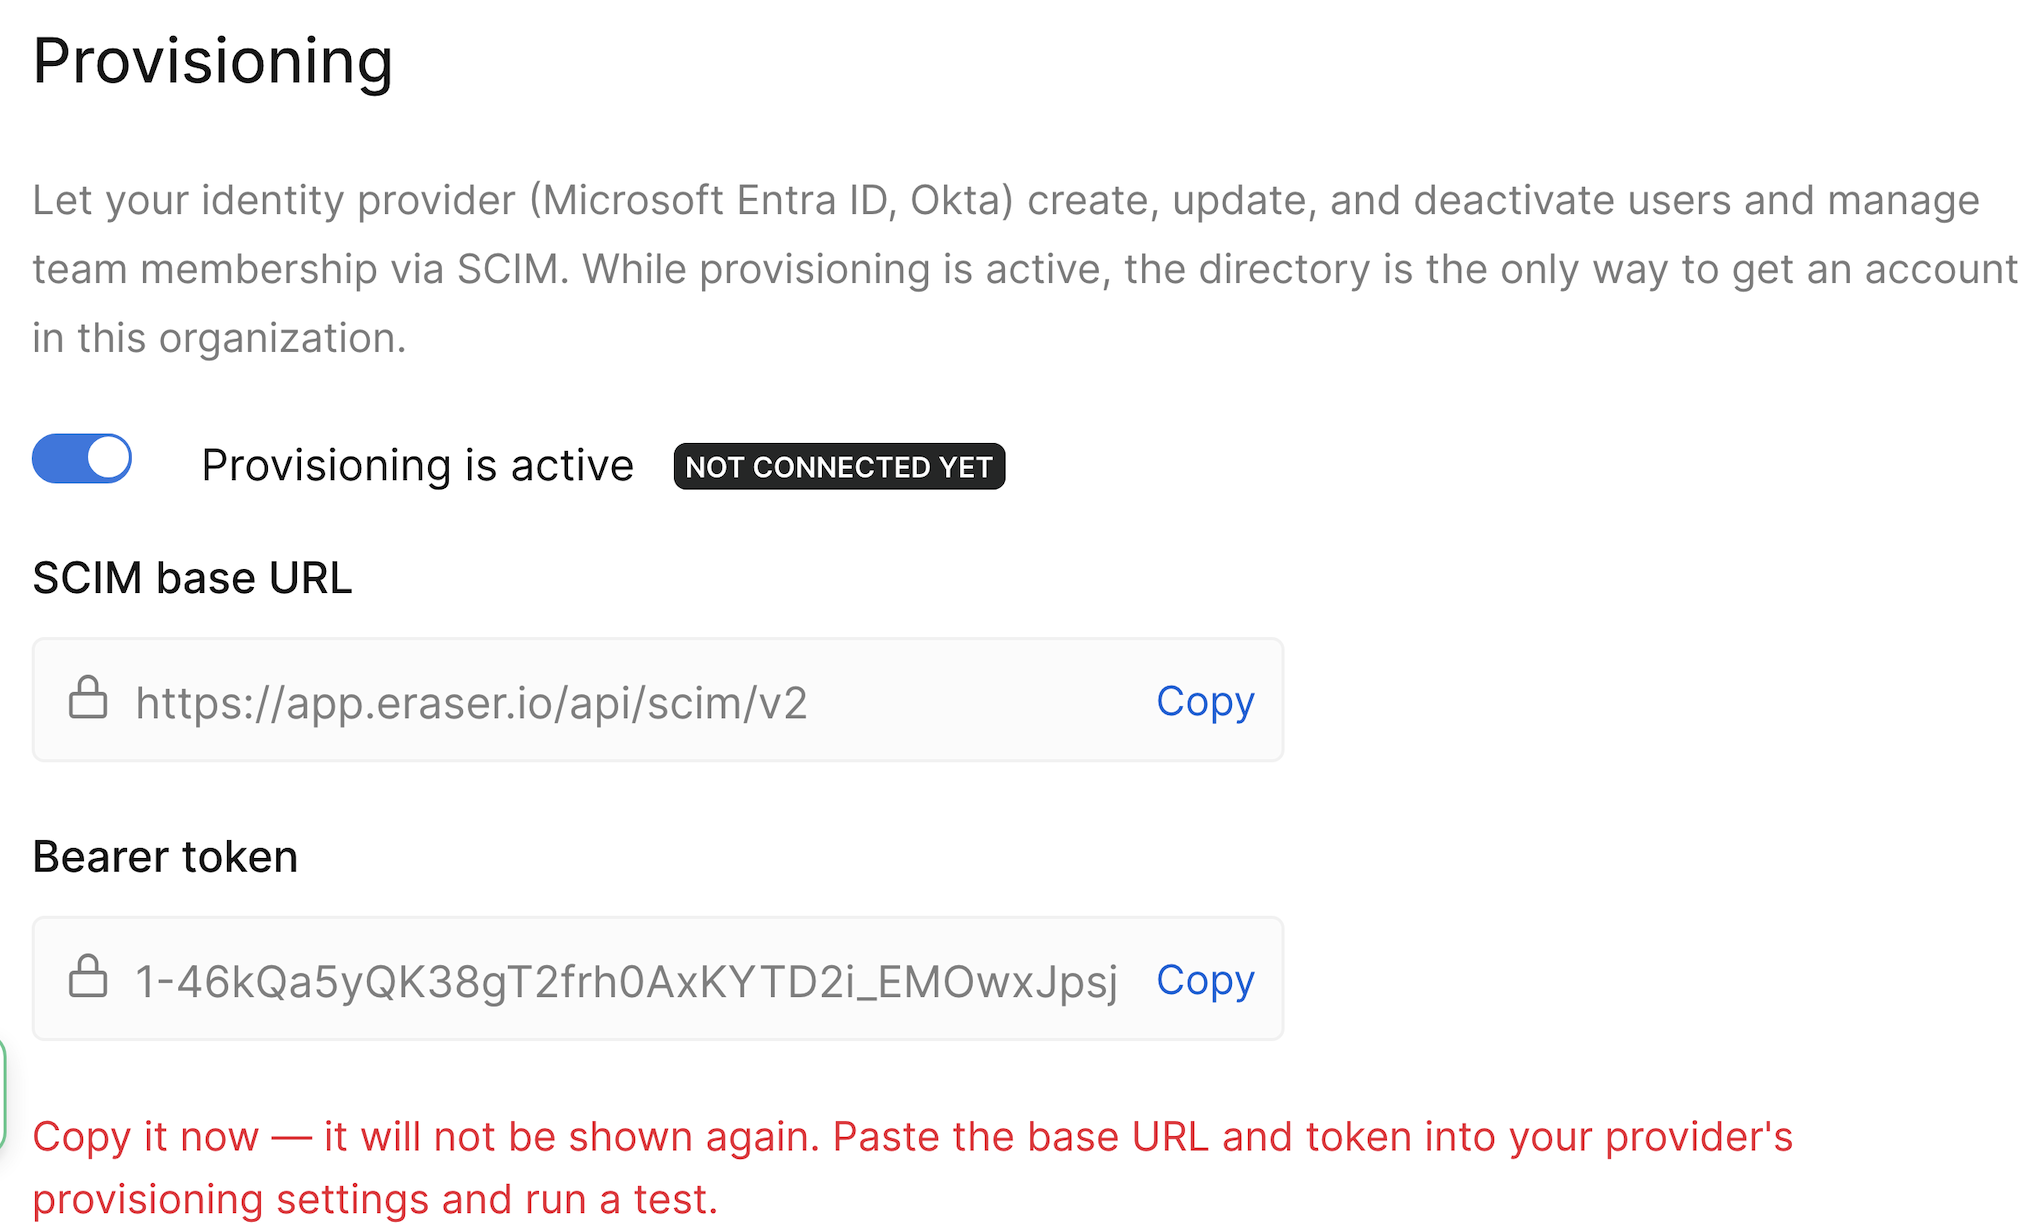
These are the two values Entra needs: the Tenant URL, https://app.eraser.io/api/scim/v2, and the secret token.
Leave the Provisioning is active toggle on. The badge beside it reads Not connected yet until Entra's first request arrives, then Last sync .
How to enable SCIM provisioning on MS Entra
An Entra admin does this and the Entra sections that follow.
-
In the Microsoft Entra admin center, open Enterprise applications → Eraser.
-
Select Provisioning in the left menu.
-
On the Get started tab, click Connect your application.
-
Under Admin credentials, set:
- Select authentication method:
Bearer authentication - Tenant URL: the SCIM base URL you copied from Eraser
- Secret token: the bearer token you copied from Eraser
- Select authentication method:
-
Click Test connection, confirm it succeeds, then click Create.
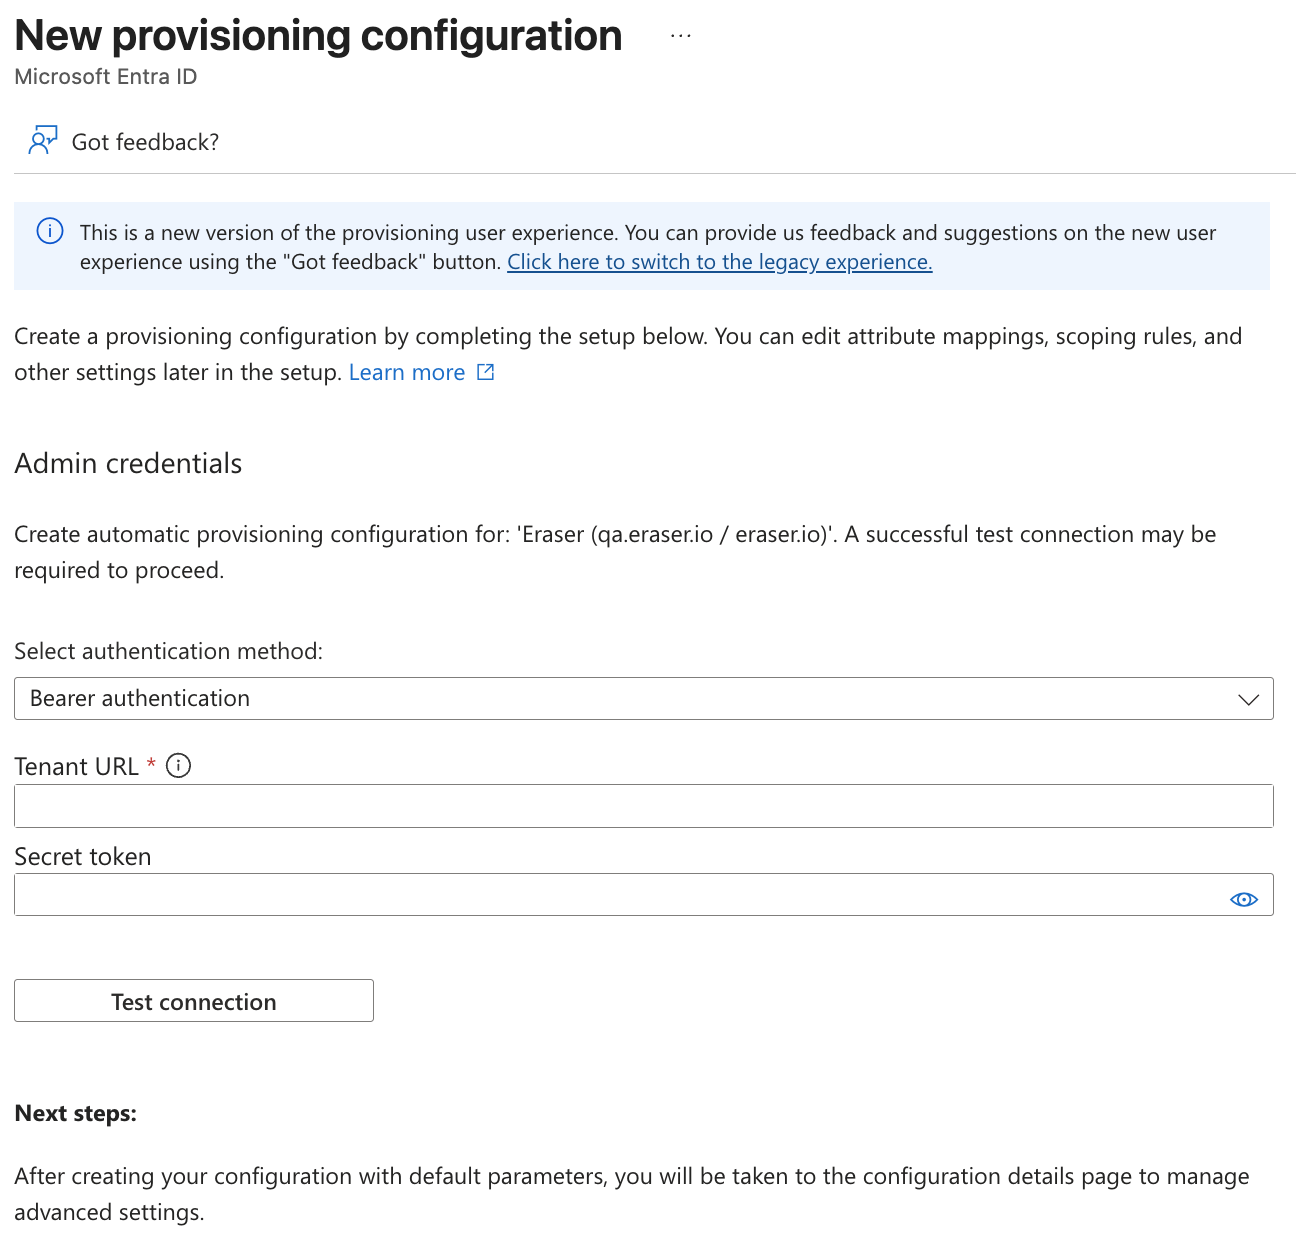
The configuration's Overview will show Current cycle status: Initial sync paused – expected, since provisioning isn't switched on yet.
Checking attribute mappings
Eraser works with Entra's default attribute mappings, so there's nothing to change under Manage → Attribute mapping. Attributes Eraser doesn't store are ignored rather than rejected.
How to add users and groups on Microsoft Entra
Entra only provisions what's assigned to the application.
- In the Eraser application, go to Users and groups.
- Click Add user/group and assign the groups that should have Eraser access.
Assign groups rather than individual users wherever you can – those group assignments are what you'll map to Eraser teams later. Entra provisions a group's members as users and the group itself, but it does not expand nested groups, so assign the groups you actually want to map. Someone assigned directly belongs to no group, so only a base team rule will place them in a team.
How to turn on and start provisioning
-
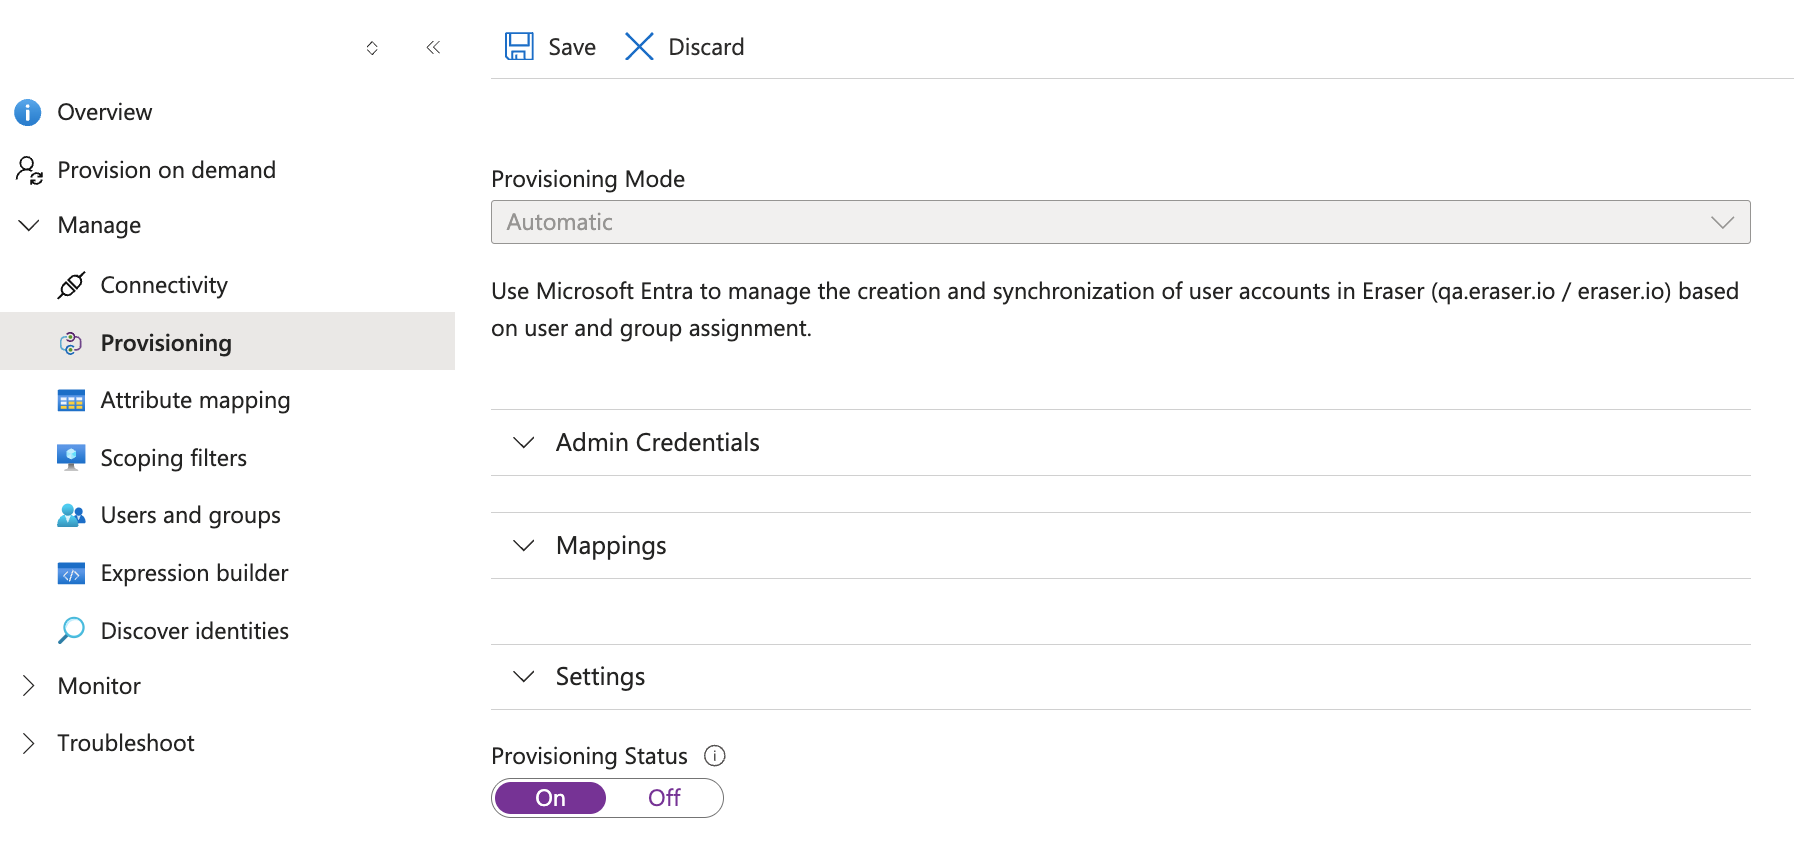
Go to Manage → Provisioning.
-
At the bottom, set Provisioning Status to On.
-
Click Save. The toggle defaults to Off on a new configuration, and the change doesn't apply until it's saved.
- Return to Overview and click Start provisioning.
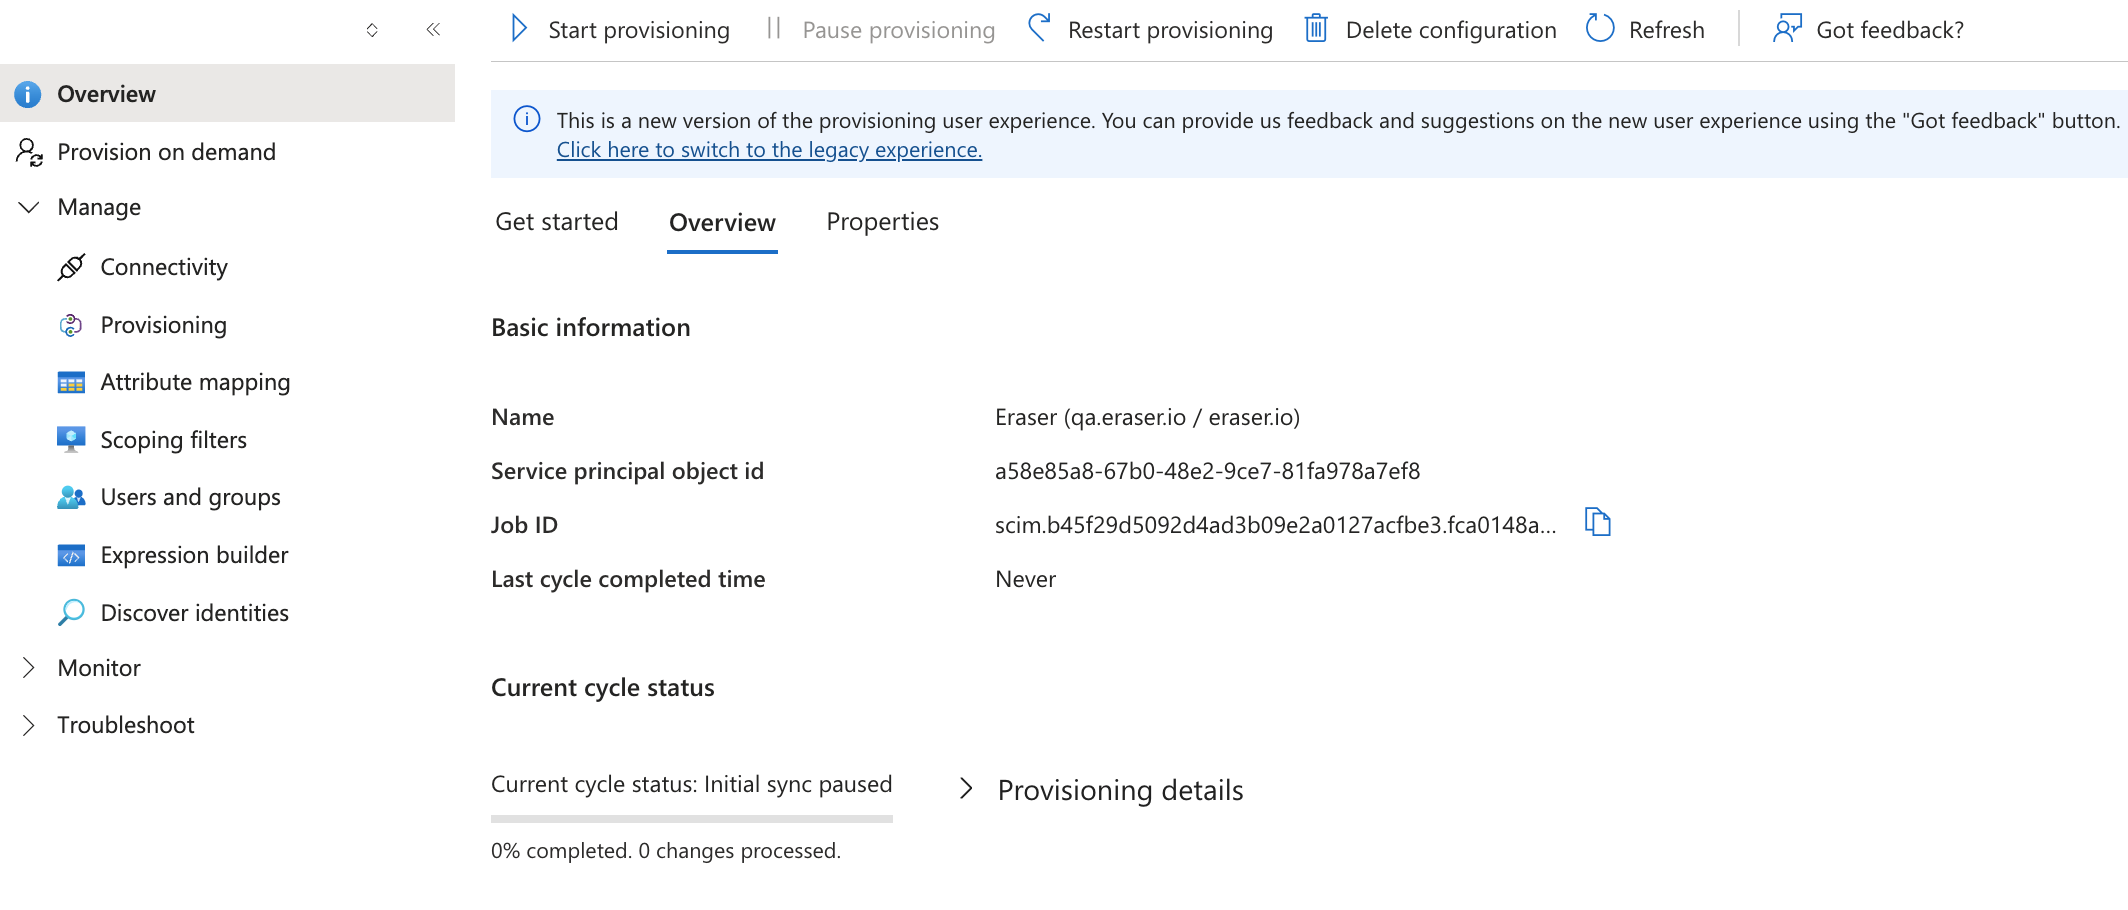
The initial cycle can take up to 40 minutes, and Entra runs incremental cycles roughly every 40 minutes after that. Monitor → Provisioning logs shows per-user results.
Nothing is granted yet: until you map a group, provisioned users are stored inert, with no account created and no membership changes. Once Entra's first request lands, Eraser's Provisioning badge reads Last sync .
Provisioning on demand
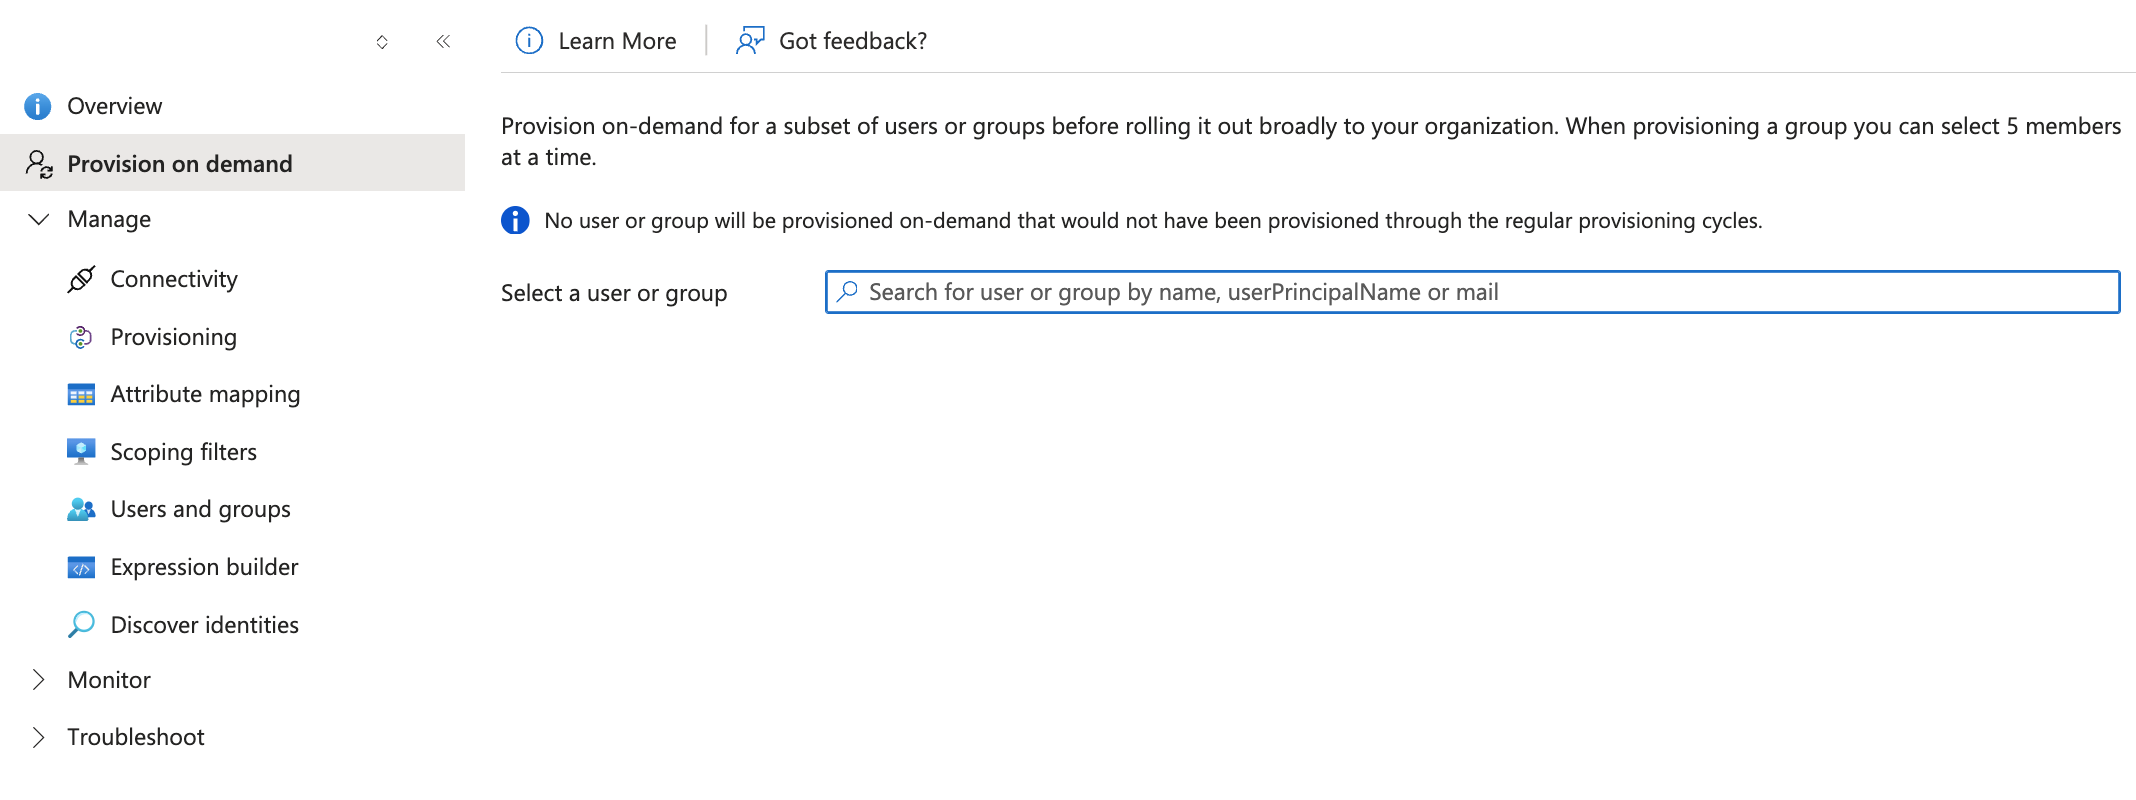
To see users and groups arrive now rather than waiting out the cycle, use Provision on demand in the left menu – search for a user or group and click Provision.
It handles 5 group members at a time, and never provisions anyone the regular cycle wouldn't.
How to map directory groups to Eraser teams
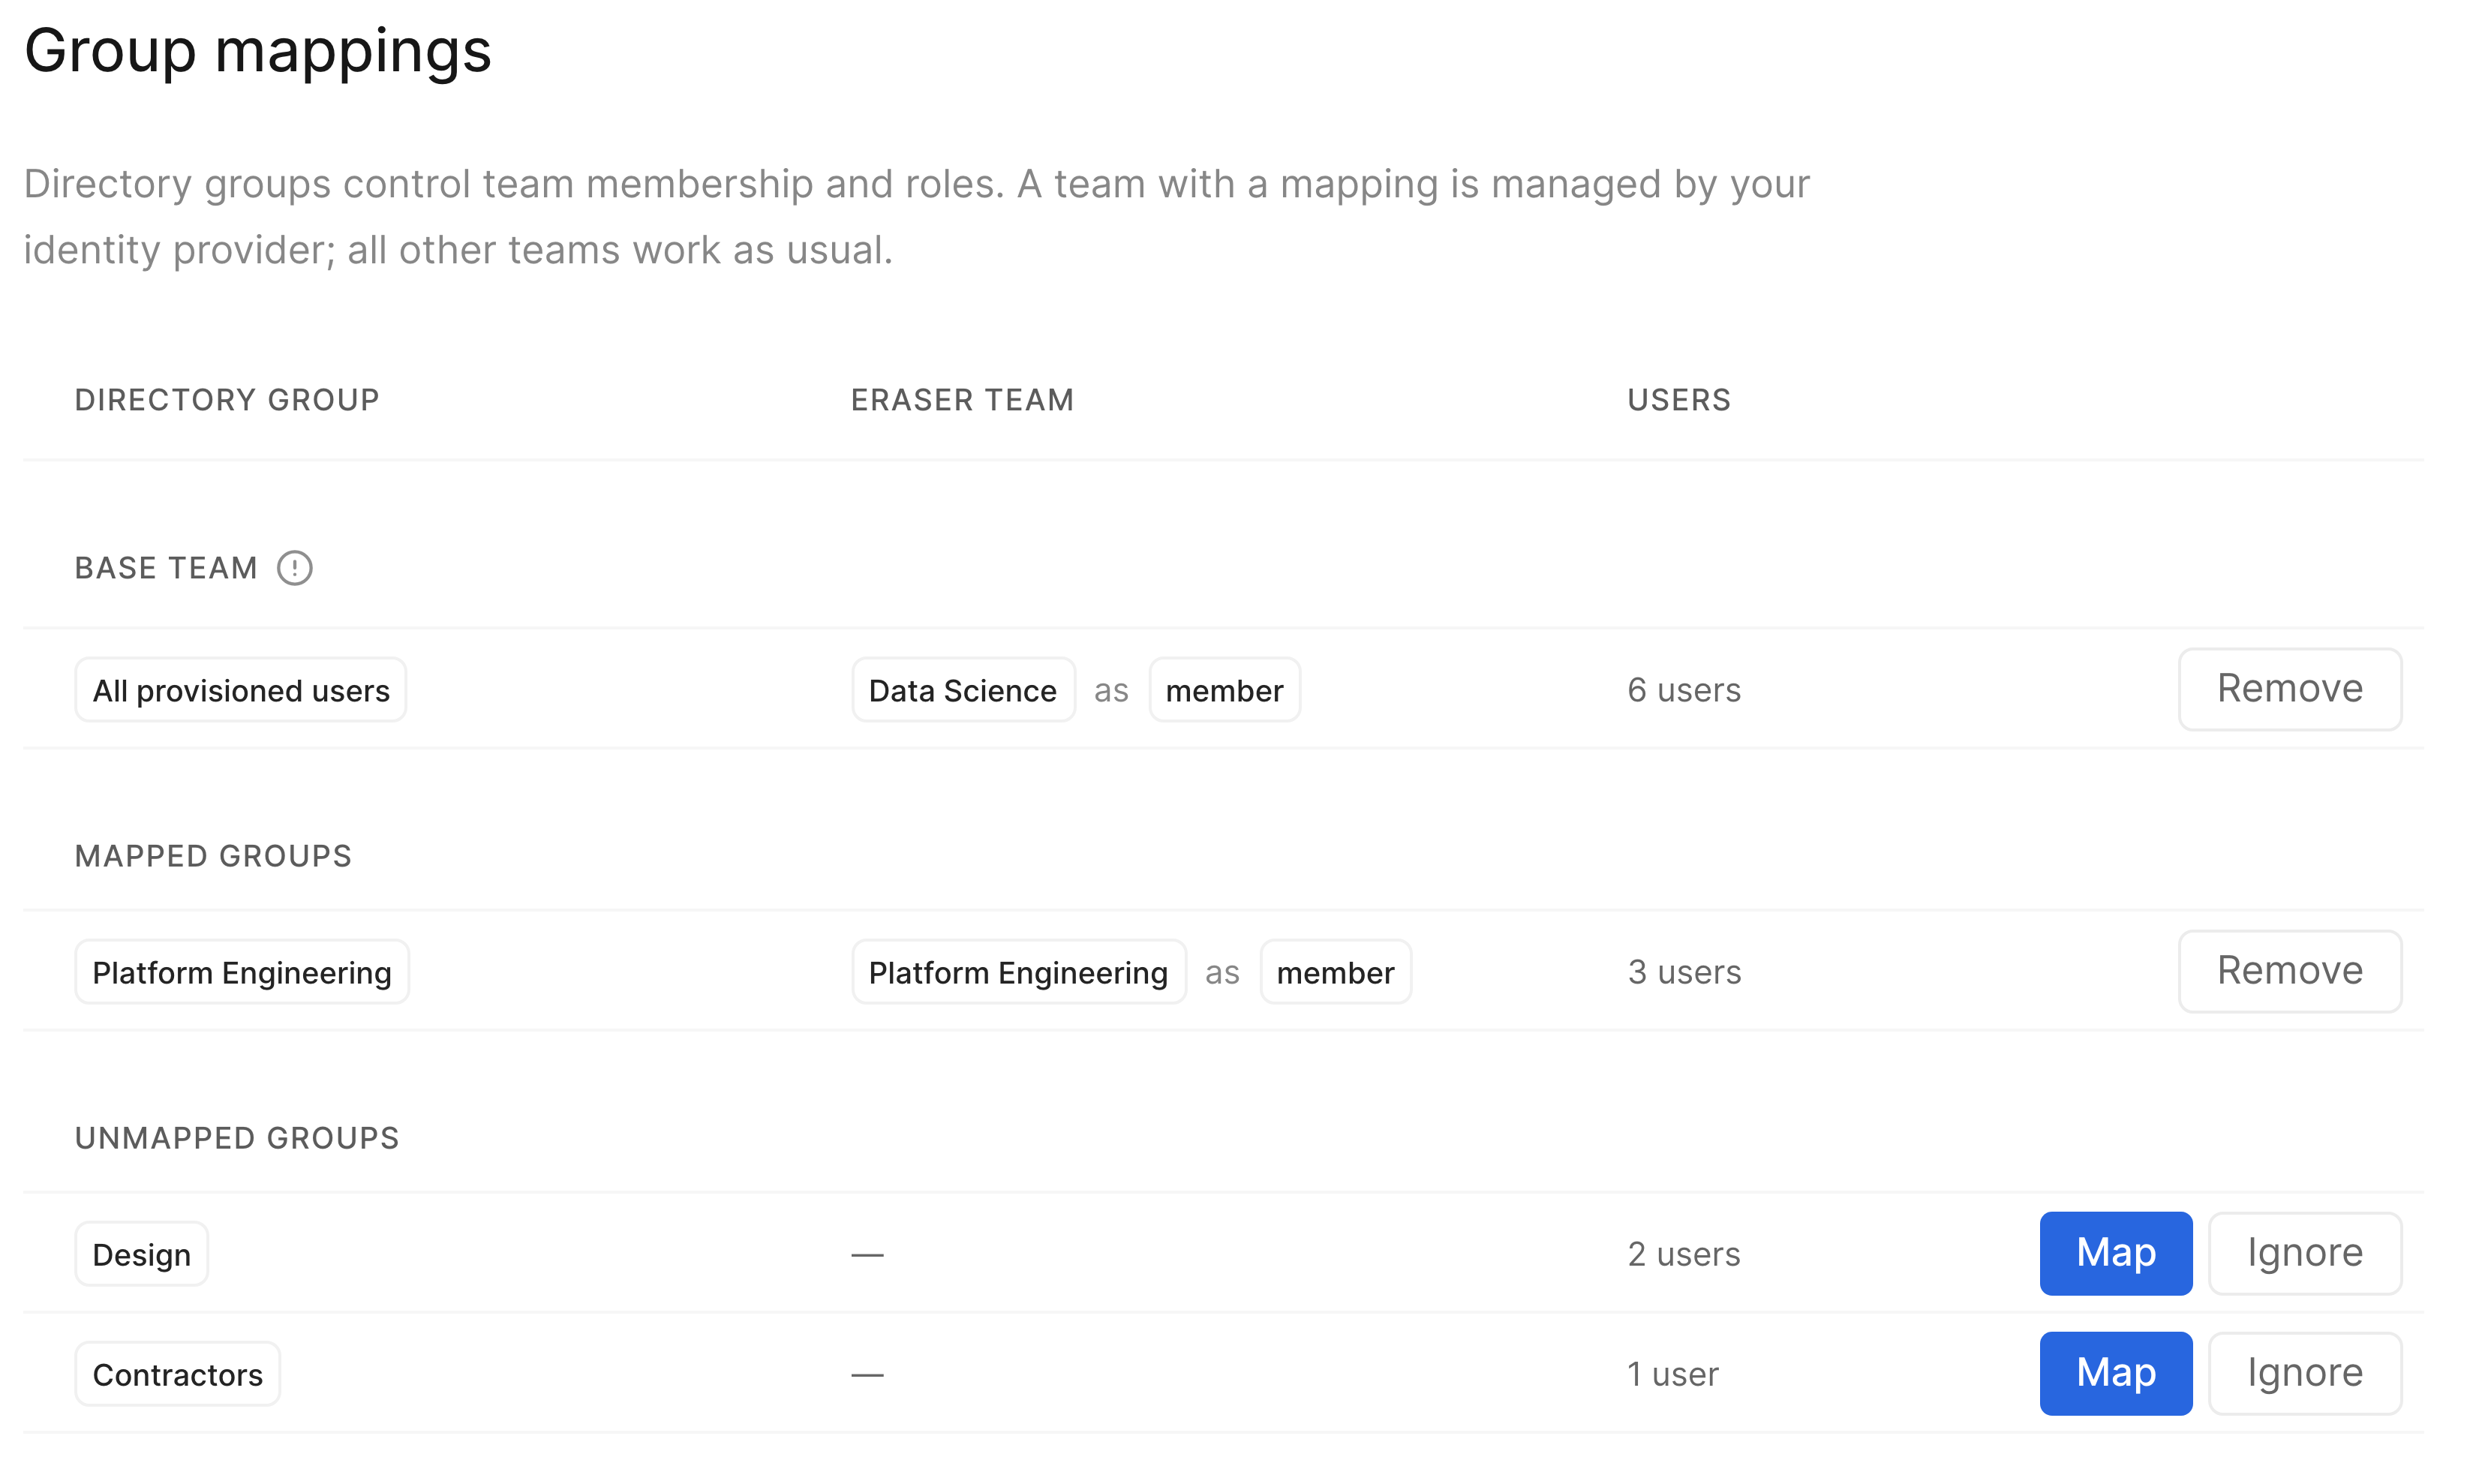
Back in Eraser, an Organization Admin decides what each directory group means. Go to Organization dashboard → Identity and settings → Group mappings, where synced groups are listed under Unmapped groups.
-
Find the group and click Map.
-
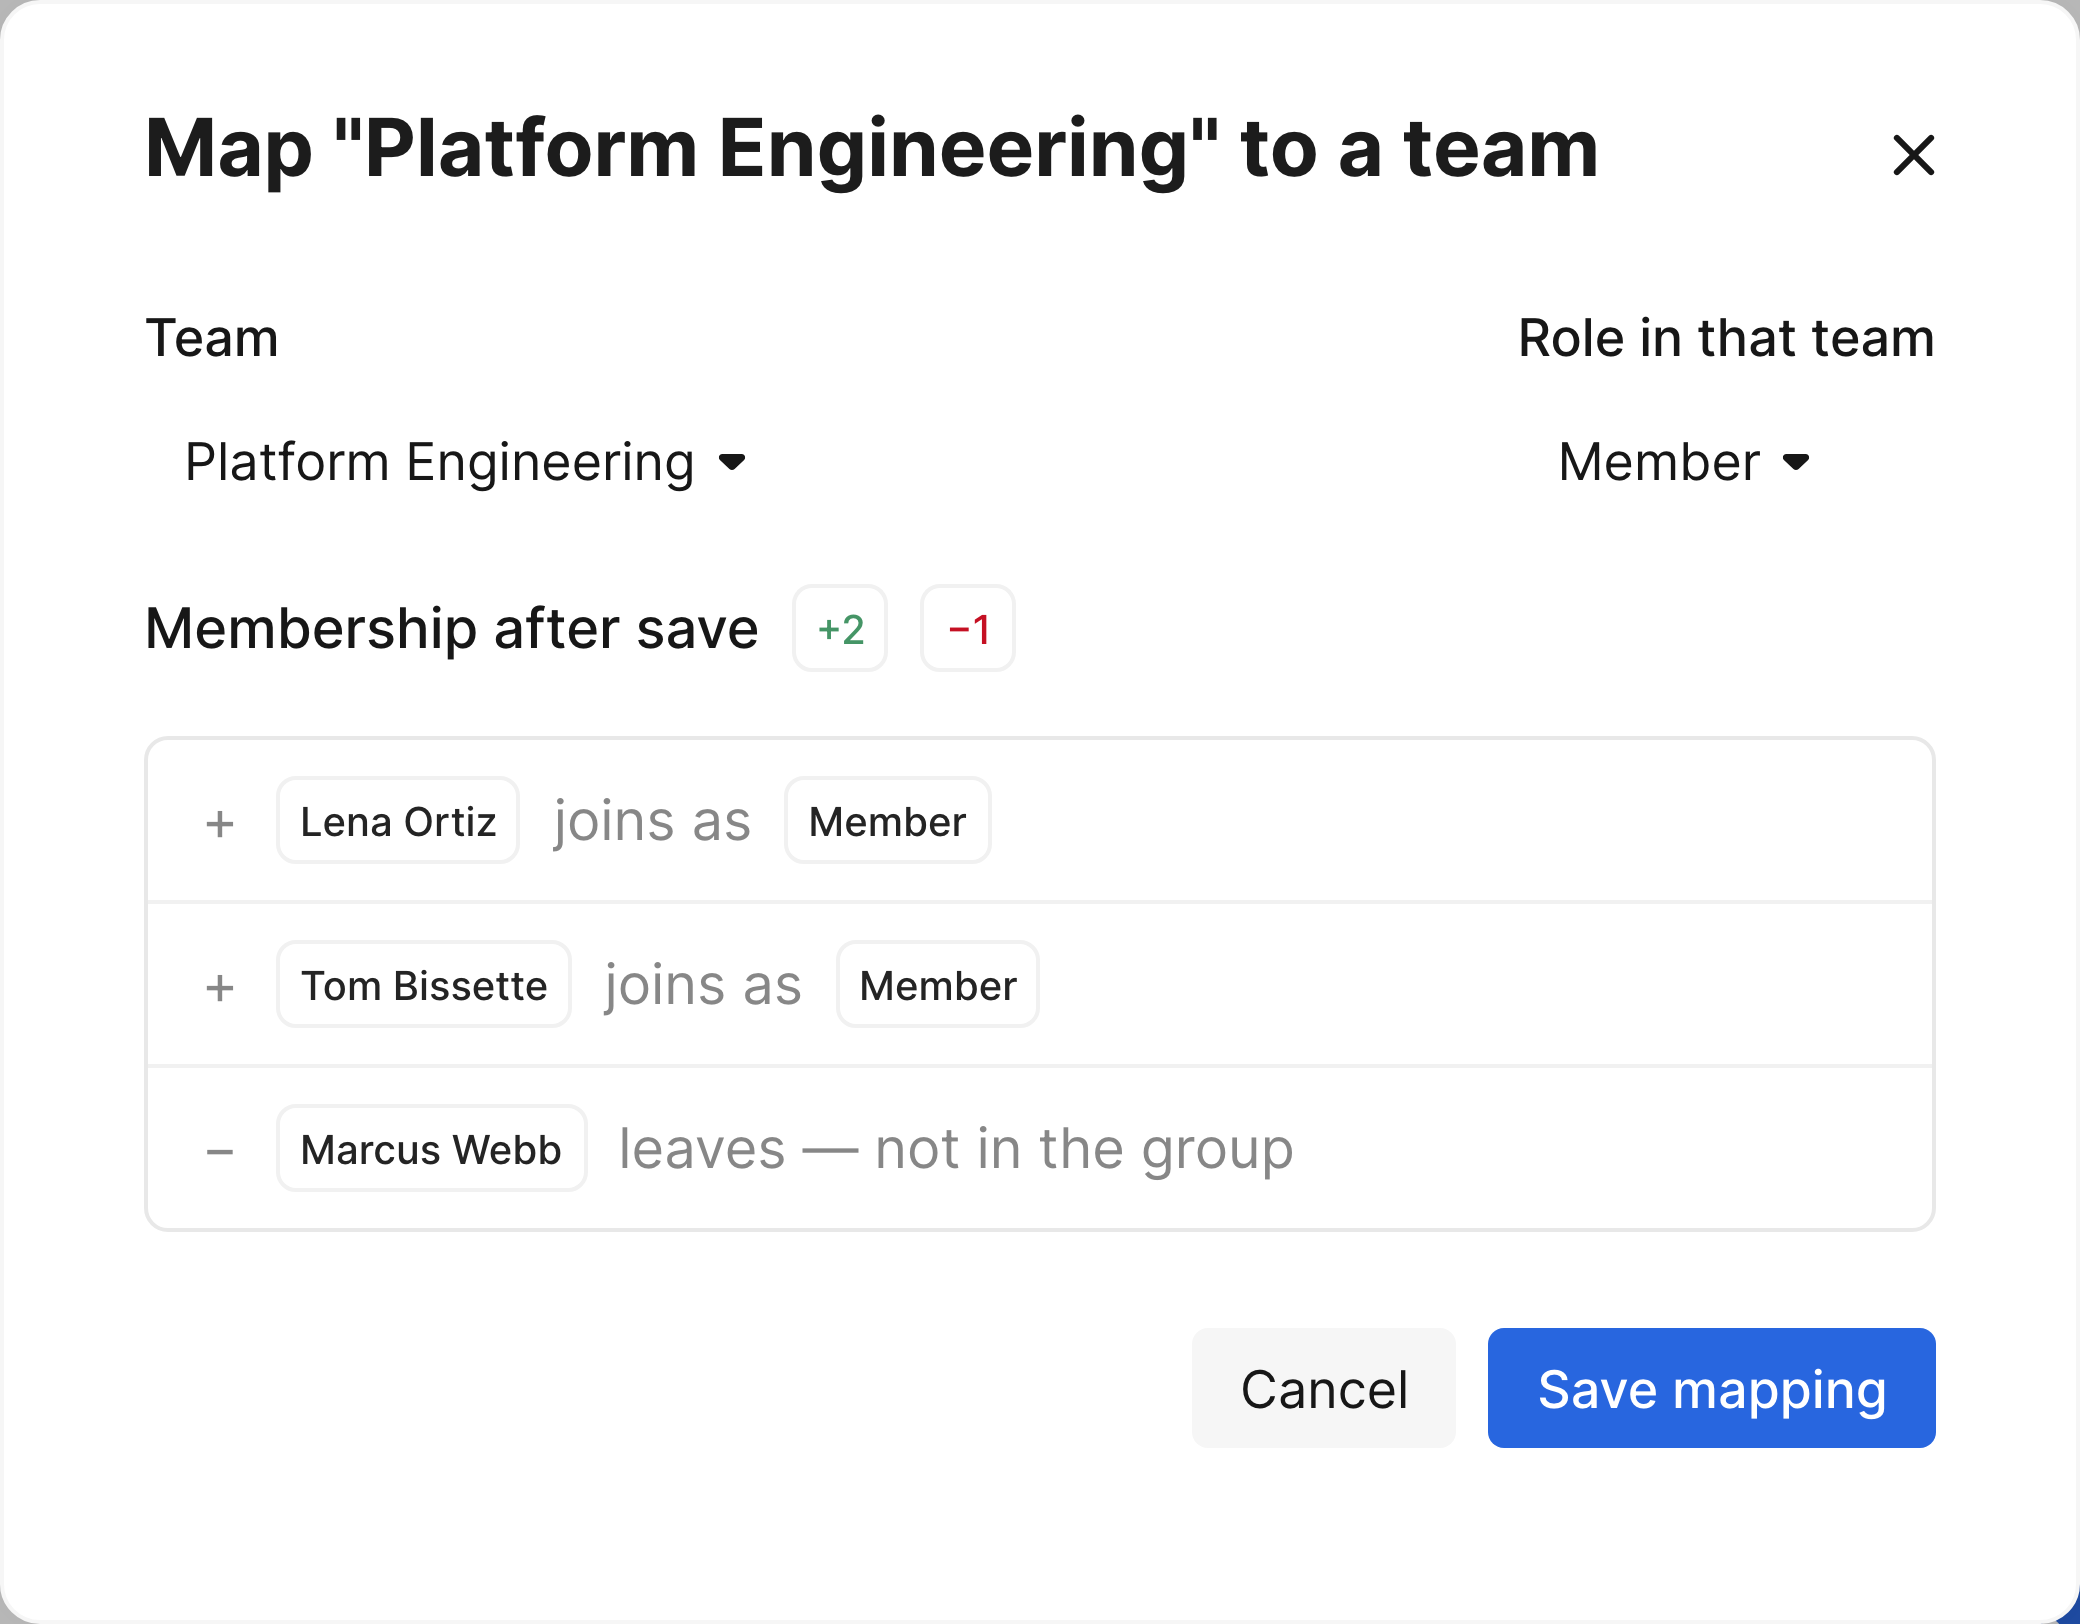
Choose the target team. Teams without SSO are disabled, marked "(enable SSO first)".
-
Choose the role it grants: Member or Admin.
-
Review the impact preview – "Adds N, removes M", naming the people affected. Save stays disabled until it loads.
-
Click Save mapping. Membership syncs immediately.
Groups you don't want in Eraser can be dismissed with Ignore; they keep syncing, and mapping one later supersedes the ignore.
- A user's role in a team is the highest any matching rule grants.
- A team with a mapping is managed: its membership list goes read-only and the invite box disappears.
- Removing a mapping keeps current members, then re-syncs against any rules that remain.
Base team
A base team is an optional rule that puts every provisioned user into one team, on top of any group rules – someone in a mapped group ends up in both. Add one from the add a base team link in the section description.
It also gives your whole assigned population accounts, so everyone assigned in Entra consumes a license. Without one, only members of mapped groups get an account; anyone else is blocked at sign-in with "Your account is not assigned to a team yet."
How to verify provisioning is working
In the Eraser organization dashboard:
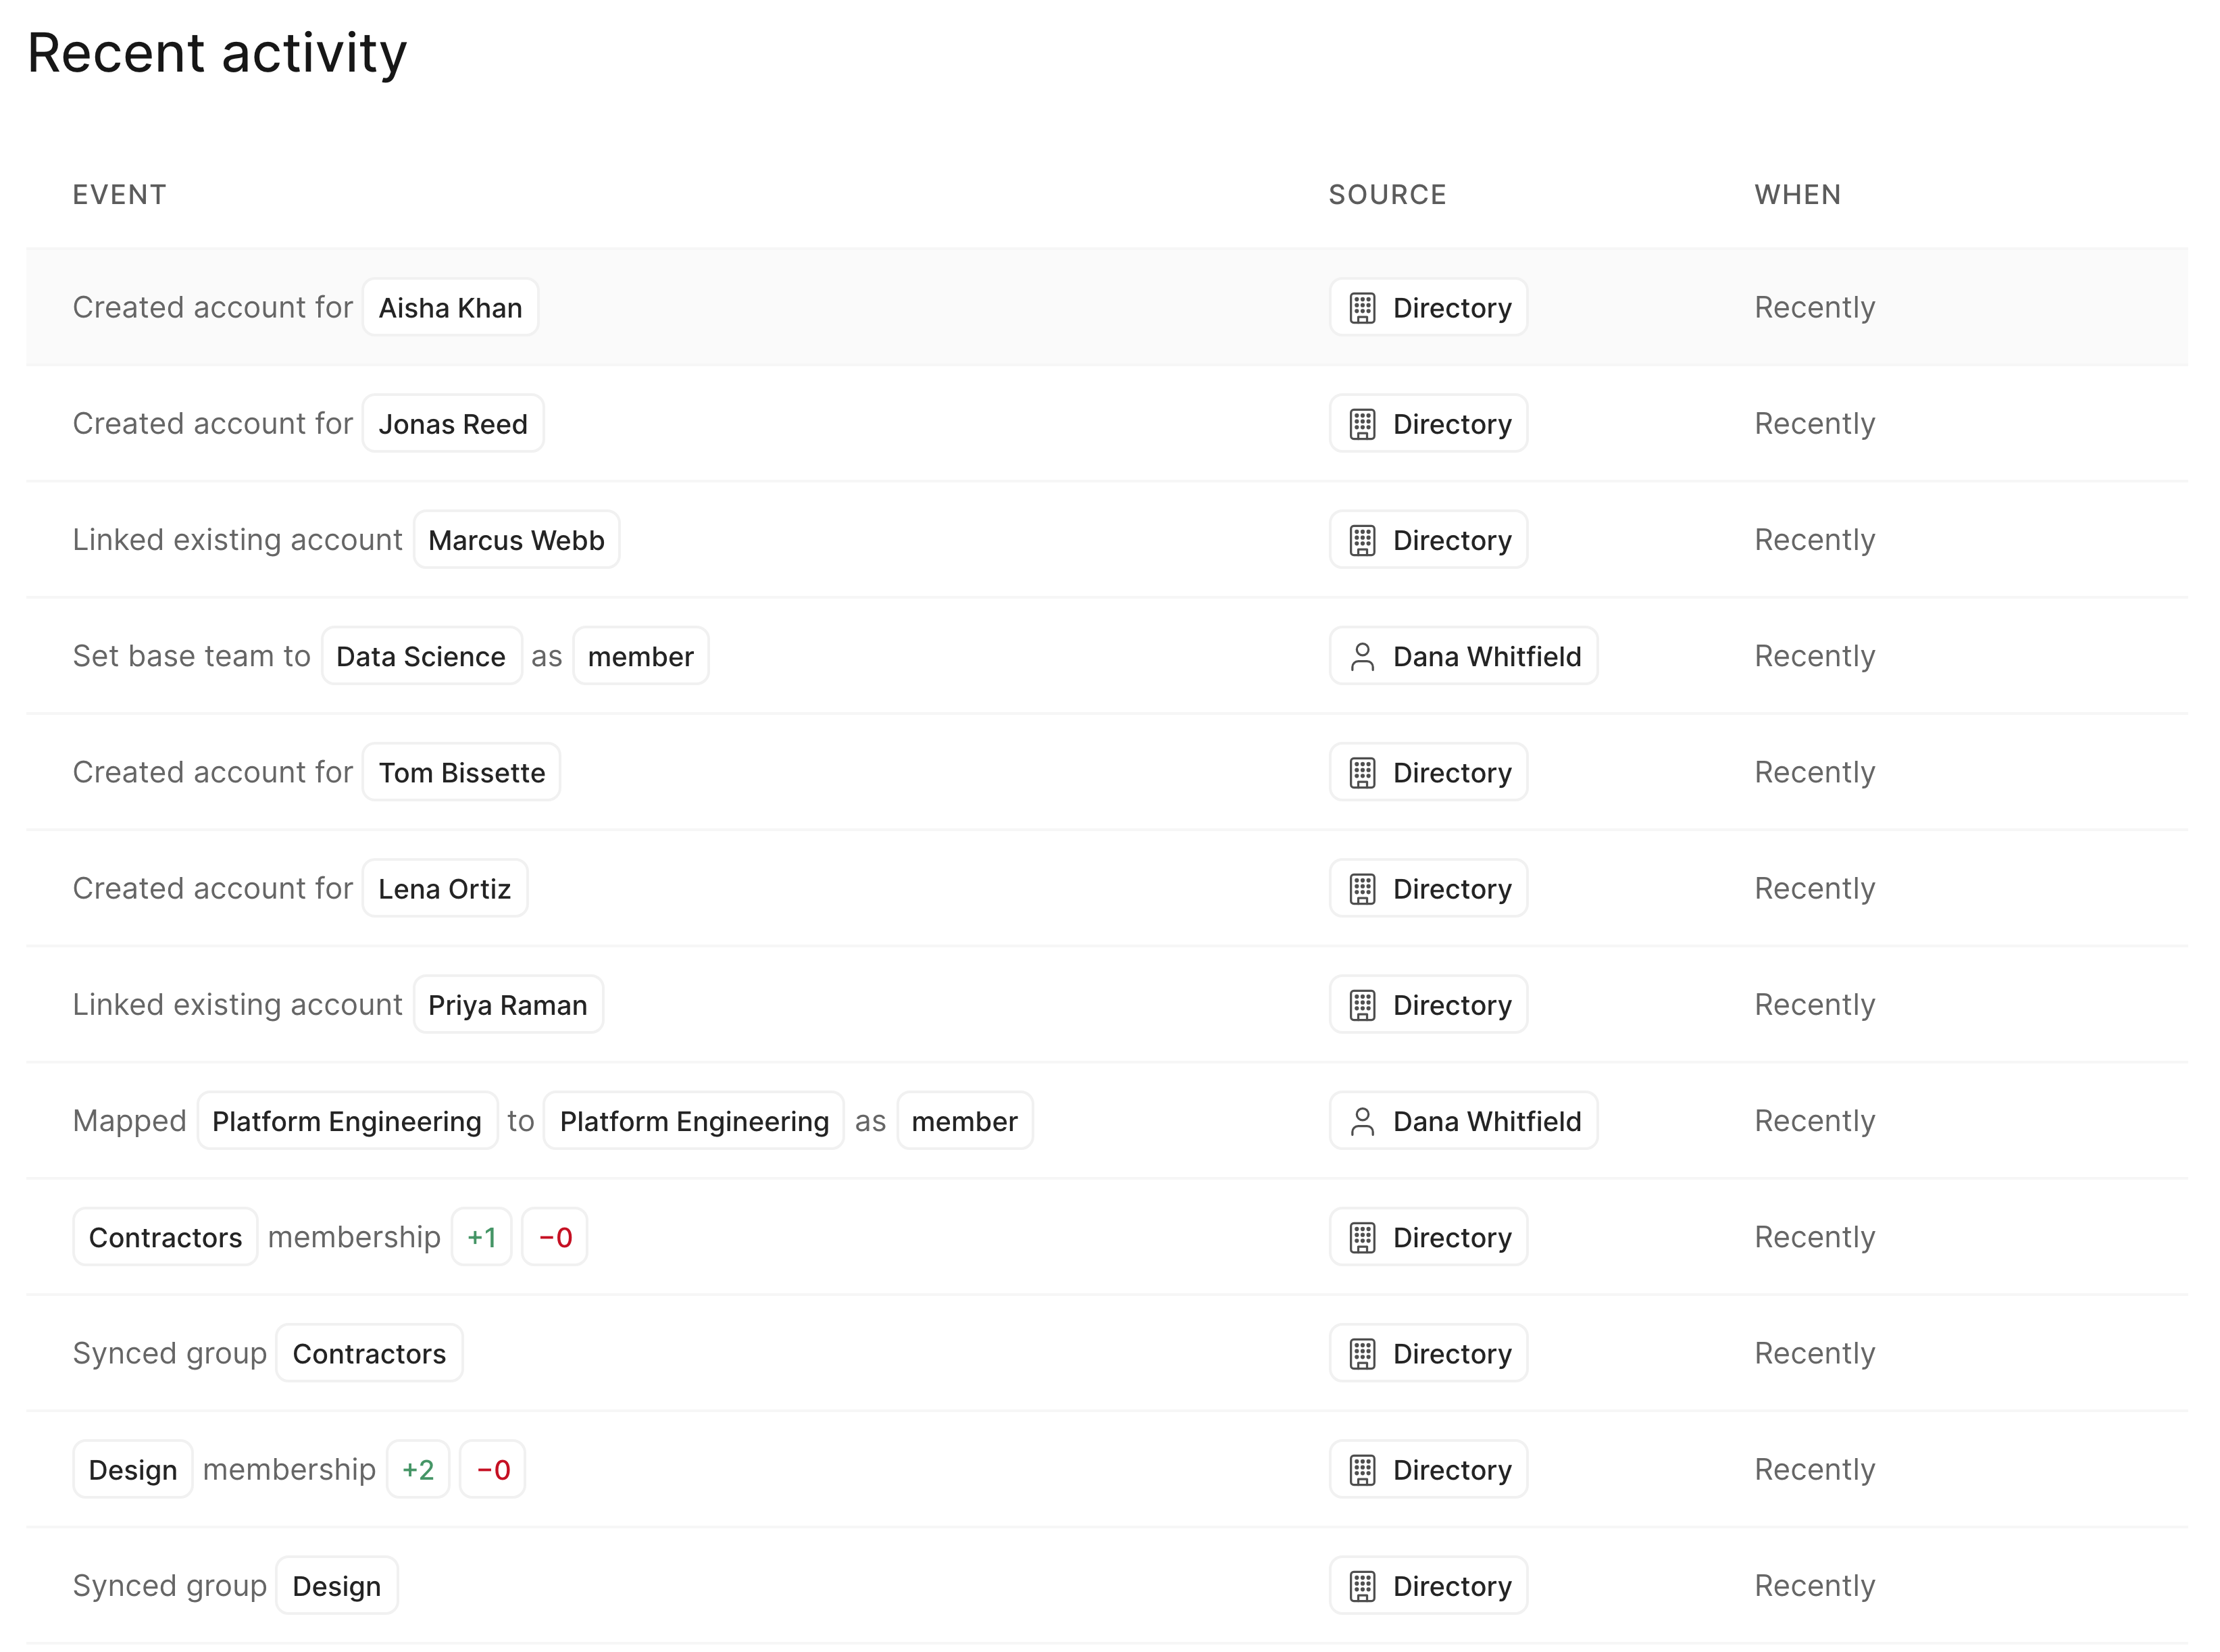
- Identity and settings → Recent activity lists what happened. Source reads Directory for anything the IdP drove, or an admin's name for changes made in Eraser.
- Teams and Users gain a Provisioning column showing SCIM managed or App managed. The base team carries a Base team badge.
- A managed team's Members tab shows the read-only banner and no invite box.
Getting help
If provisioning isn't behaving as expected – a sync that won't start, users who can't sign in, or team membership that doesn't match your directory – email us at [email protected] and we'll help you work through it.
Updated 1 day ago