
Custom styles
A custom style is a reusable bundle of visual guidelines that shapes how Eraser's AI styles the diagrams it generates for your team. Where an AI preset governs what the AI produces, a custom style governs how it looks. Apply one, and every diagram the AI generates comes out on-brand without anyone editing it by hand.
A style bundles three things:
- Style brief – plain-language guidance the AI follows (tone, color usage, shape conventions)
- Color palette – your on-brand colors, each mapped to where it appears
- Style defaults – the default look of shapes, connectors, and text
Custom styles apply most powerfully to freeform diagrams, where the style's defaults drive shapes, connectors, and layout. You can apply a style alongside an AI preset: the preset controls the content, the style controls the look.
Creating a style
Open the Styles section of your team dashboard and choose New style. Give it a name and an optional description, then fill it out one of two ways.
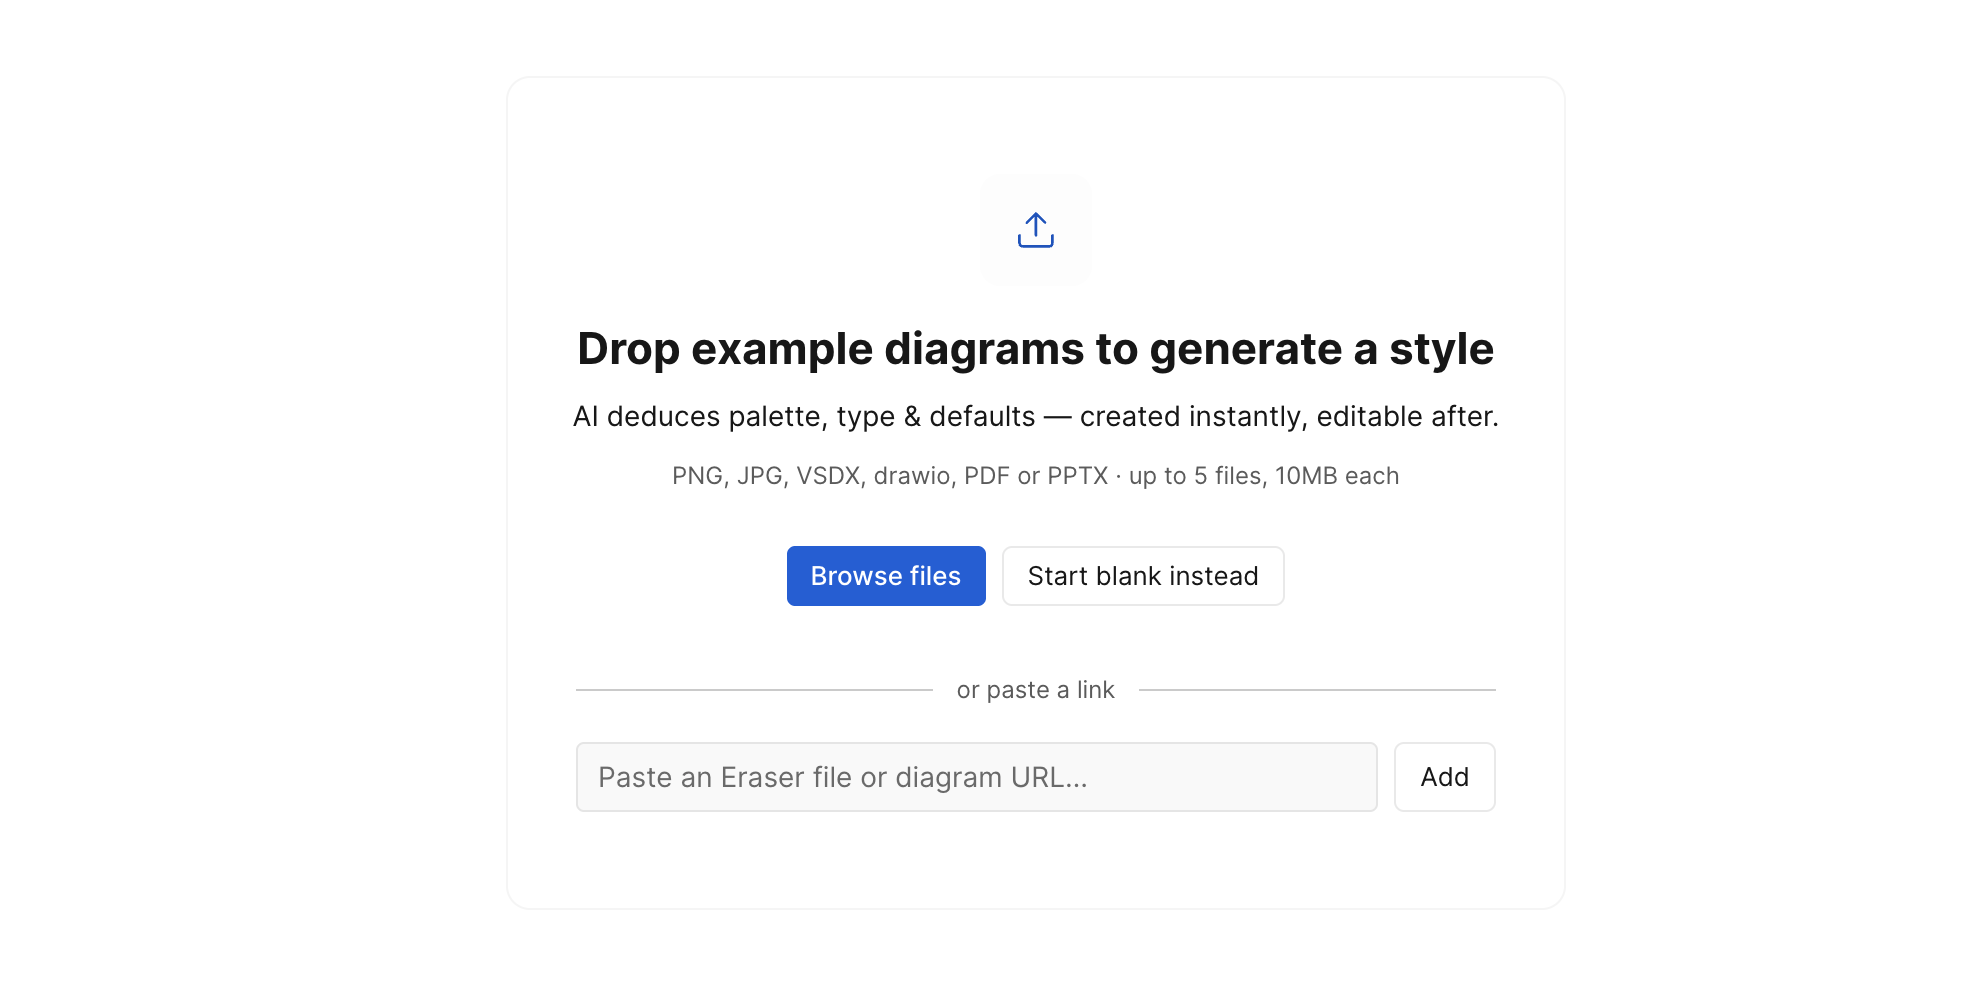
Generate from example diagrams. Drop in a few diagrams that already look the way you want, and the AI deduces the palette, typography, and shape defaults for you – created instantly and fully editable afterward.
- Accepted files: PNG, JPG, VSDX, drawio, PDF, or PPTX
- Up to 5 files, 10 MB each
- Analysis usually takes 1-3 minutes – keep the page open while it runs
If the AI can't read a coherent style, it tells you why and lets you try different files or start blank. (Generating from a pasted Eraser link is coming soon.)
Start blank. Create an empty style and fill in the three parts yourself.
The three parts of a style
Style brief
Plain-language guidance the AI follows when styling a diagram.
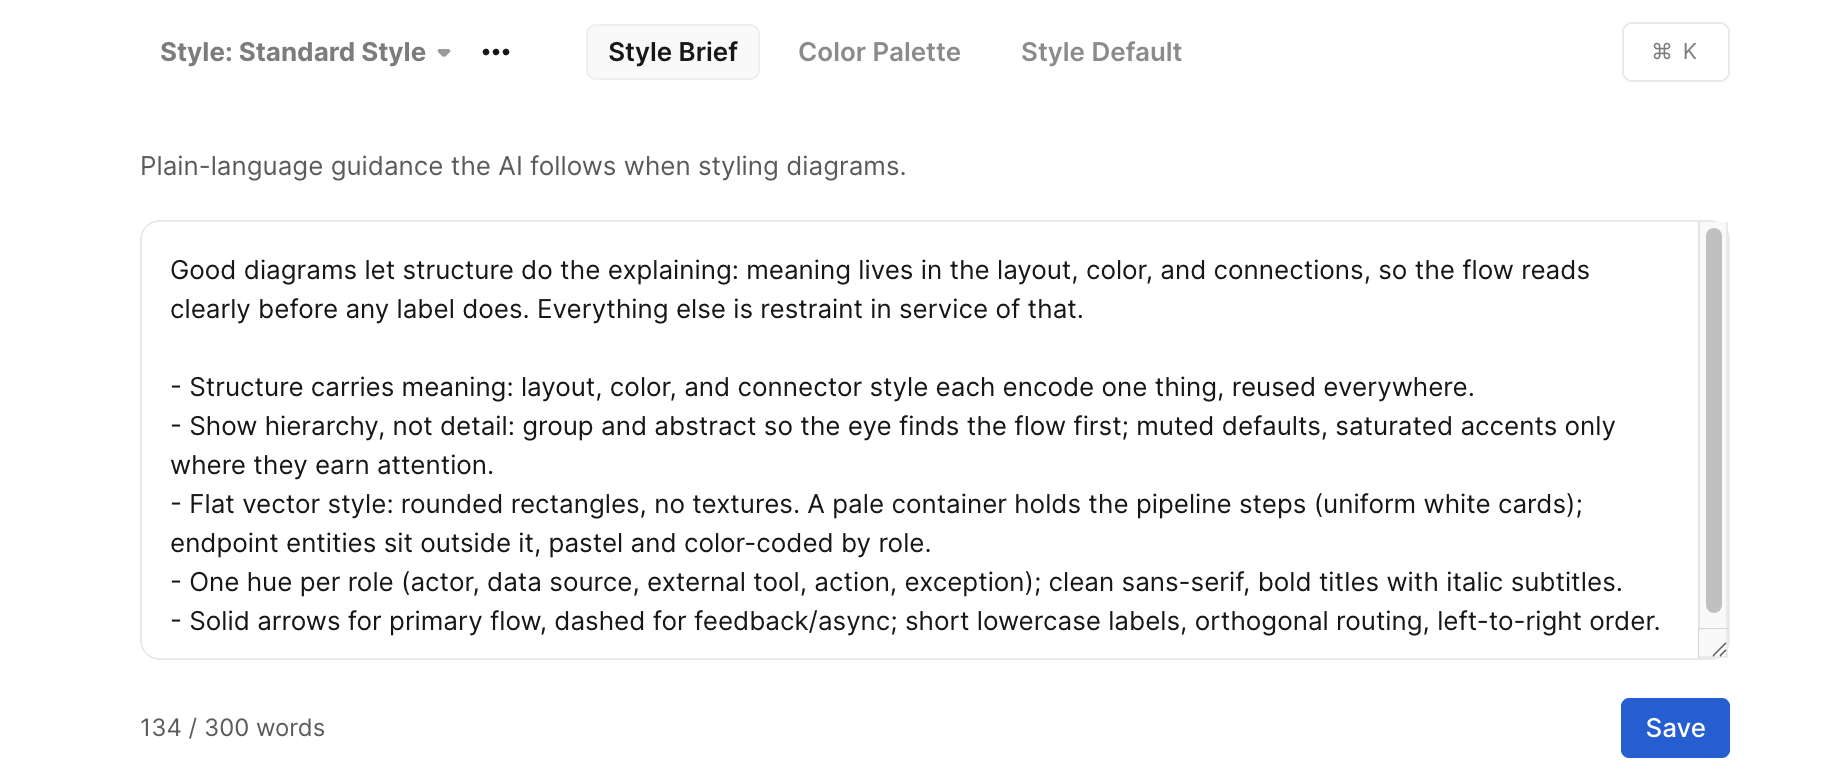
Keep it focused – a brief can be up to 300 words, and a few unambiguous sentences steer the AI more reliably than a long list. For example:
- "Use blue for services, gray for infrastructure. Reserve red for anything security-related."
- "Prefer rounded rectangles. Use cylinders only for datastores."
Edit it in the Brief tab and choose Save.
Color palette
The named colors the AI draws from.
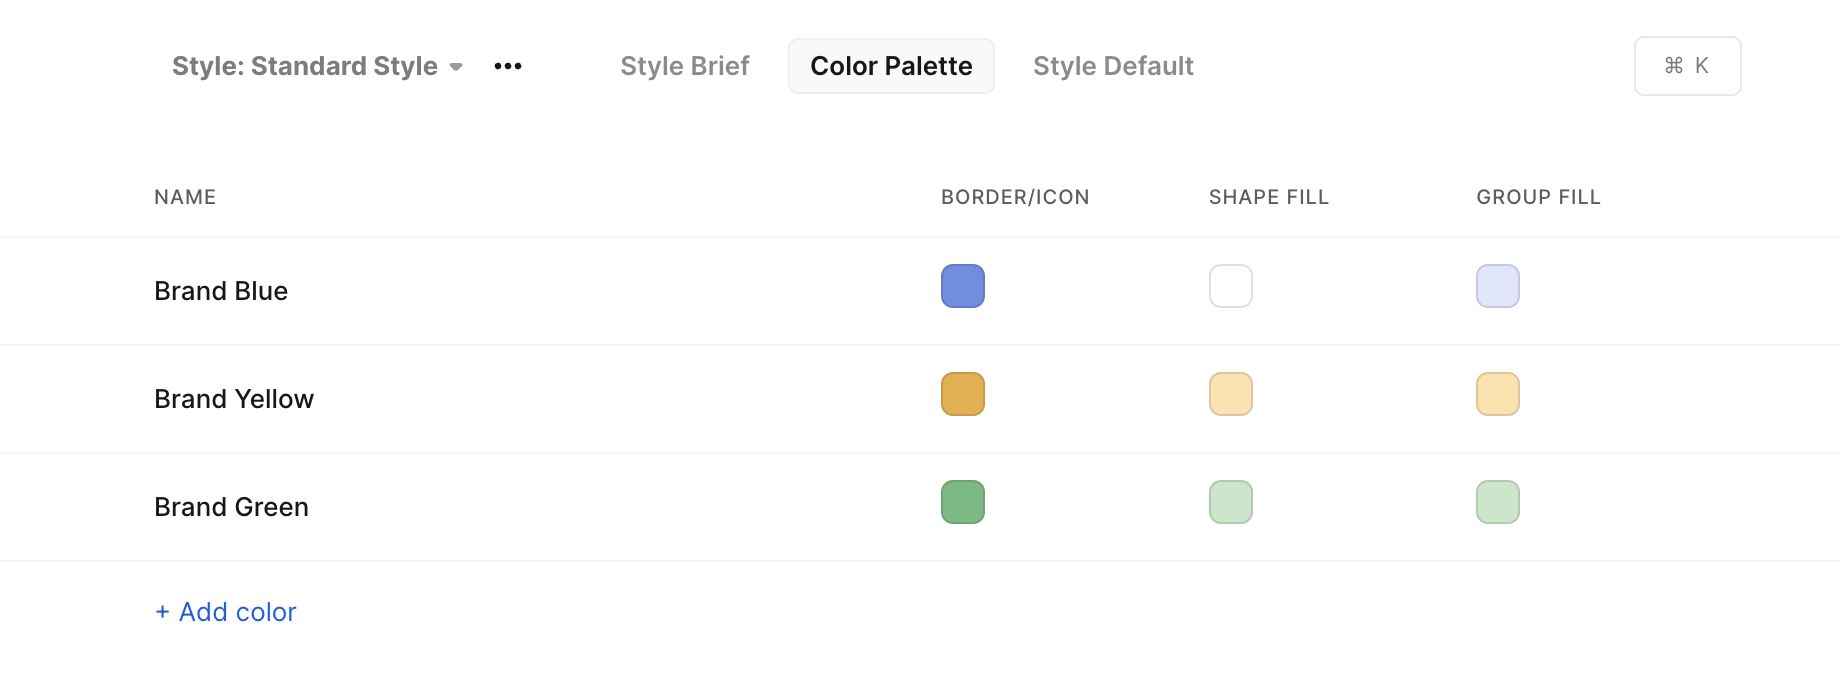
Each color has a name and three role colors for where it appears:
| Role | Where it applies |
|---|---|
| Border / Icon | Shape borders and icon color |
| Shape fill | The body fill of a shape |
| Group fill | The fill of a group, lane, or pool |
Adding a color seeds all three roles from one color you pick; each is then independently editable. Colors adapt automatically for dark mode. Manage them in the Palette tab – add, rename, adjust a swatch, or remove. Naming colors by meaning (Service, Datastore, Security) makes the brief's guidance easier to apply.
Style defaults
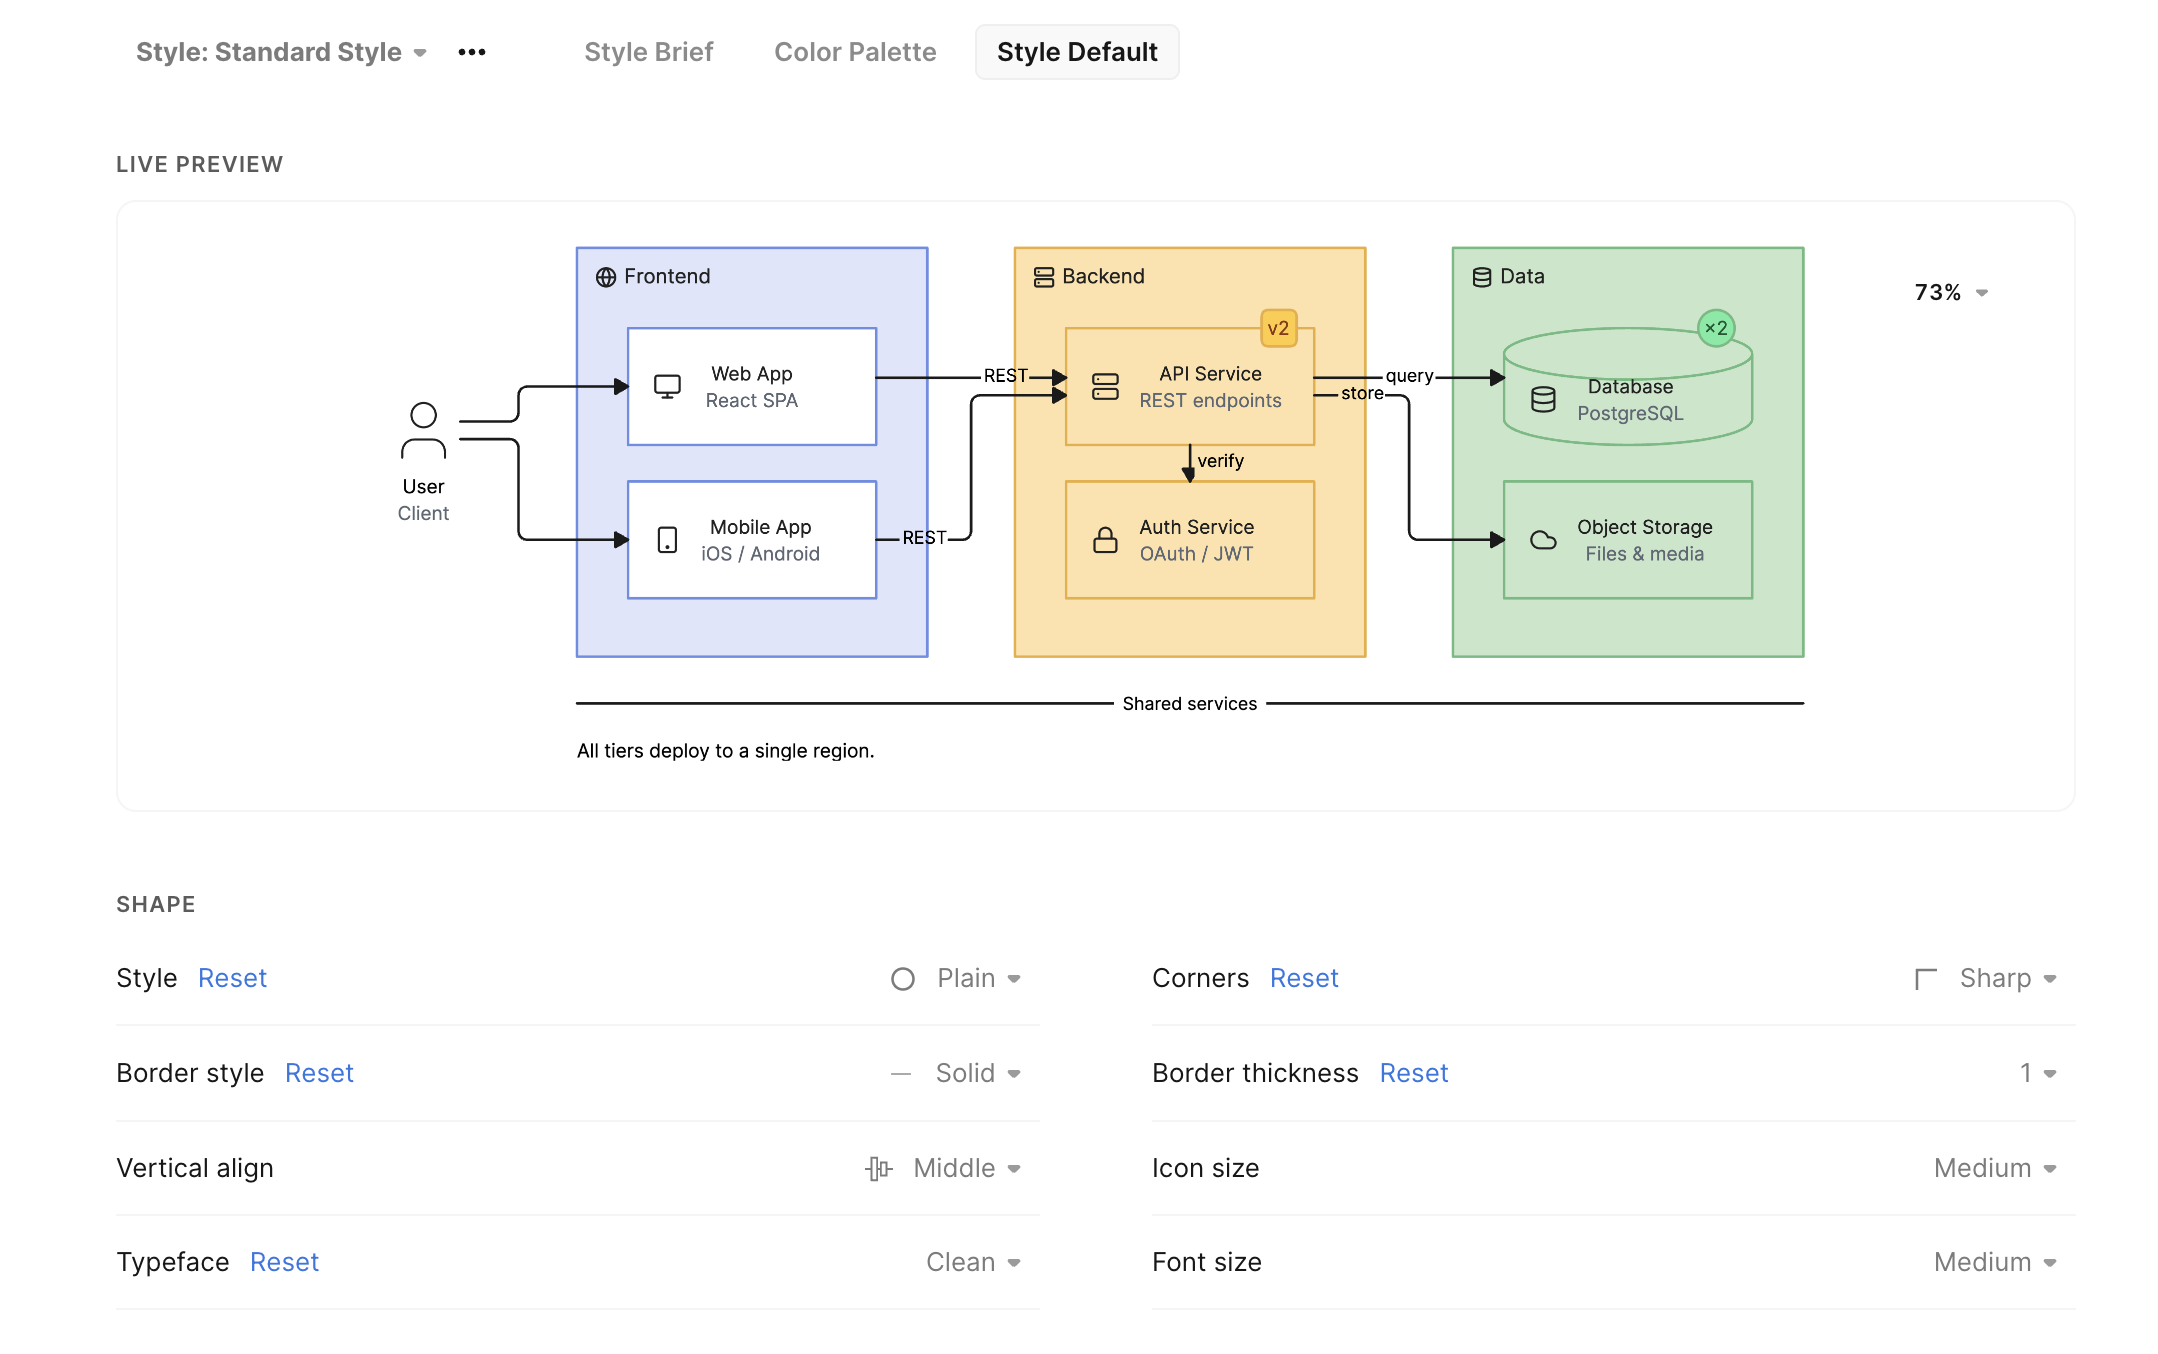
The default look of everything that isn't color, applied to freeform diagrams and organized by element:
| Section | Examples |
|---|---|
| Shape | Corners, border style/thickness, alignment, icon size, typeface, font size |
| Group, lane & pool | Title width, border, alignment, font size, typeface |
| Icon | Icon size, typeface, font size |
| Textbox | Font size, alignment, typeface |
| Divider | Line style, thickness, typeface, label size |
| Relationship | Connector style, line style/thickness, start/end arrowheads, typeface, label size |
Set values in the Defaults tab; anything you leave alone stays on Eraser's built-in default. A live preview shows how a sample diagram responds, and a Reset link restores any value.
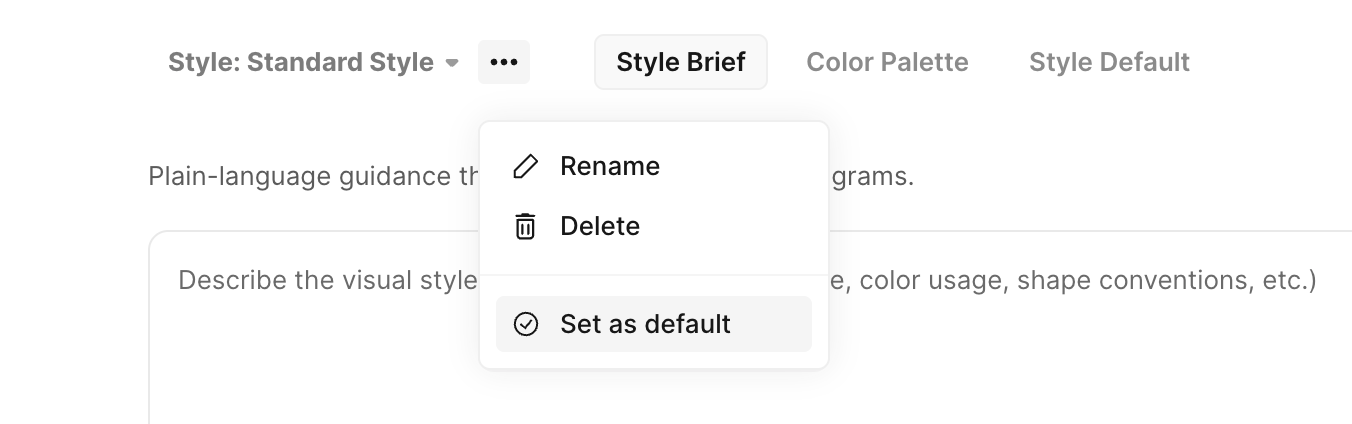
Setting a default style
Mark one style as the team default and it applies automatically to new AI sessions. Anyone can switch to a different style – or none – for a given diagram.
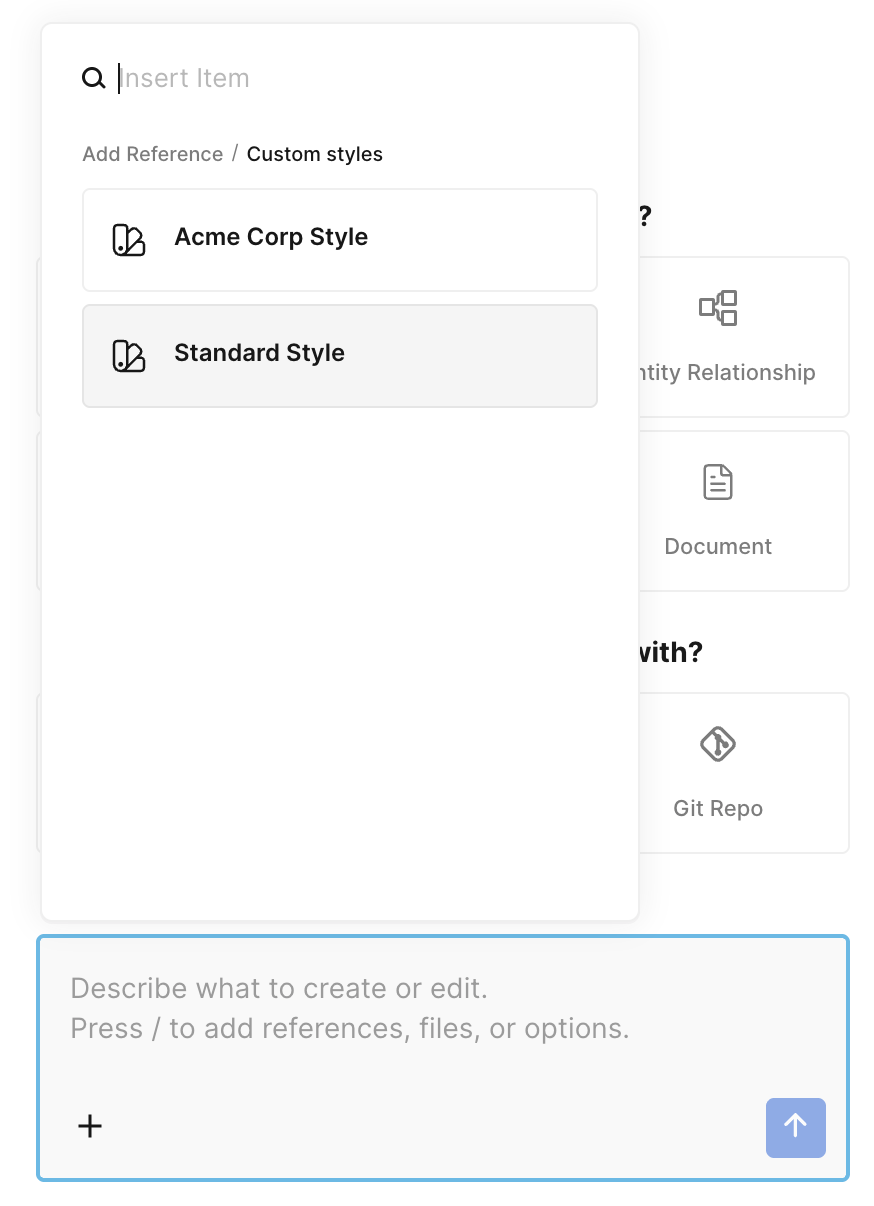
Applying a style
Select a style from the style dropdown in the AI sidebar before you generate. Styles are independent of AI presets, so you can apply both at once – each appears as its own chip.
Access & permissions
| Action | Who can do it |
|---|---|
| View and use styles | Any team member |
| Create, edit, or delete styles | Team admins |
| Set the default style | Team admins |
Updated 21 days ago