
Eraserbot (CI integration)
What is Eraserbot?
Eraserbot helps you generate and maintain up-to-date diagrams based on your codebase as it evolves. It allows you to visualize infrastructure, system architecture, data models, API flows, application logic, and more, ensuring that your diagrams always stay in sync with your latest changes.
Prerequisites
There are two requirements to use Eraserbot:
- Eraser must have access to your GitHub repo (install GitHub app)
- Only GitHub is supported at the moment. GitLab and Azure DevOps support coming soon.
- Usage-based pricing must be enabled
Setting up a monitor
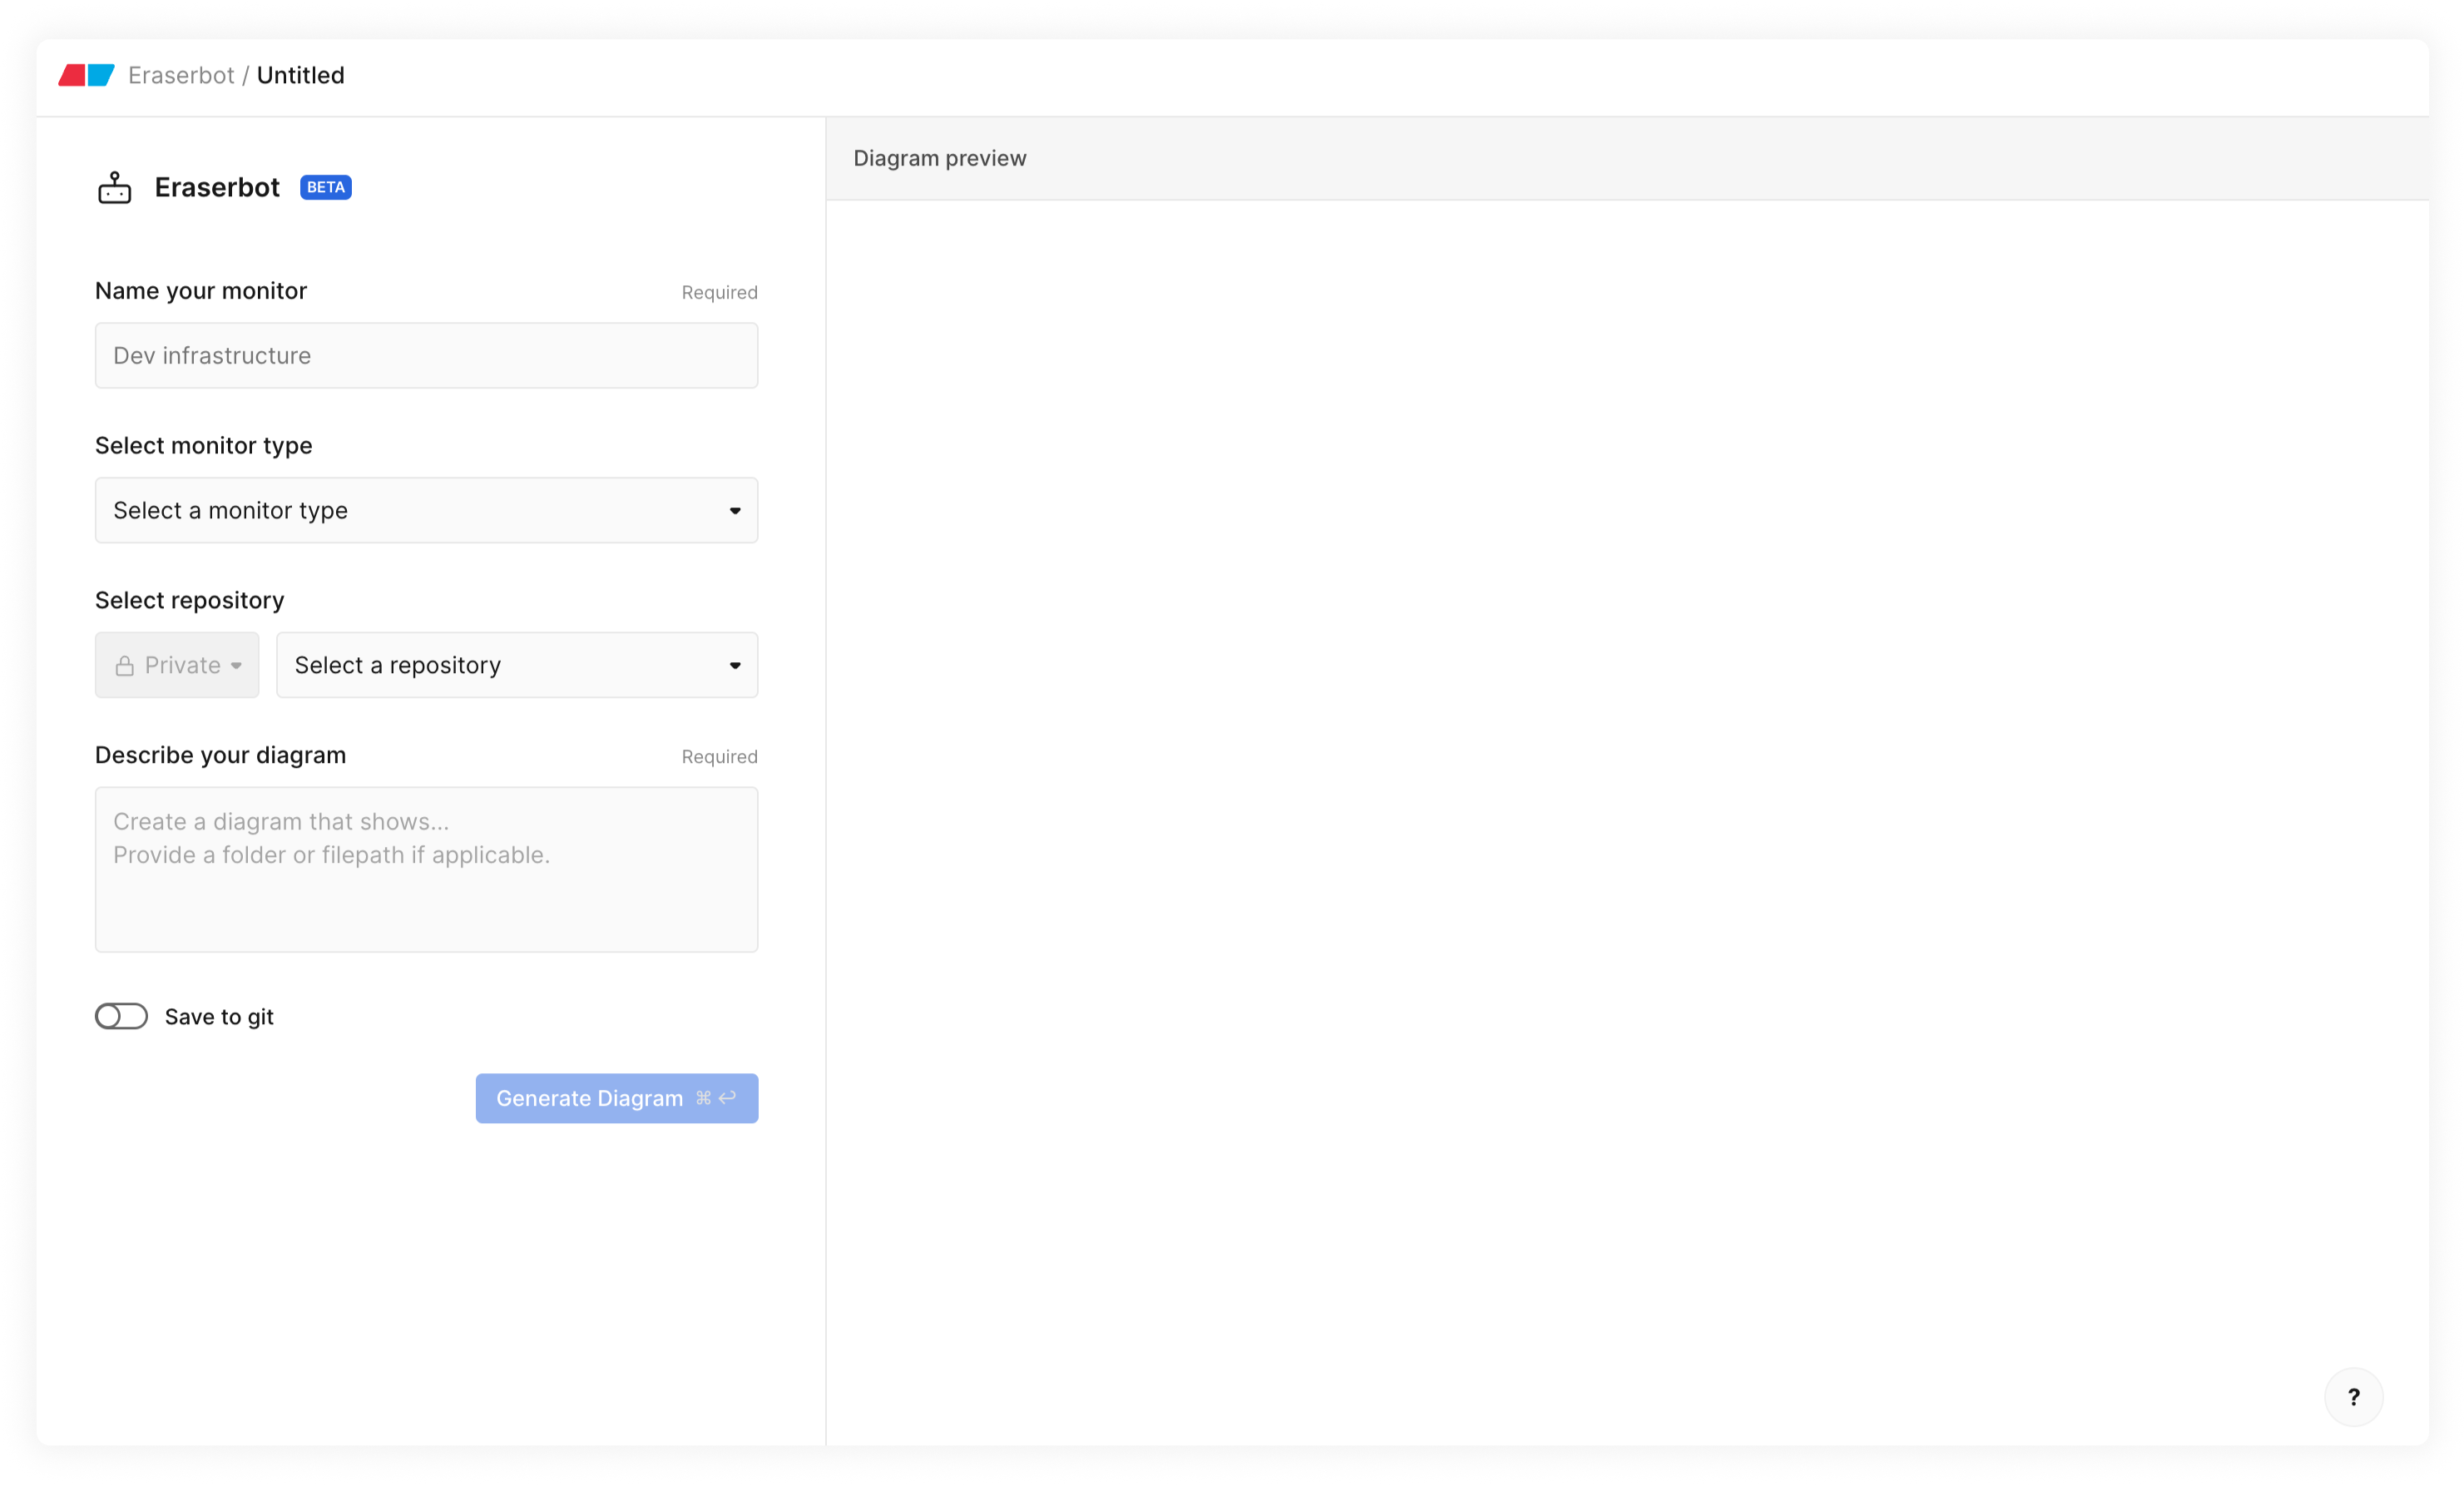
- On the Eraserbot page, click "New monitor"
- Fill out necessary information including the diagram prompt and generate the diagram
- (Optional) Adjust the prompt or files used and re-generate the diagram as necessary.
- (Optional) Click the "Edit" button and directly change the diagram syntax as necessary.
- Click "Save monitor"
Open PRs
- When a PR is opened, if there are any monitors that are monitoring files that were edited in the PR, Eraserbot will leave a comment of the updated diagram on the PR within 1-2 minutes.
- If a PR changes monitored files but are not relevant to the diagram, it will not update the diagram but still leave a comment (no credits are consumed in this case).
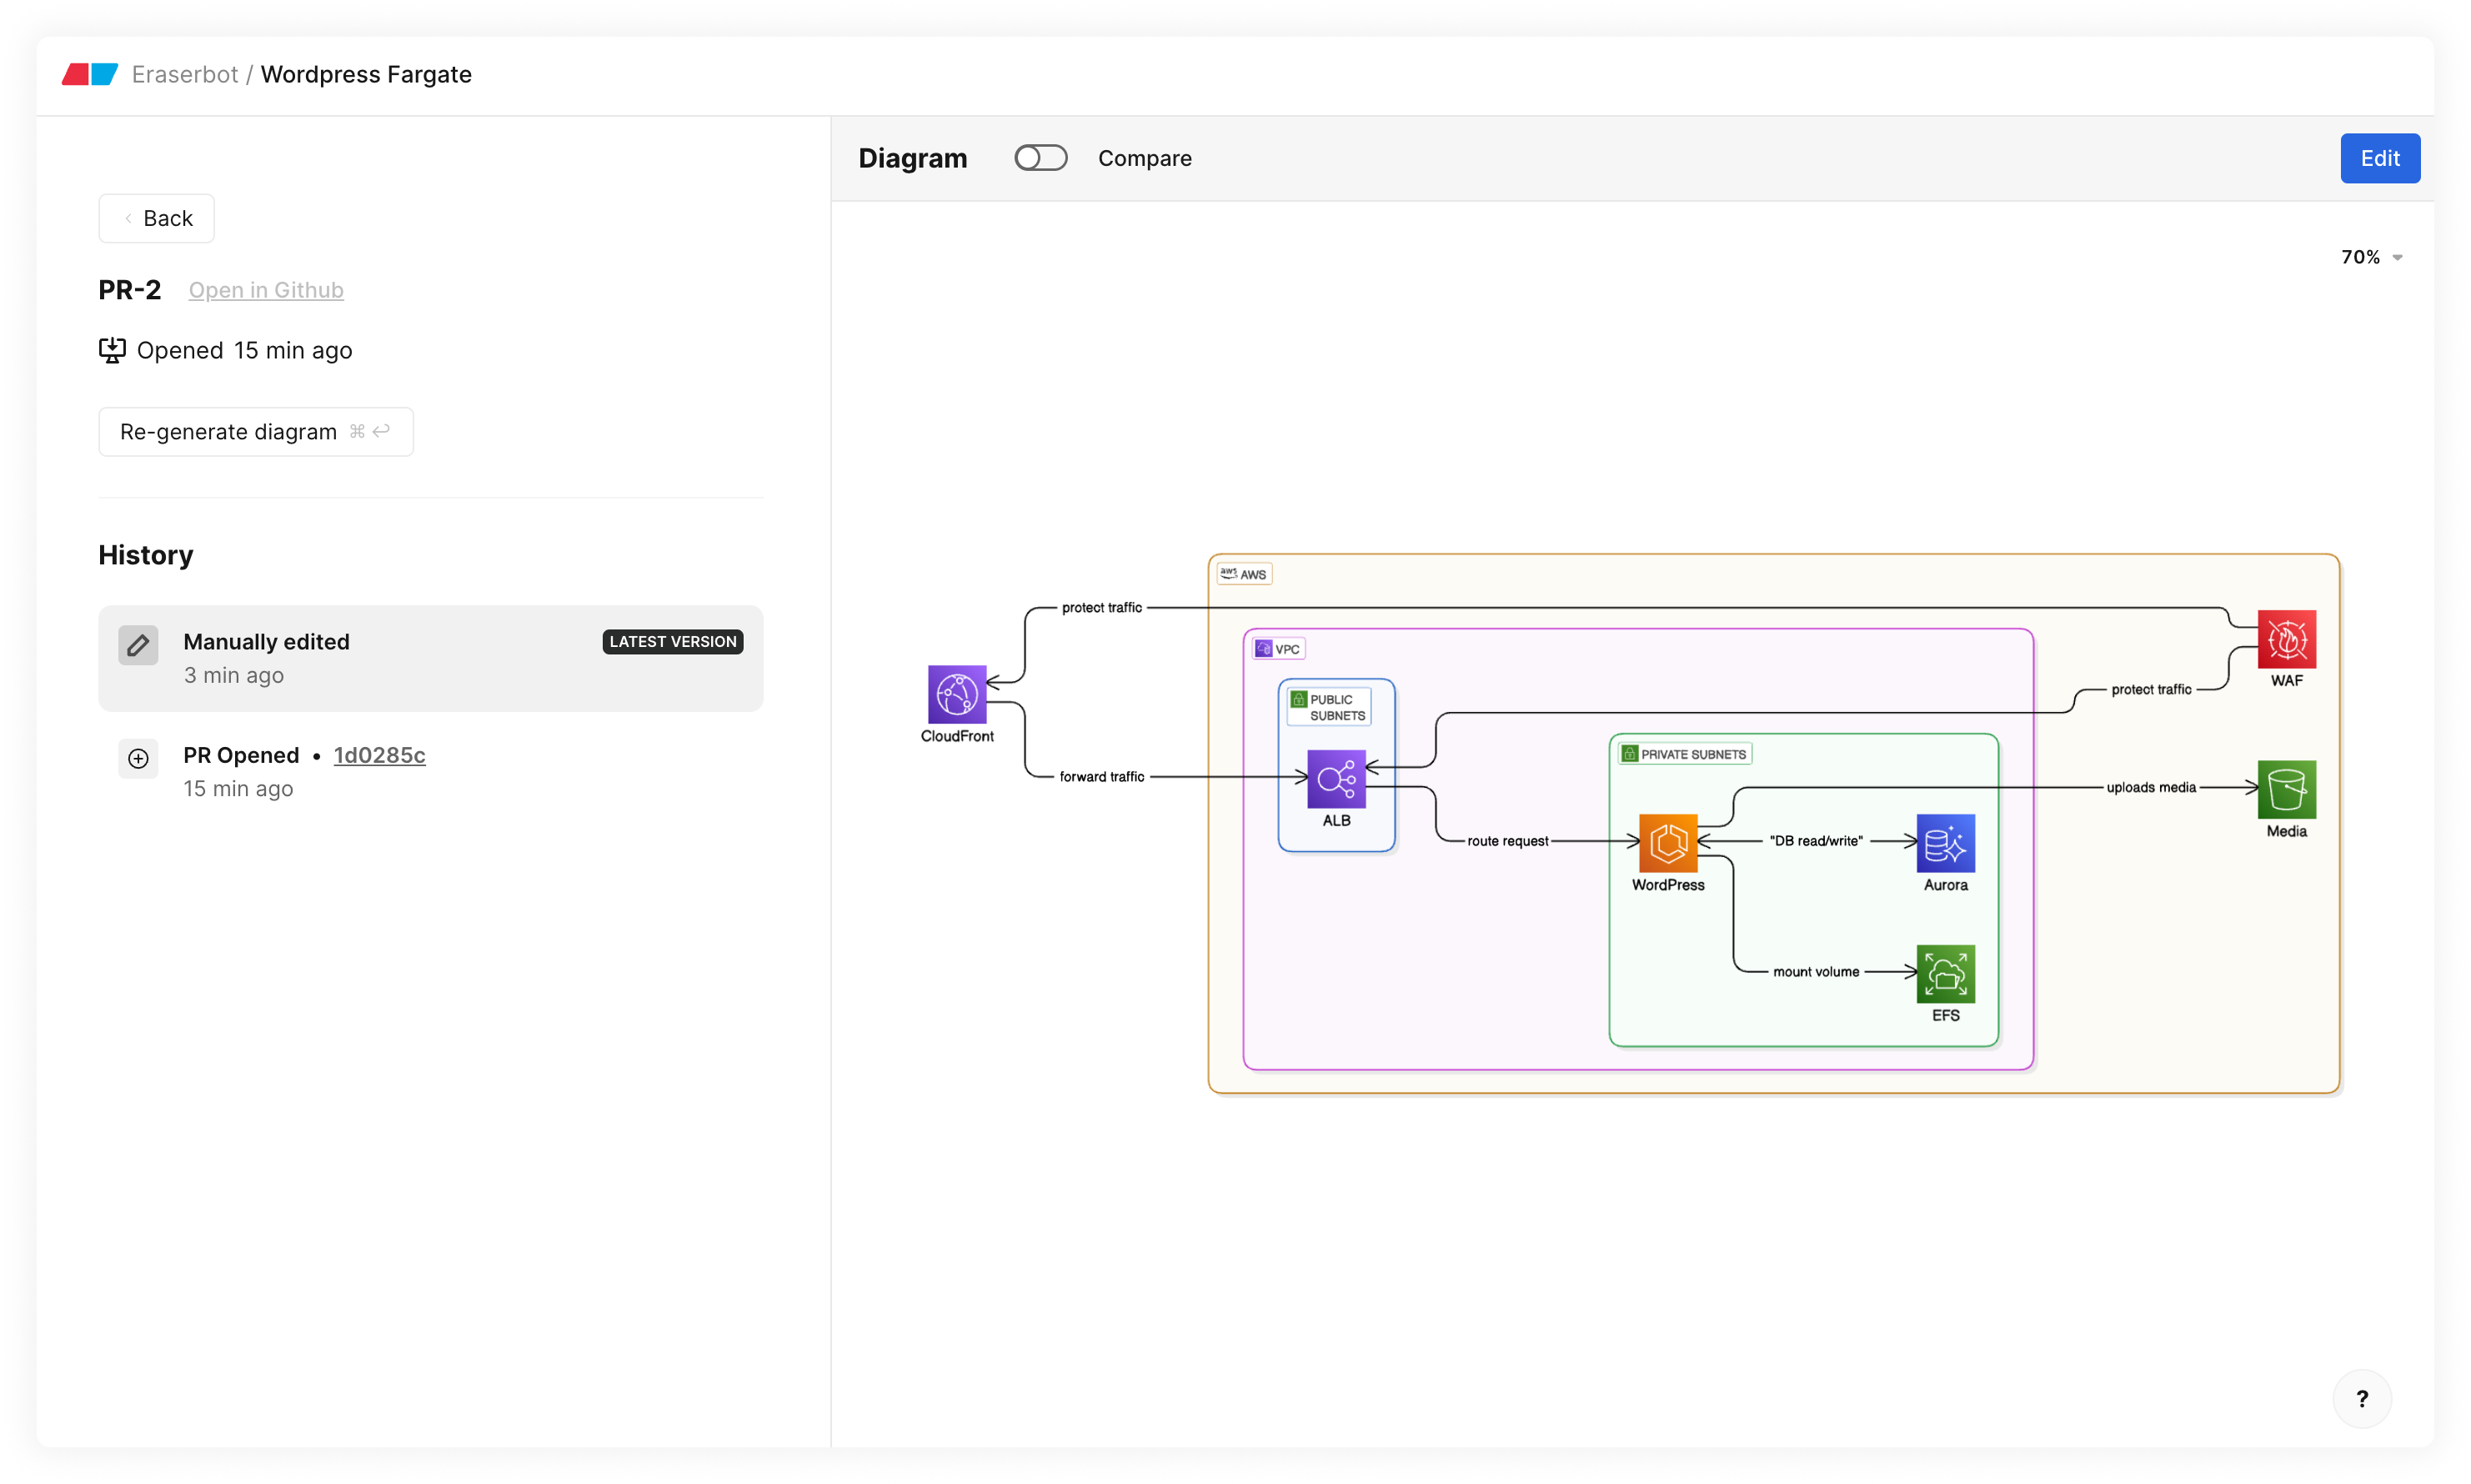
- (Optional) If the user wants to make additional changes on top of the diagram generated by Eraserbot, the user can do the following:
- Open the monitor either via the Eraserbot page or the monitor link in the PR
- Click on "Open PRs" and select the relevant PR (in case there are multiple open PRs)
- Click "Edit" to change the diagram syntax, and then "Done"
- Click "Save diagram to PR"
- This will add a history item to the PR history
- (Optional) After the PR is opened, if there are subsequent commits that require the diagram to be re-drawn, the user can trigger a regeneration by doing the following:
- Open the monitor either via the Eraserbot page or the monitor link in the PR
- Click on "Open PRs" and select the relevant PR (in case there are multiple open PRs)
- Click "Regenerate"
- Once completed (can take ~1 minute) a history item will be added to the PR history
- When a PR is merged, the monitor's diagram will be updated.
- Previous versions of the monitor can be viewed by clicking on "History" of the monitor.
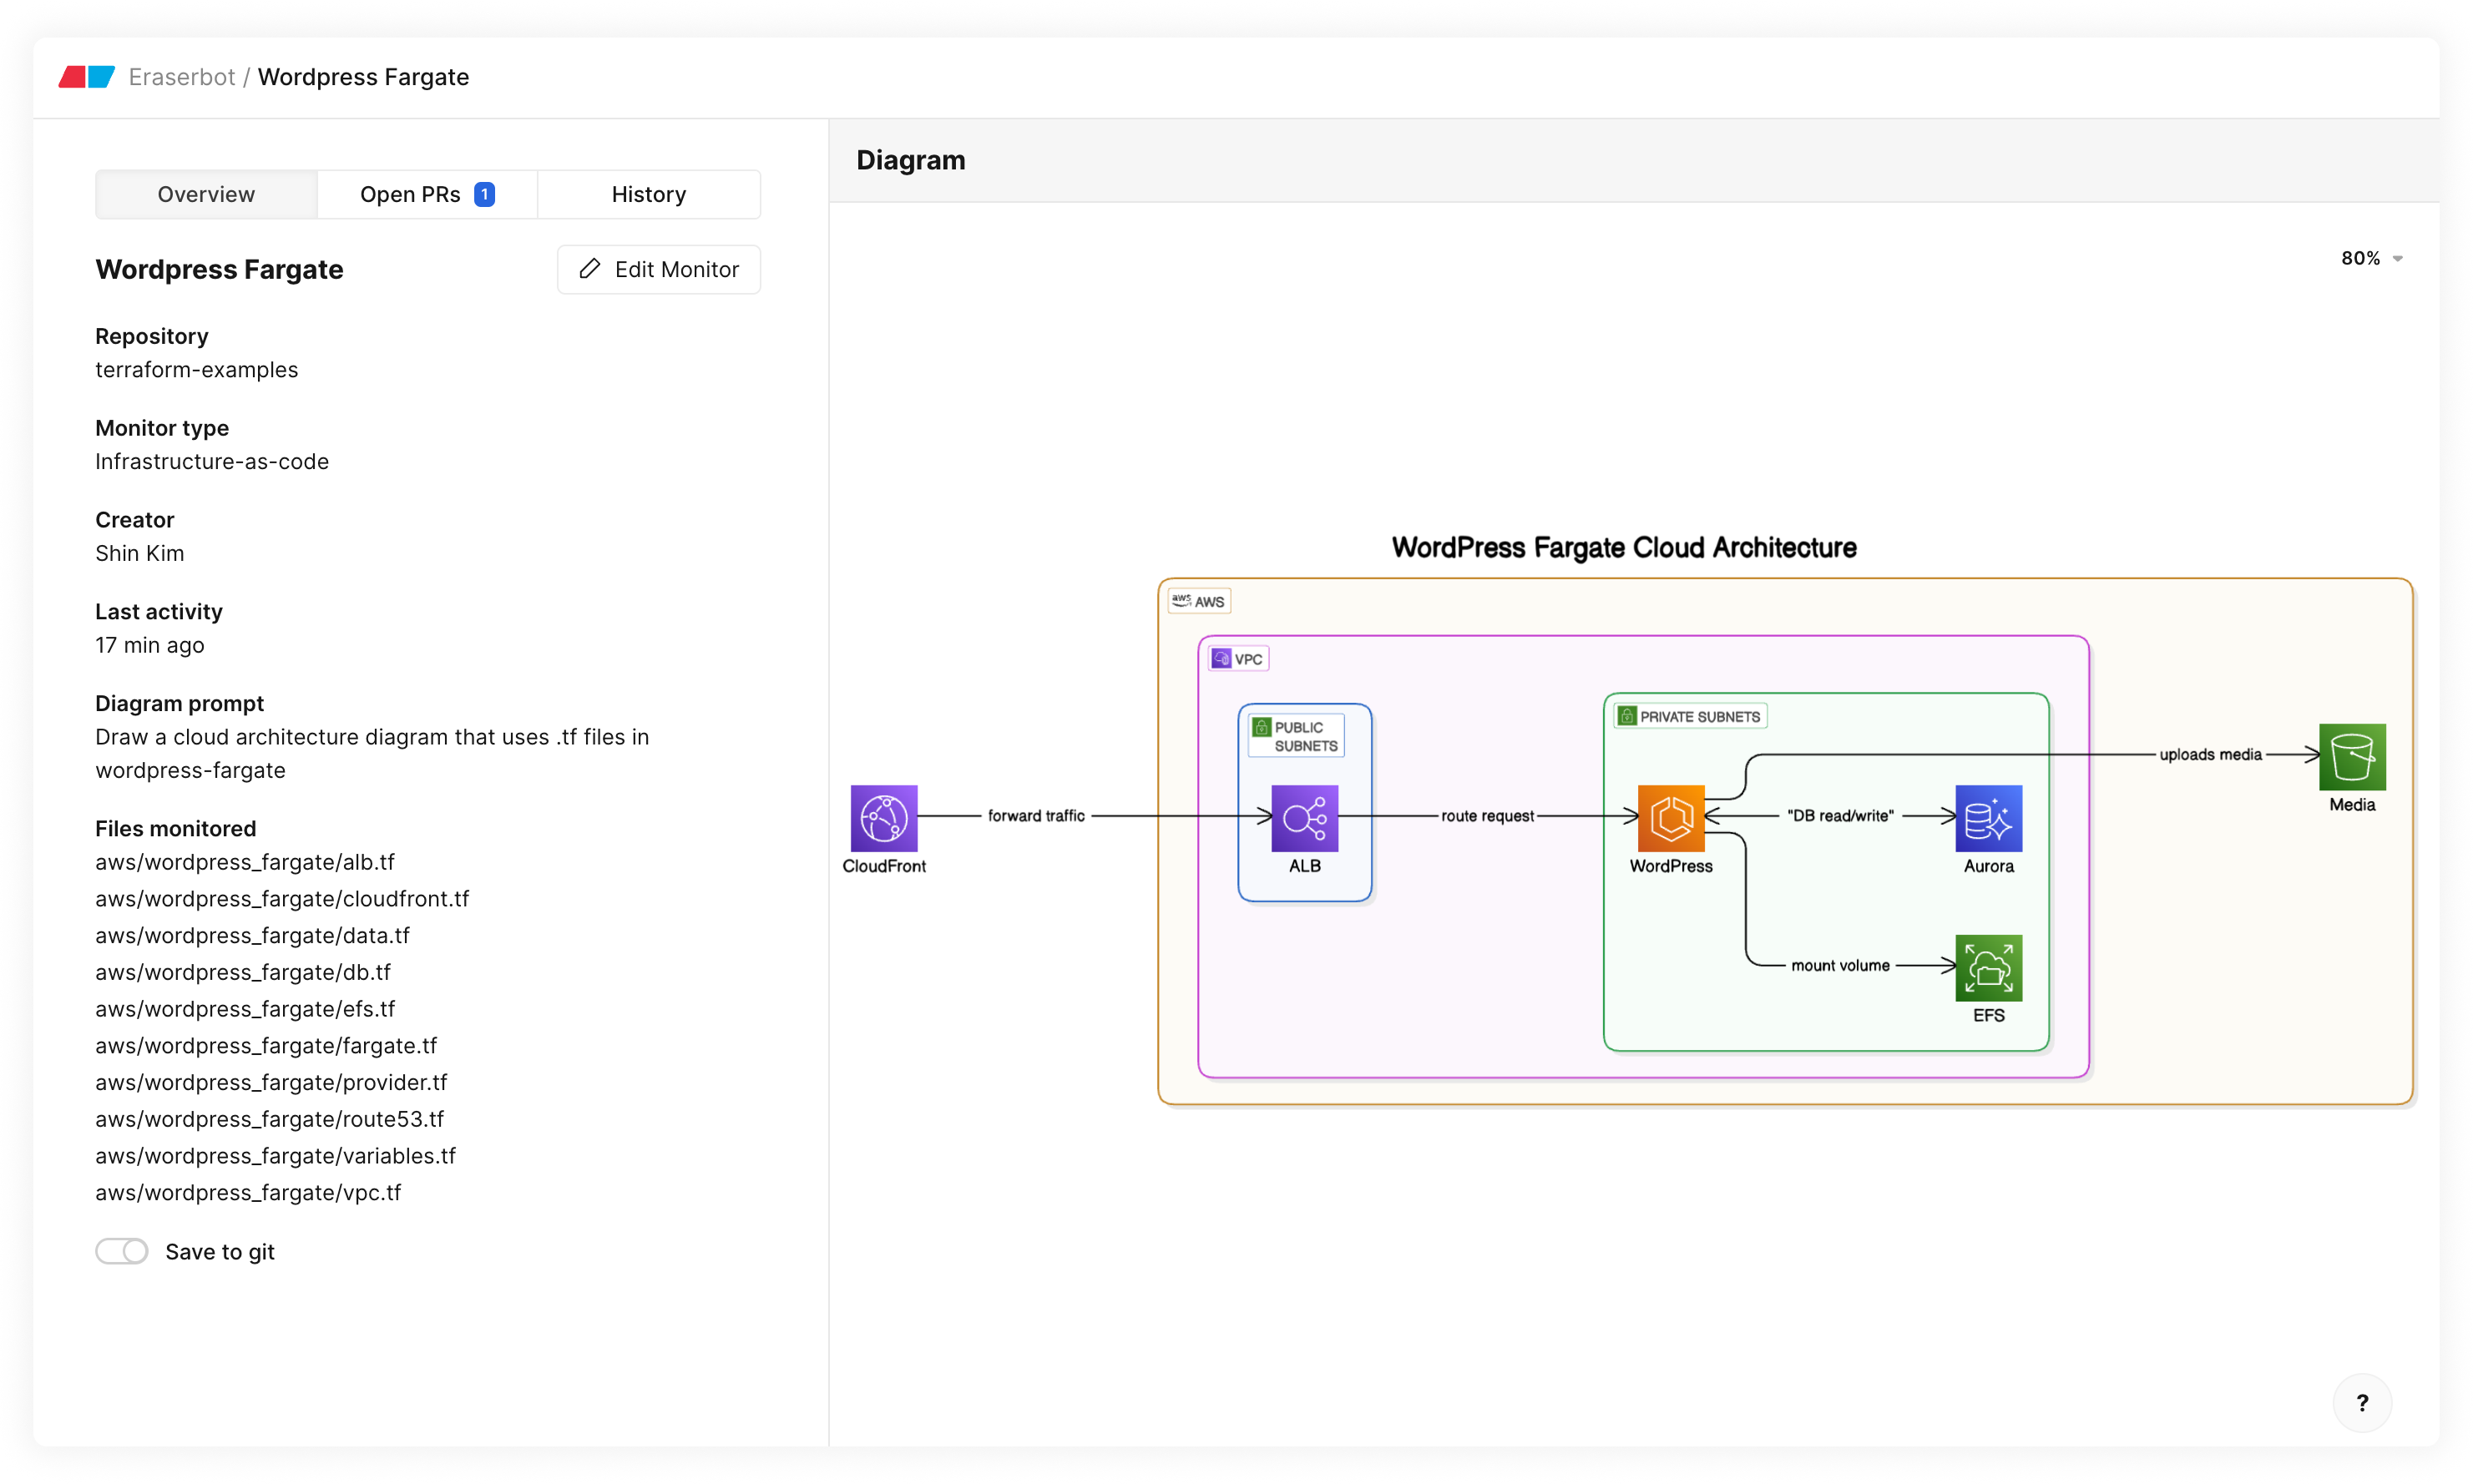
Editing a monitor
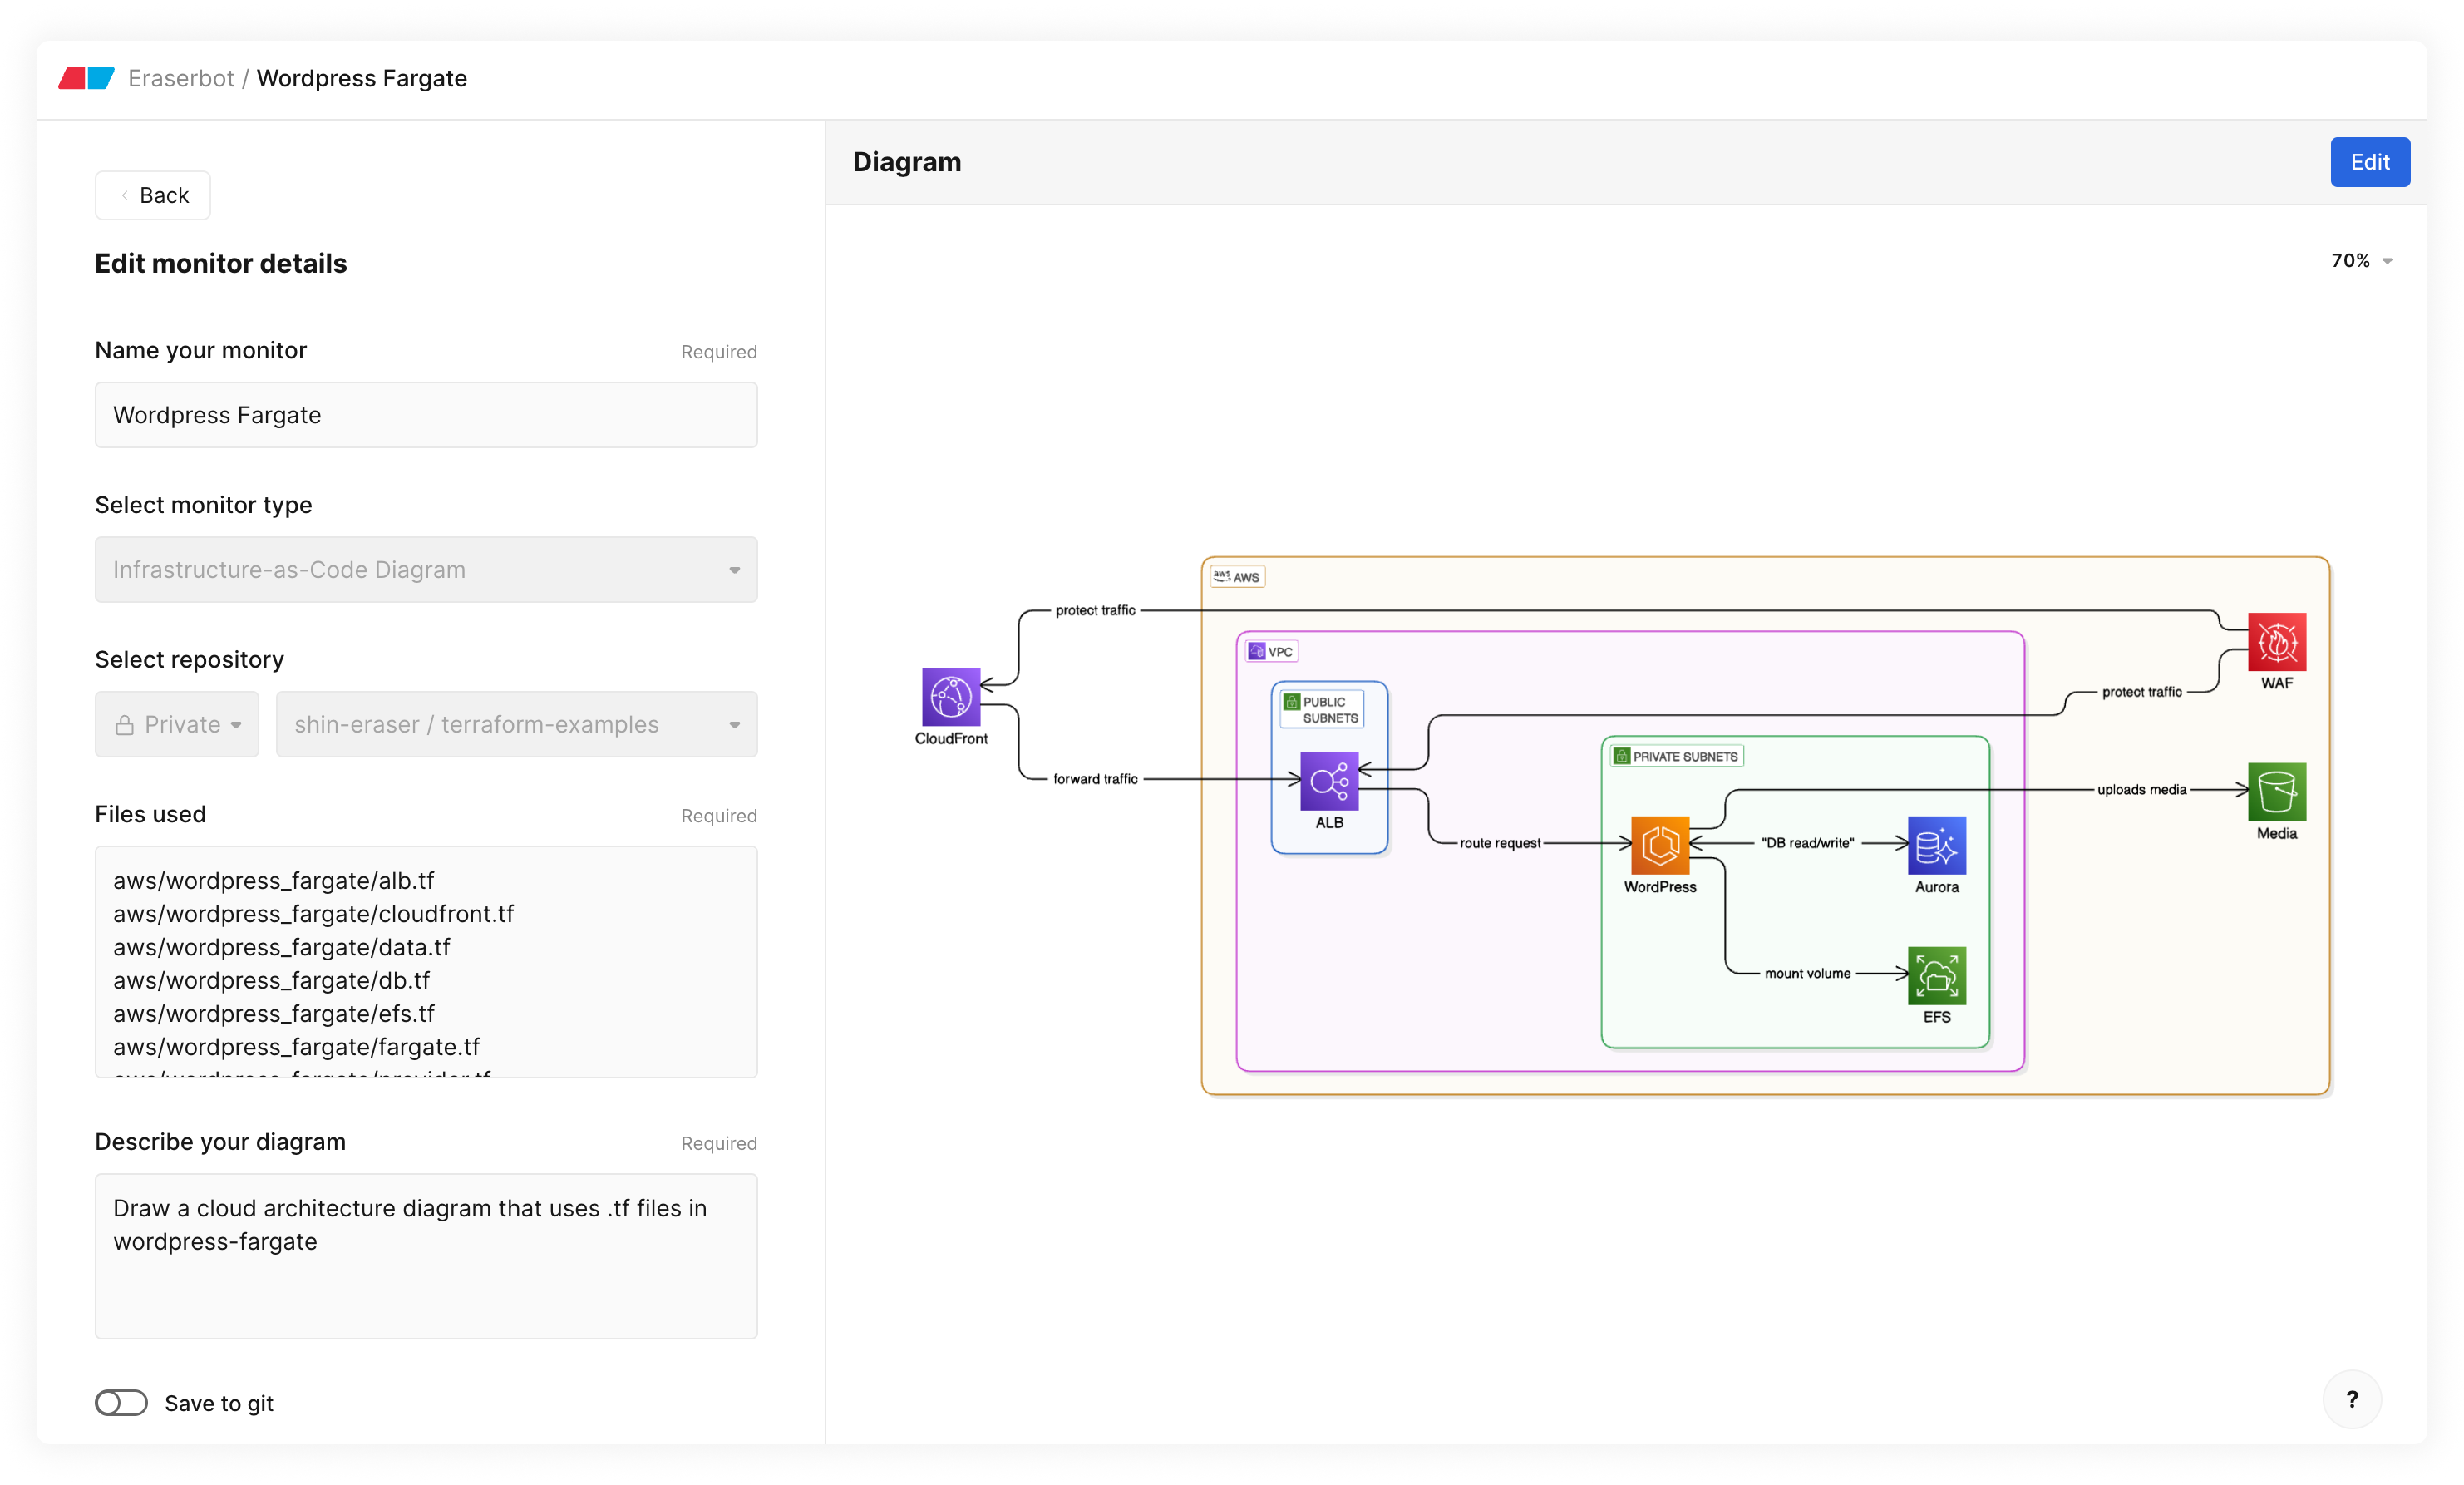
- On the Eraserbot page, select an existing monitor.
- Click "Edit"
- You can change any of the below:
- Diagram prompt
- Files monitored
- Diagram syntax
- (Optional) Depending on what you changed in the previous step, you may want to re-generate the diagram
- Click "Save monitor"
Monitor history
Previous versions of the monitor can be viewed by:
- On the Eraserbot page, select a monitor.
- Click on "History"
Billing
During the creation of a monitor, AI credits are consumed in each generation attempt.
After a monitor is opened, API credits are consumed. Credits are consumed only when a diagram is created either because a PR is opened and it contains code changes that require a diagram update or when the user manually re-generates a diagram in relation to an open PR. Usage-based pricing must be turned on.
Updated 2 months ago