
SAML SSO
Note that SAML SSO is only available to customers on the Business Plan and Enterprise Plan.
Quick overview
- Upgrade to Business Plan or higher (how-to)
- Turn on SSO in Eraser (how-to)
- Using MS Entra
- Using Okta
- Send invites to users to join team in Eraser (how-to)
- Enable just-in-time (JIT) provisioning
How to enable SSO in Eraser
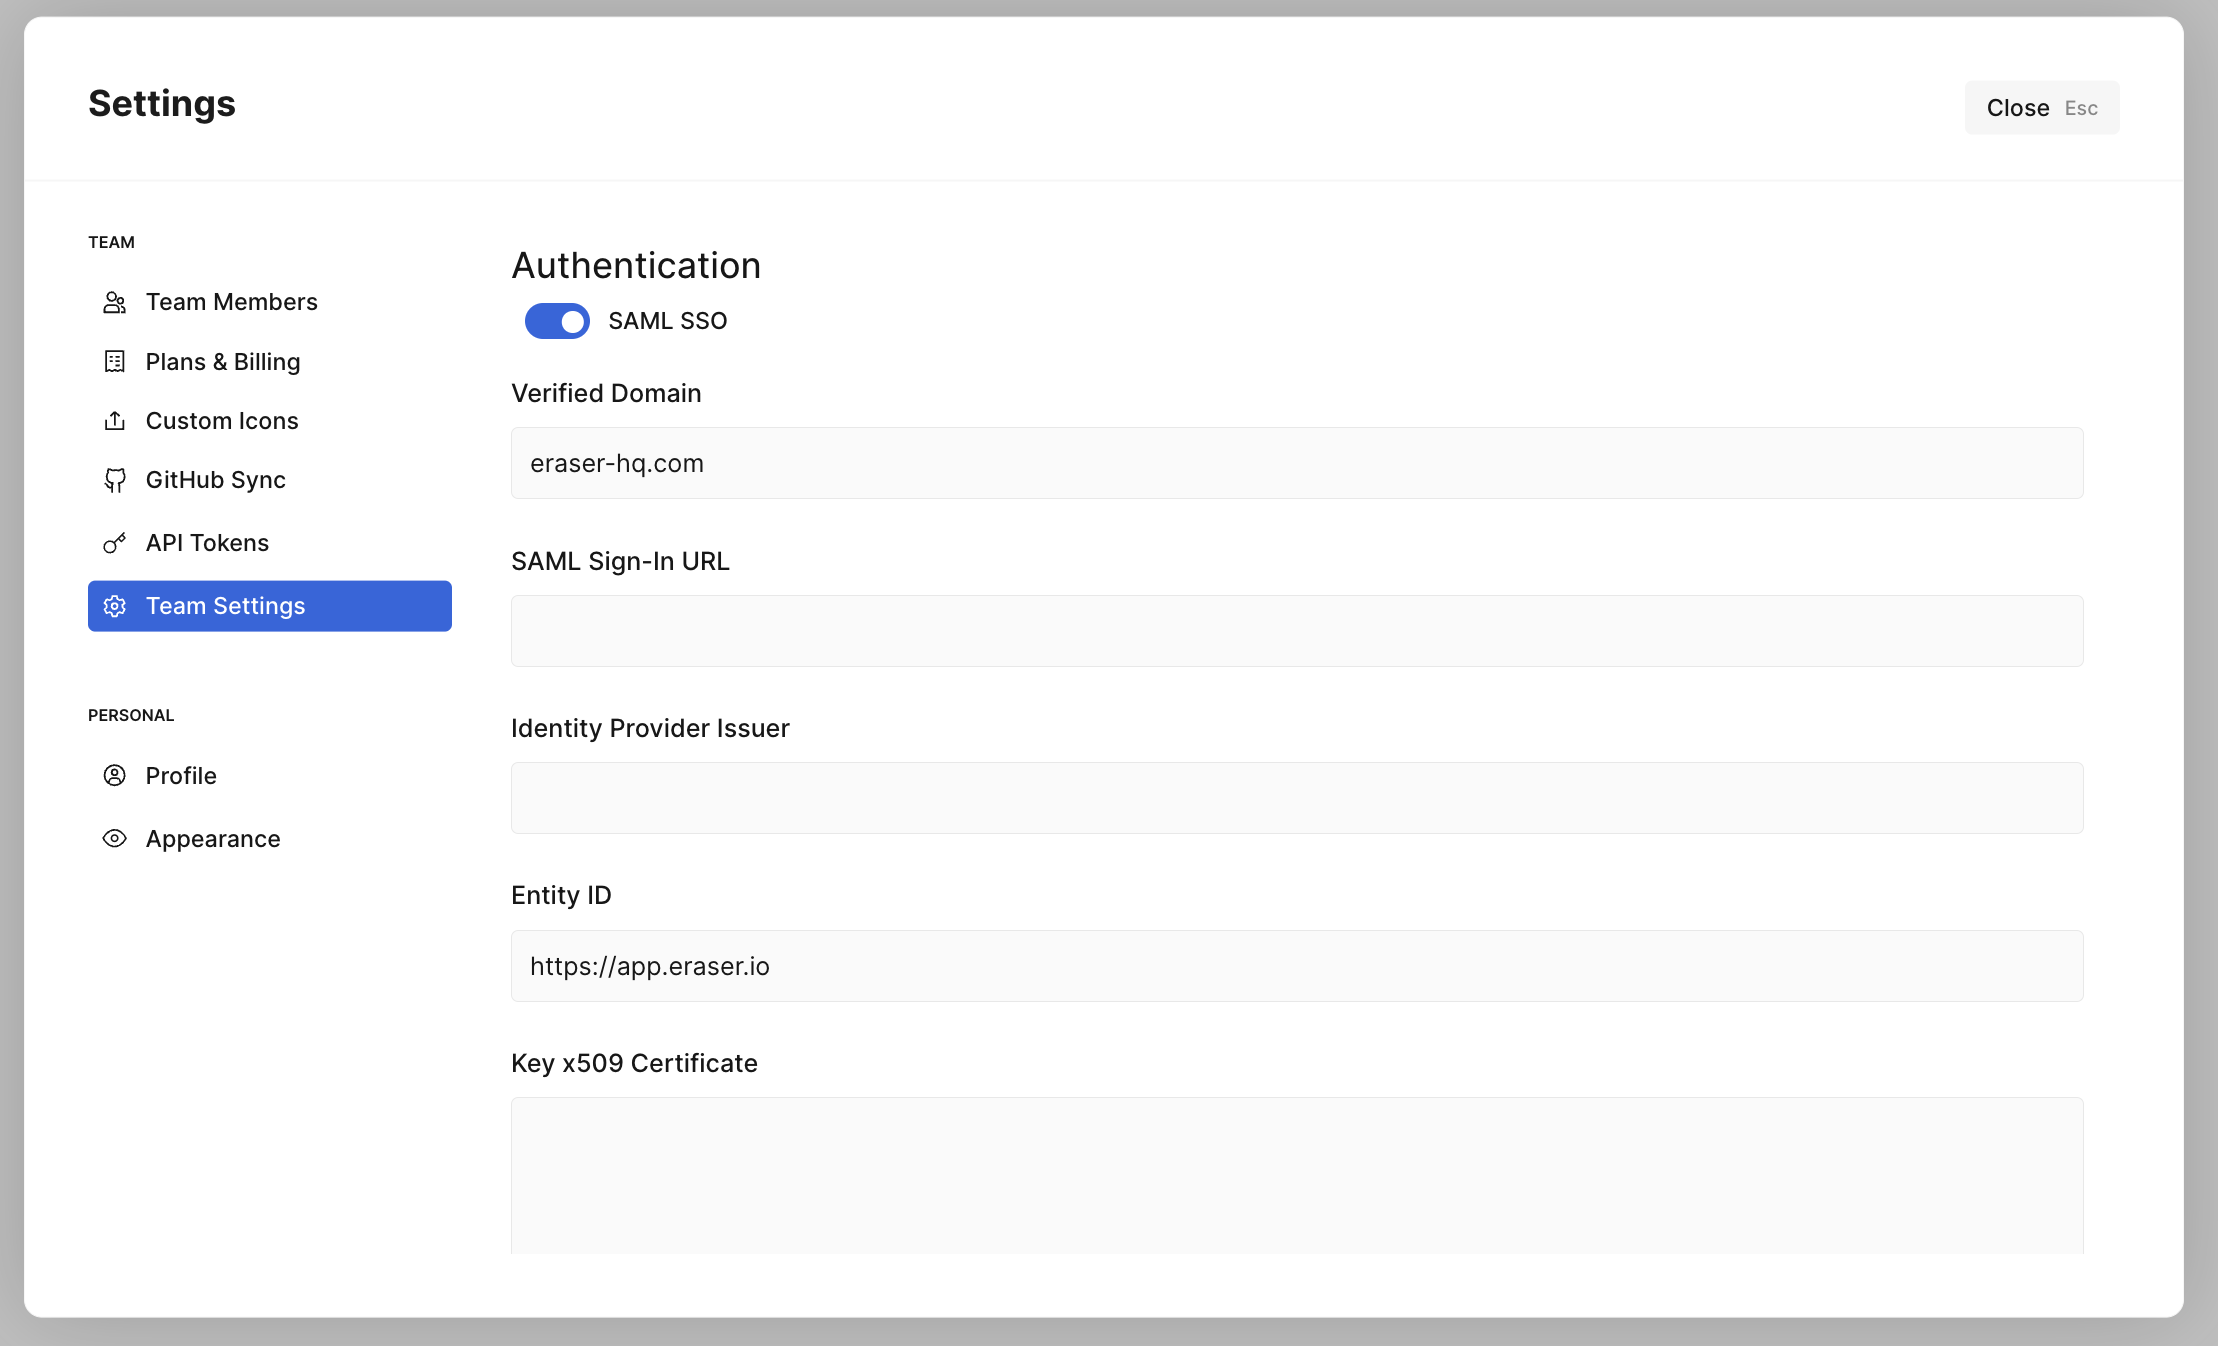
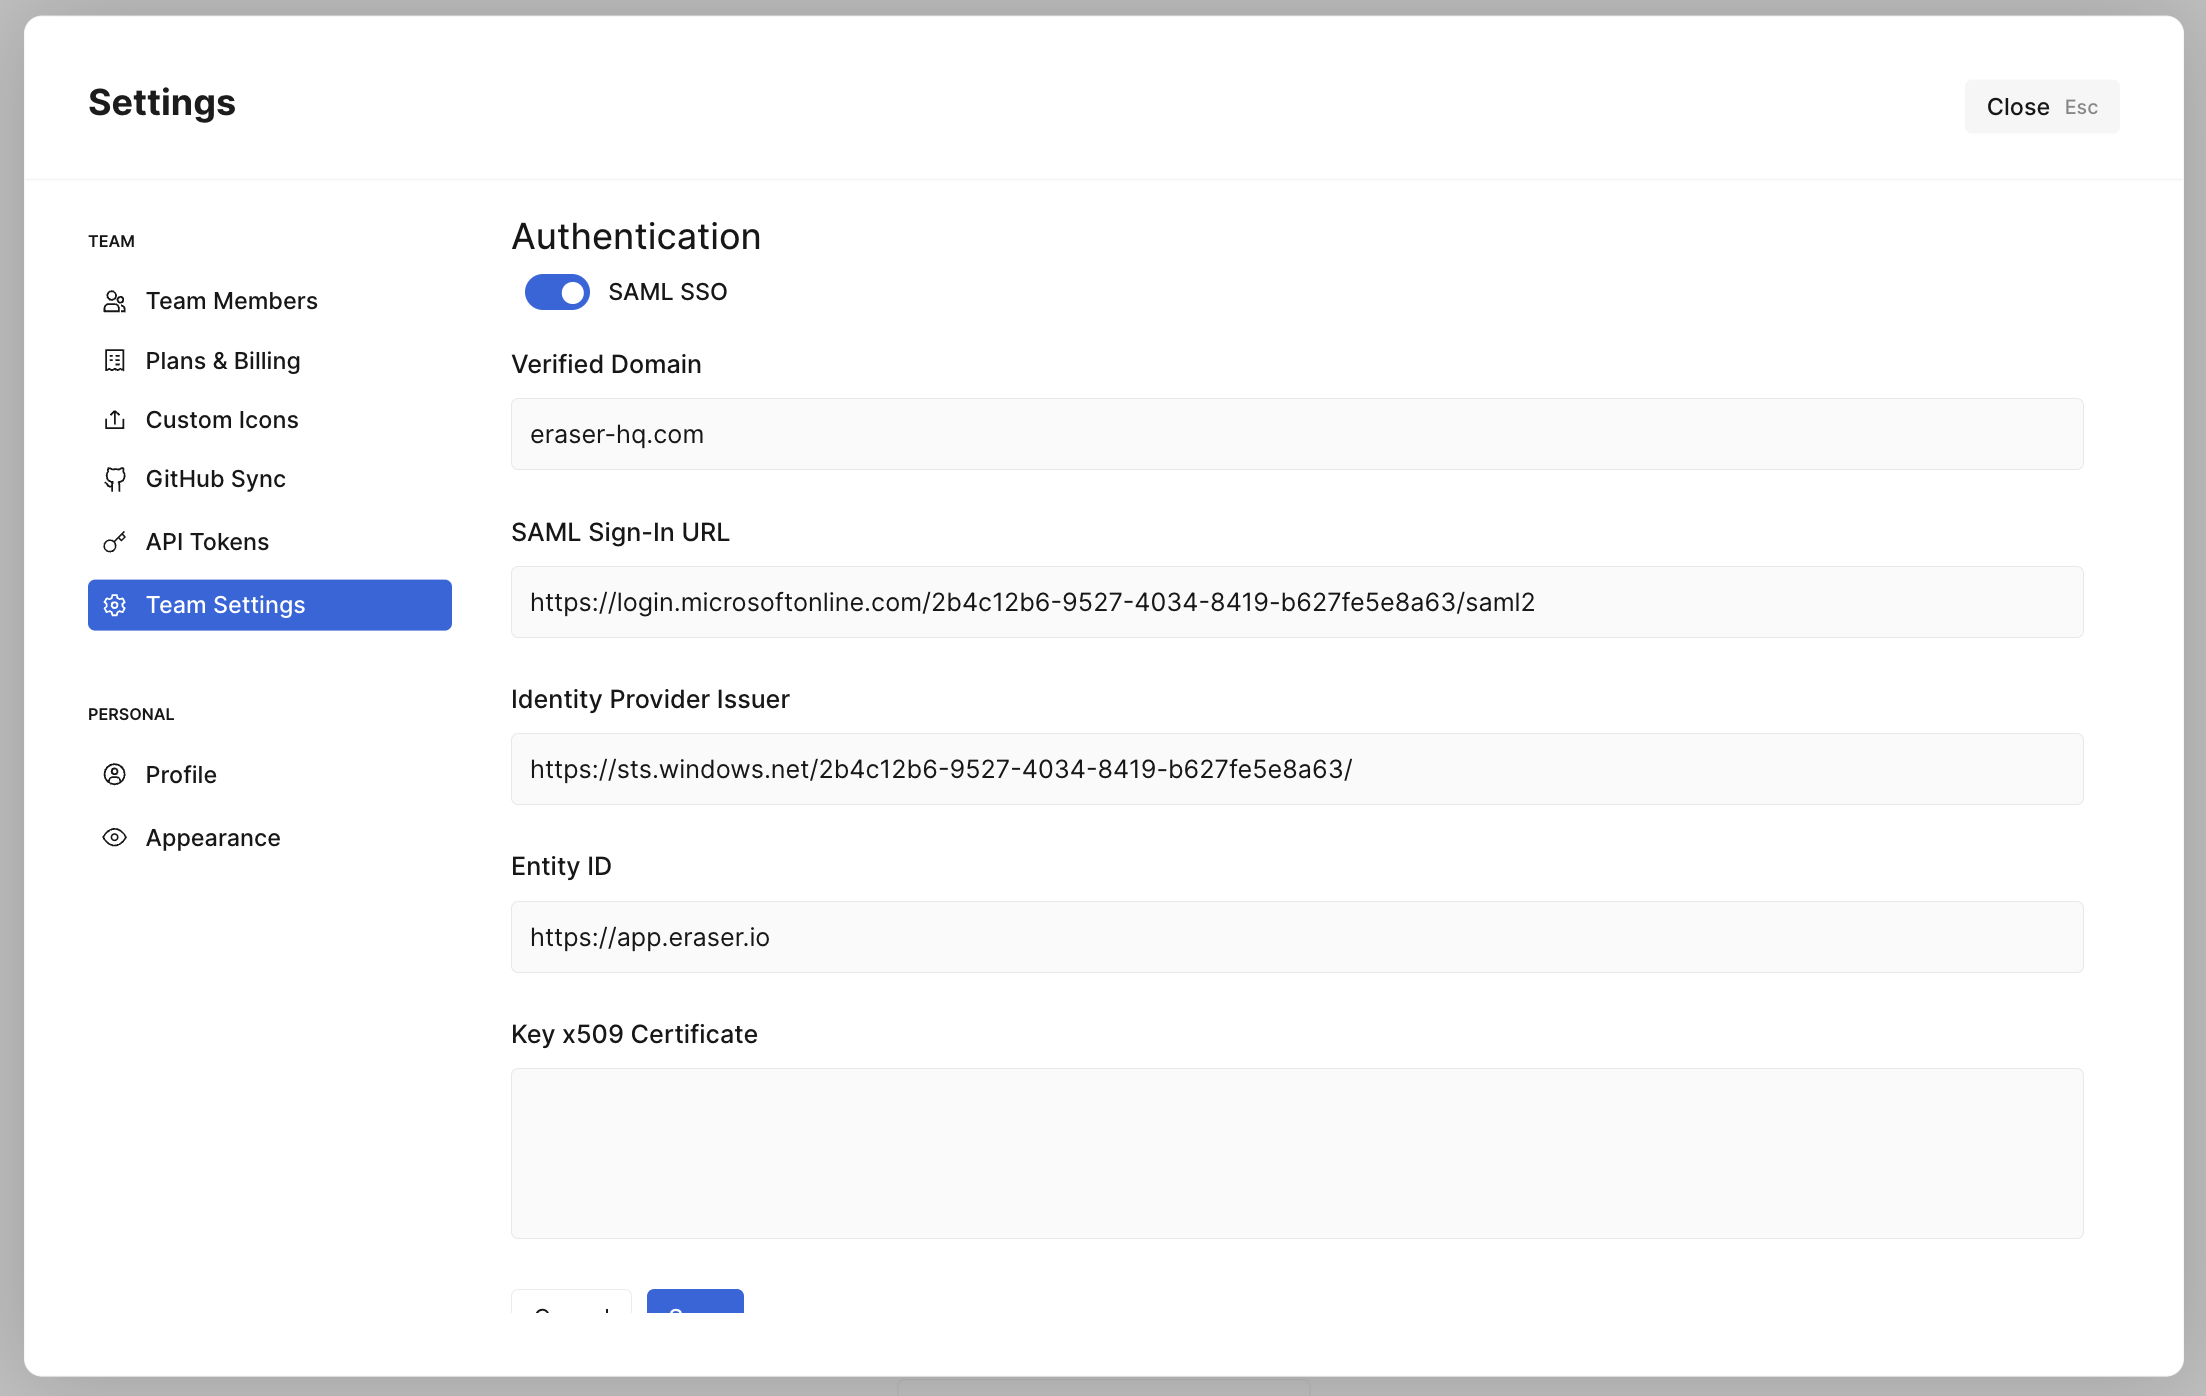
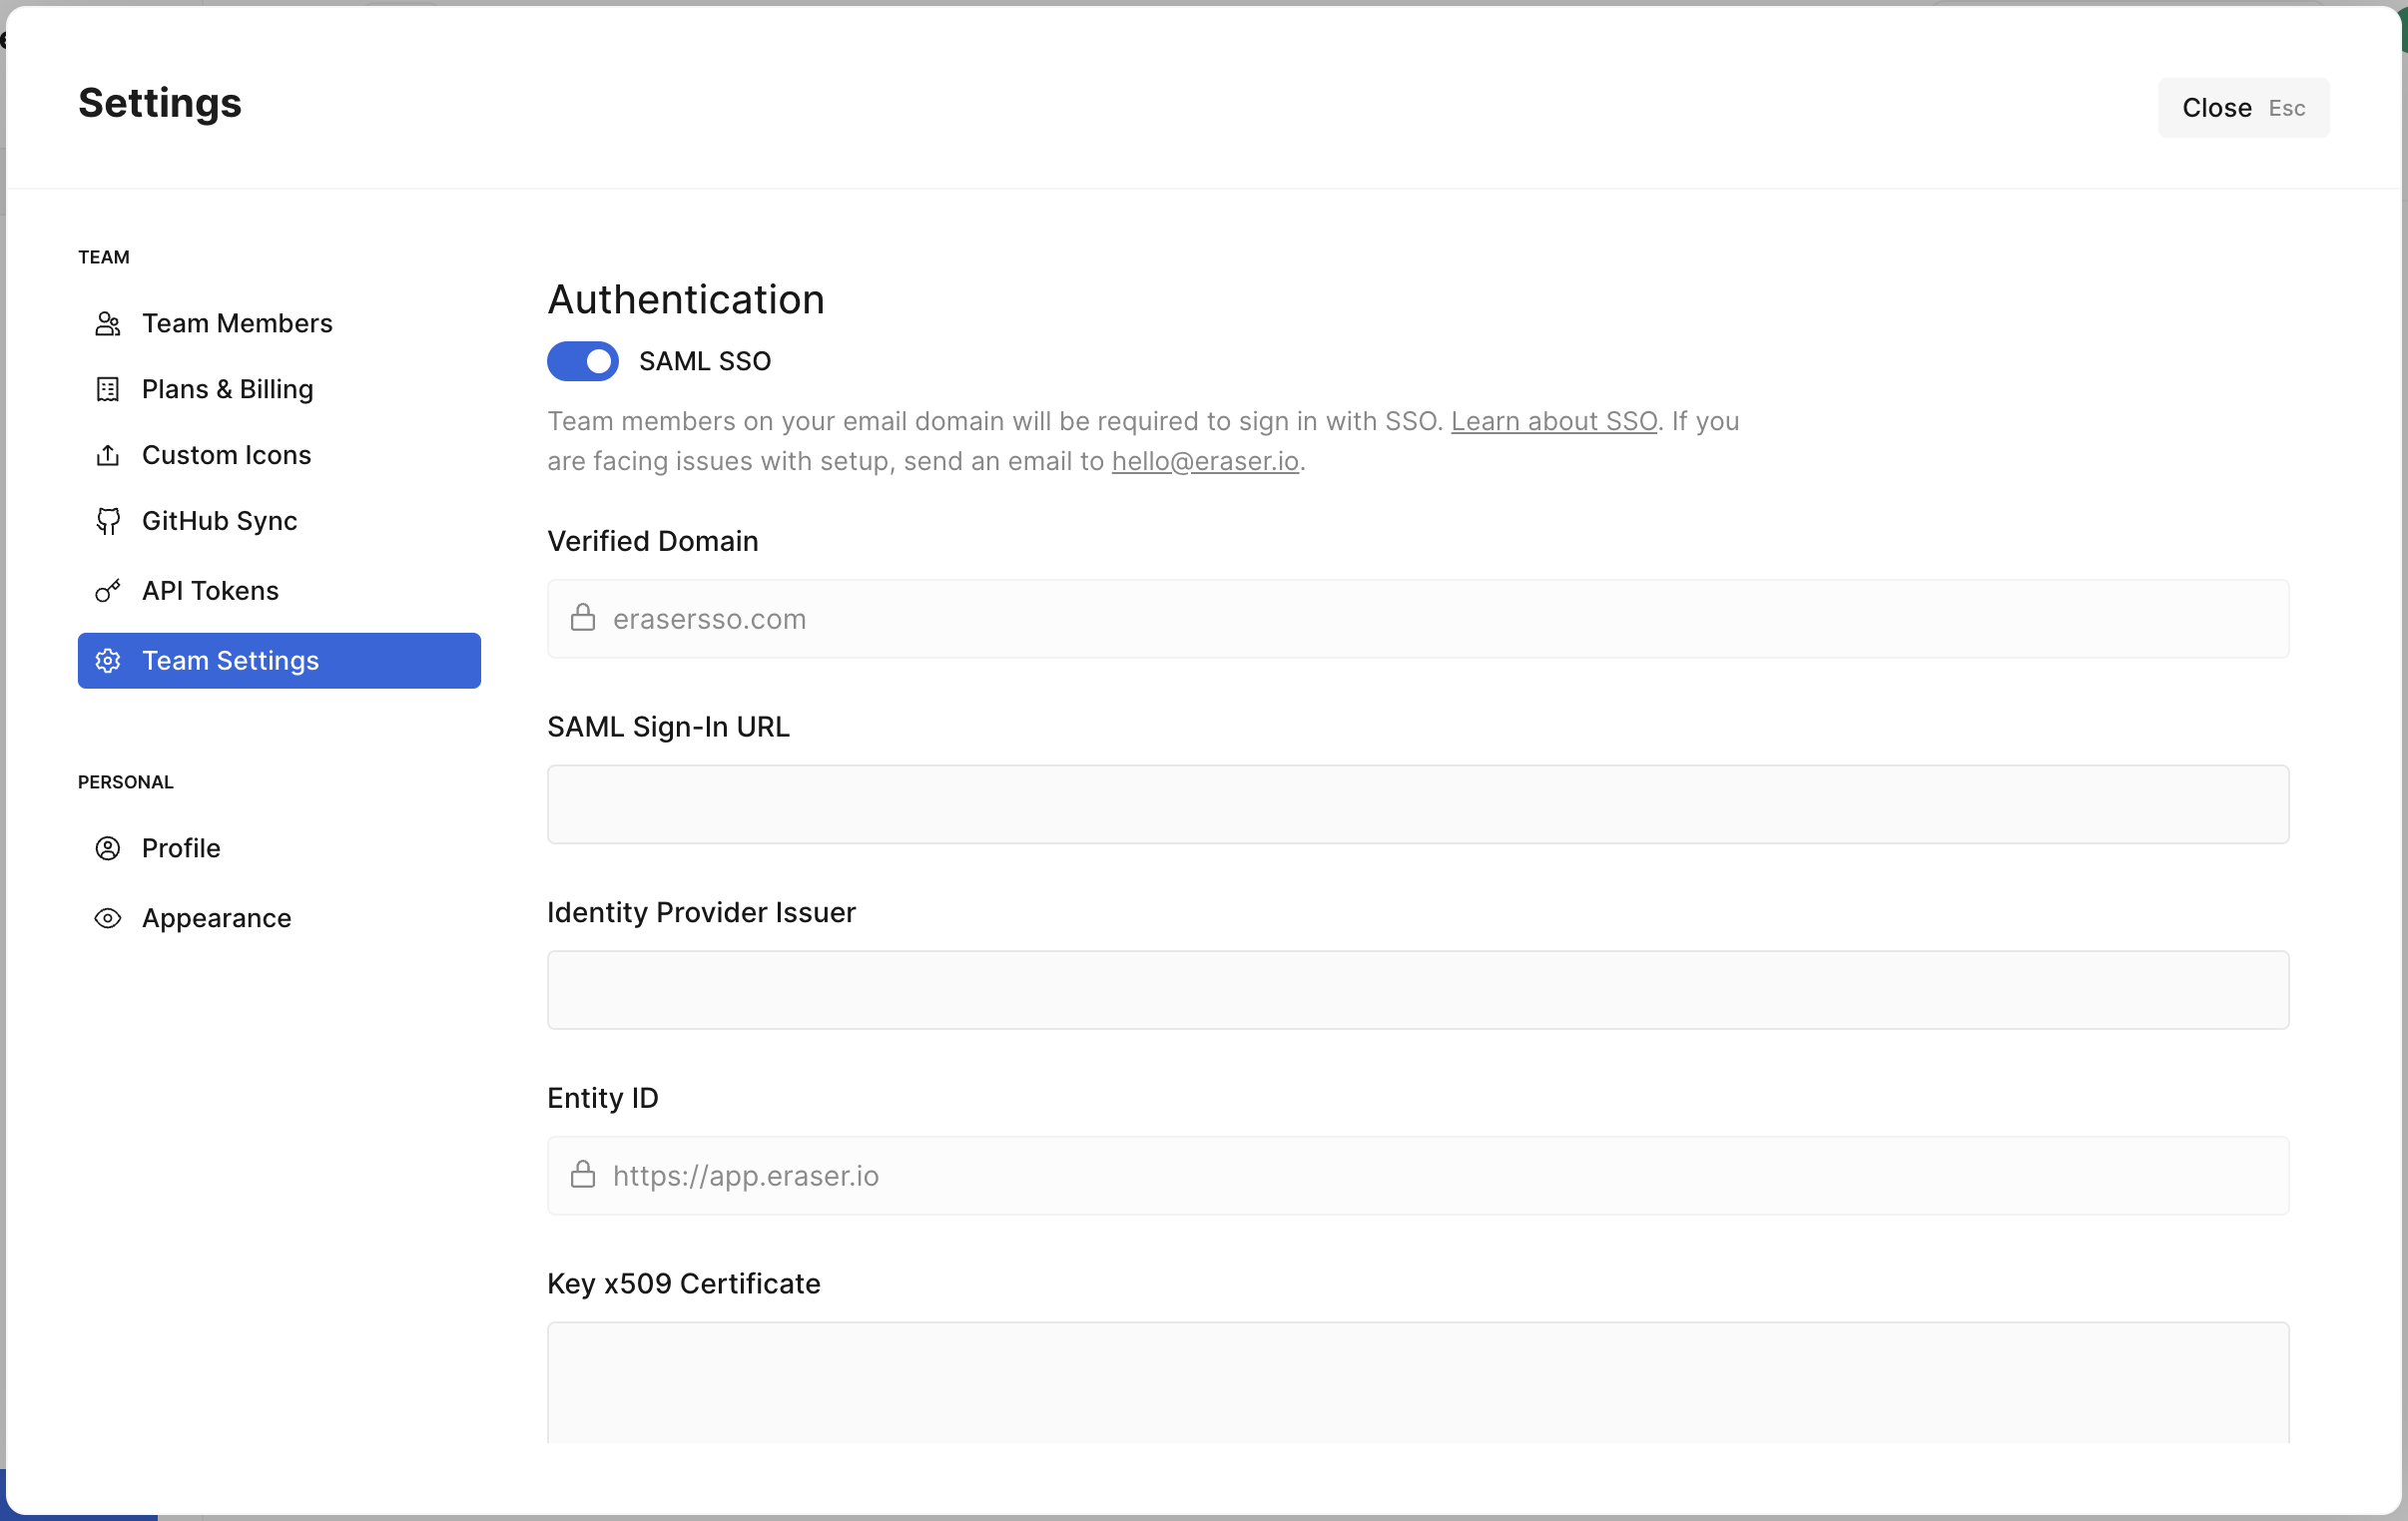
Under Settings > Team Settings, find the SAML SSO toggle and turn it on. Note that this toggle will only be available if you're on a Business Plan or Enterprise Plan.
Verified Domain and Entity ID should already be filled out.
How to install Eraser on MS Entra (AD)
Configuring Entra
Required roleAn Entra admin needs to perform the below
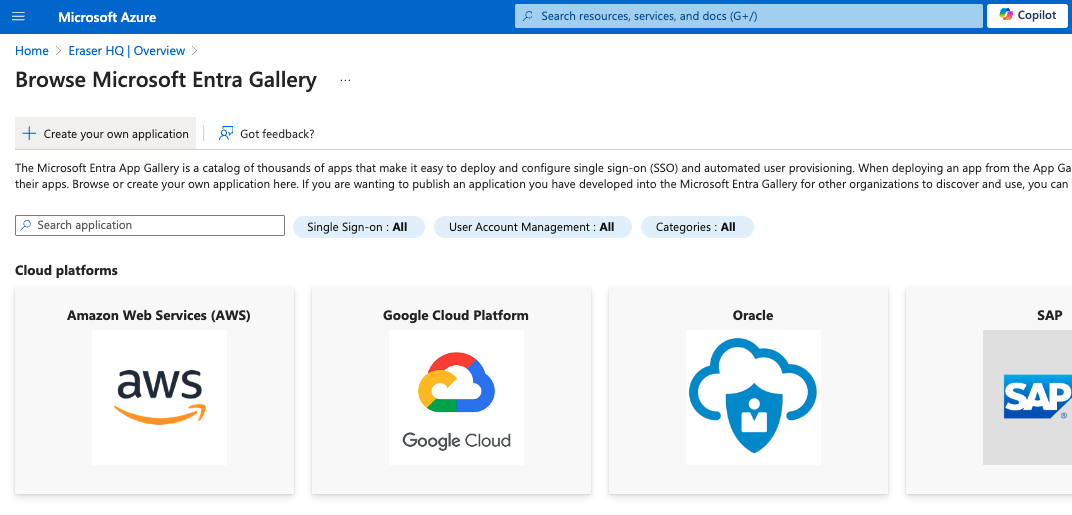
- On your Entra dashboard, click on "Add > Enterprise application"

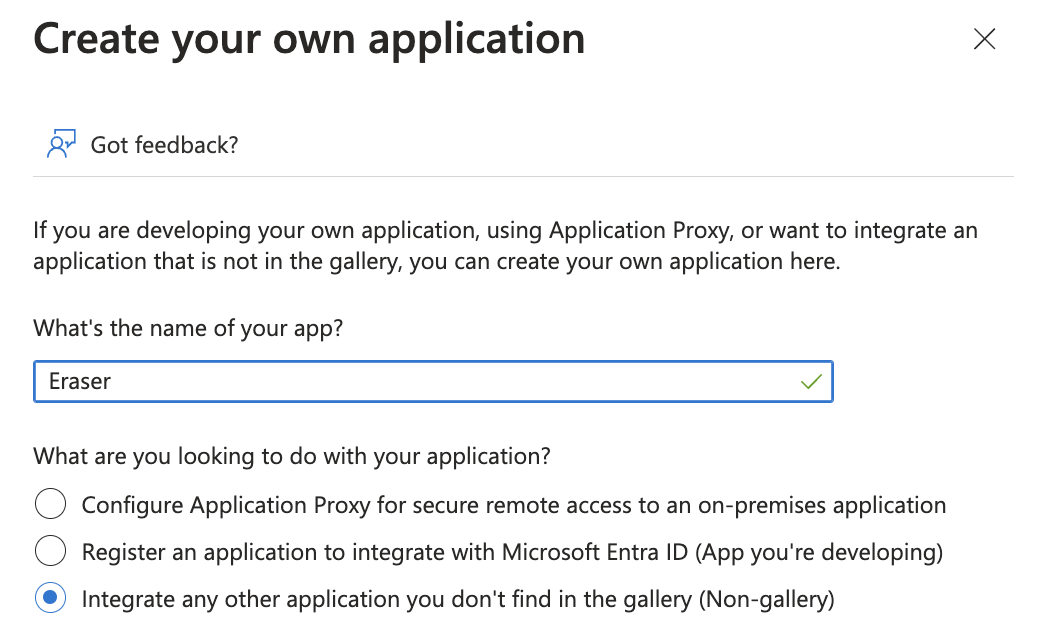
- Click on "Create your own application"
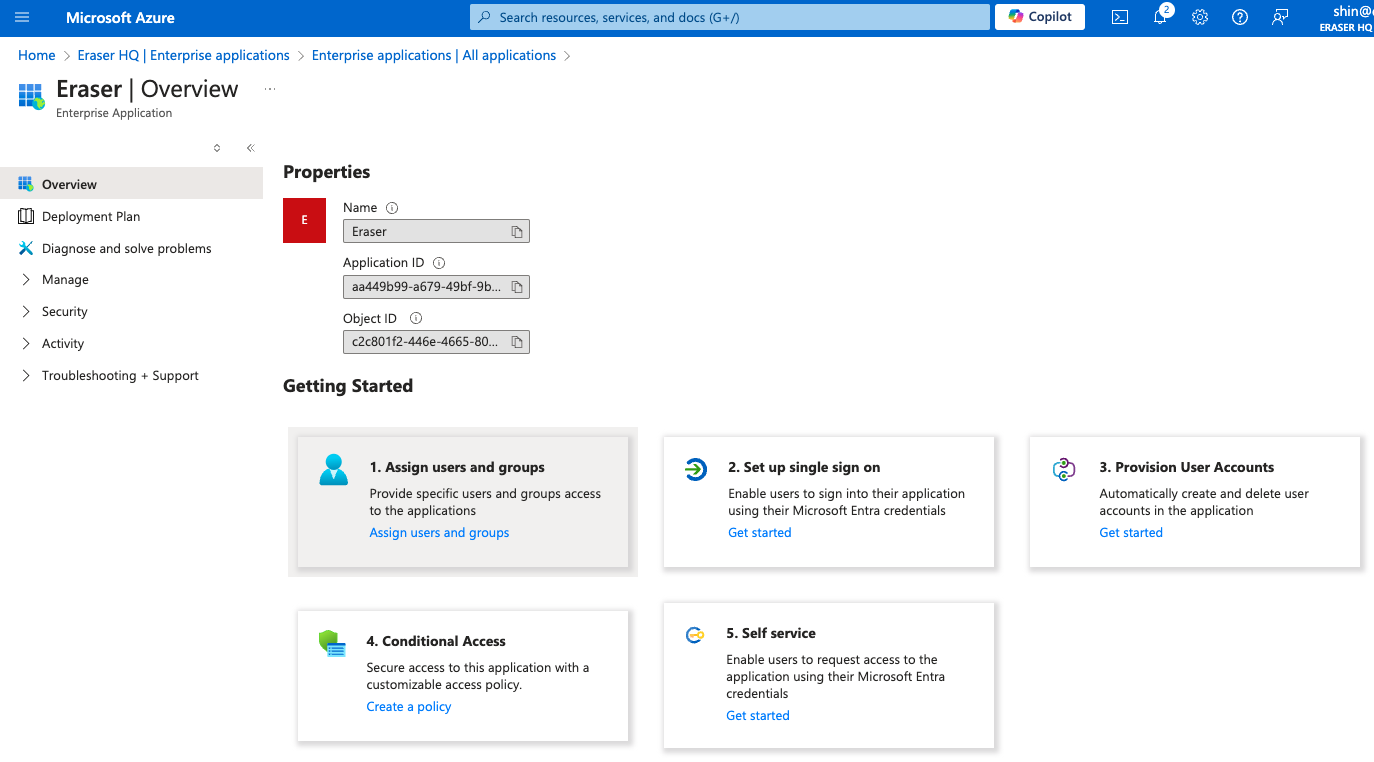
- Enter "Eraser" as name of app, select "Integrate any other application you don't find in the gallery (Non-gallery)", and select "Create".
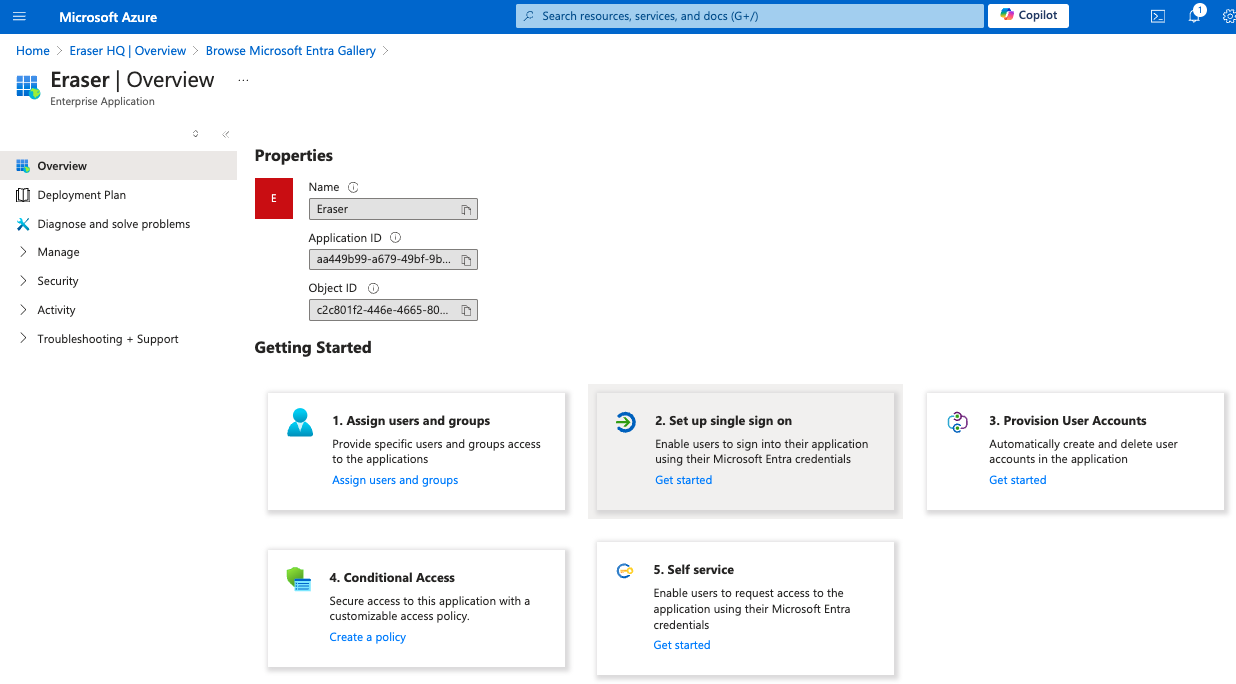
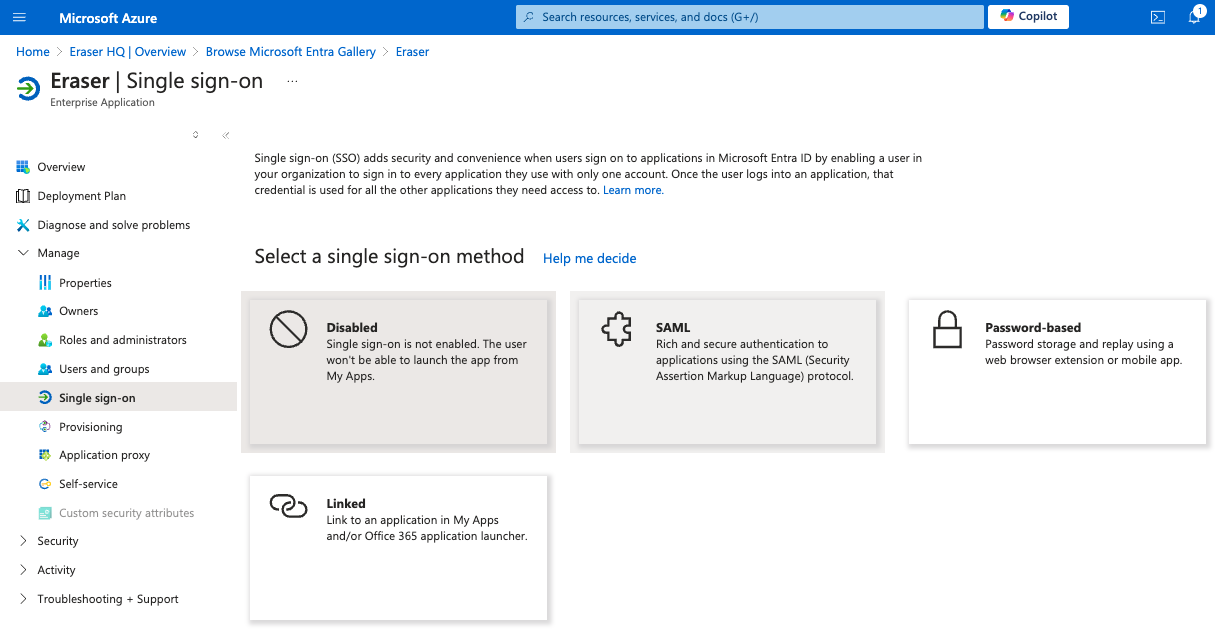
- In the "Eraser" application profile, select "Set up single sign on"
- Select "SAML" as single sign-on method
- In the "Basic SAML Configuration" section, click on "Edit"
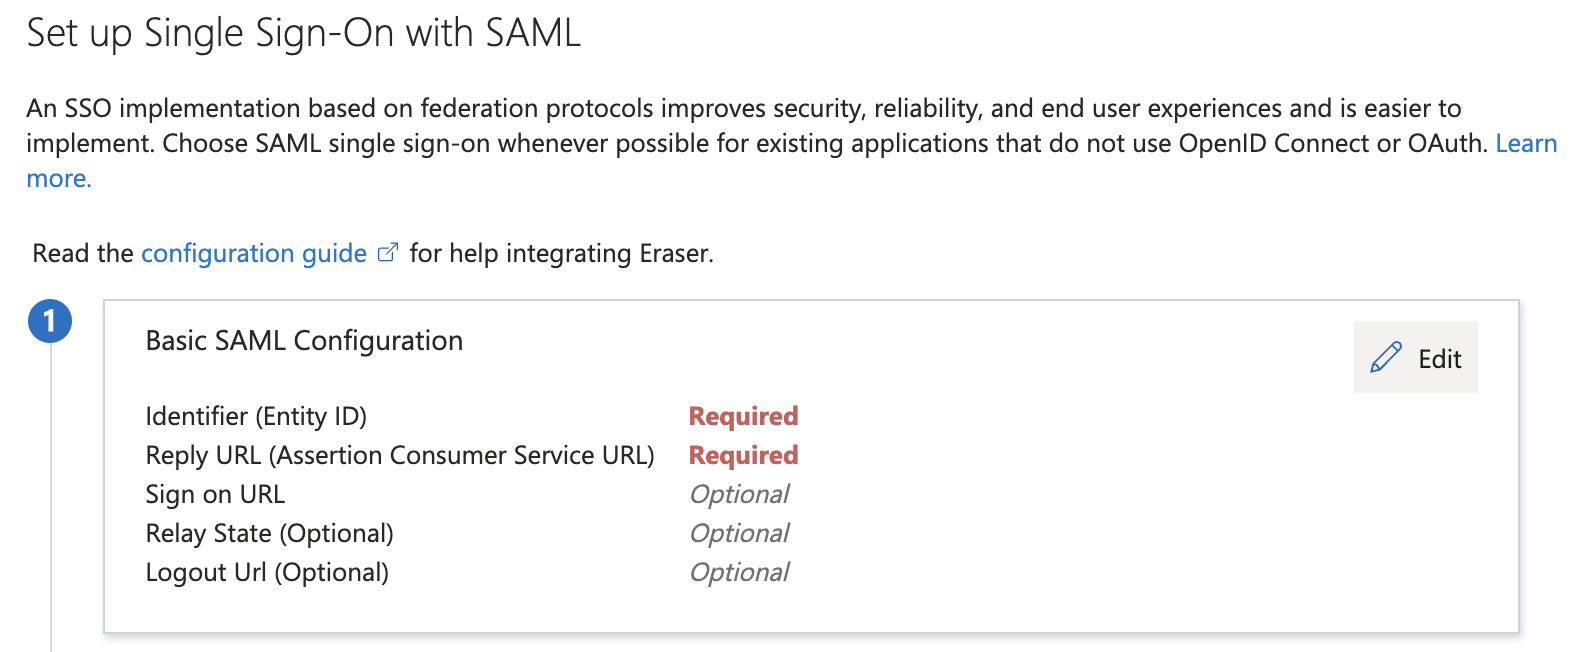
- Fill in "Identifier (Entity ID)" and "Reply URL (Assertion Consumer Service URL)" with the below information, then click "Save".
- Identifier (Entity ID):https://app.eraser.io
- Reply URL (Assertion Consumer Service URL):https://app.eraser.io/auth/callback/YOUR-DOMAIN.COM
- Replace YOUR-DOMAIN.COM with your actual domain. For example, if your domain is acme.com, it would be https://app.eraser.io/auth/callback/acme.com
- If you are a single-tenant customer, replace app.eraser.io with your-subdomain.eraser.io

- Make sure SAML assertion encryption is not being applied.
- Open "Enterprise Applications > Eraser > Security > Token Encryption"
- If there are any active certificates, click on the three dots and click "Deactivate token encryption certificate"
How to fill out SSO configuration fields in Eraser
Required roleAn Eraser admin needs to perform the below
Note that the below steps are based on Microsoft Entra but any other identity provider (e.g. Okta) can be used as well.
- Copy "Login URL" from the SSO setup page in Entra and paste it into in the "SAML Sign-In URL" field in the Eraser SAML SSO settings page.
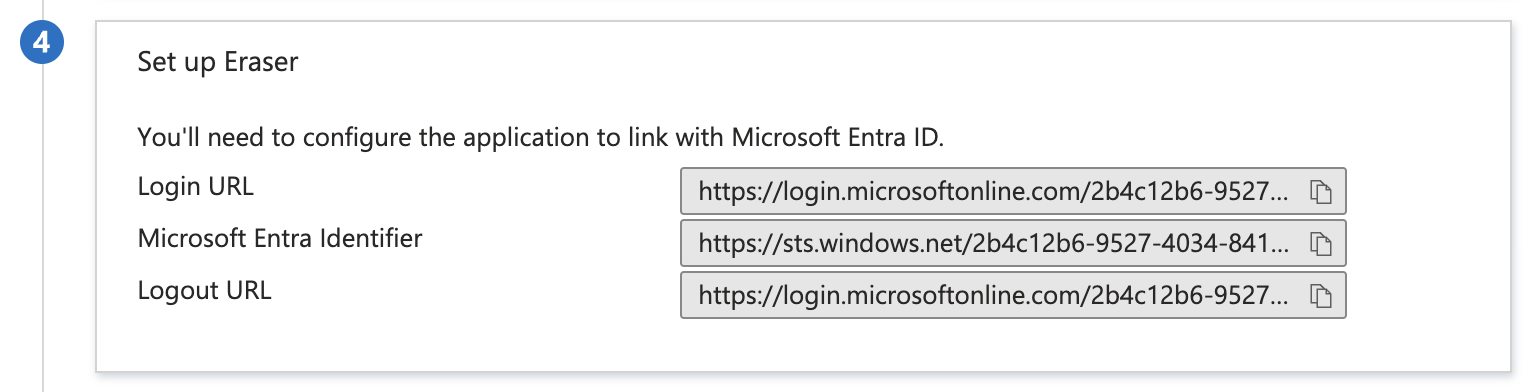
- Copy "Microsoft Entra Identifier" from the SSO setup page in Entra and paste it into in the "Identity Provider Issuer" field in the Eraser SAML SSO settings page.
- Refer to screenshots in the previous step
- Download "Certificate (Base 64)" from the SSO setup page in Entra. Open the downloaded
Eraser.cerfile in a text editor and copy the text content of the file.
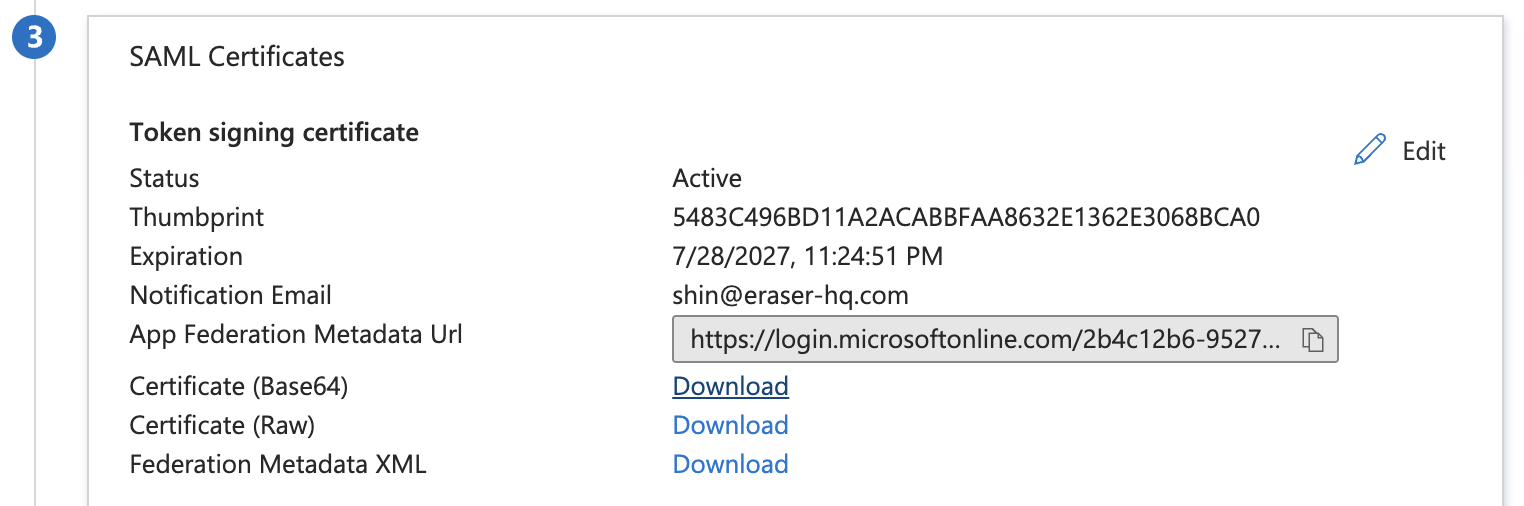
- Paste the certificate content copied from the previous step into the "Key x509 Certificate" field in the Eraser SAML SSO settings page.
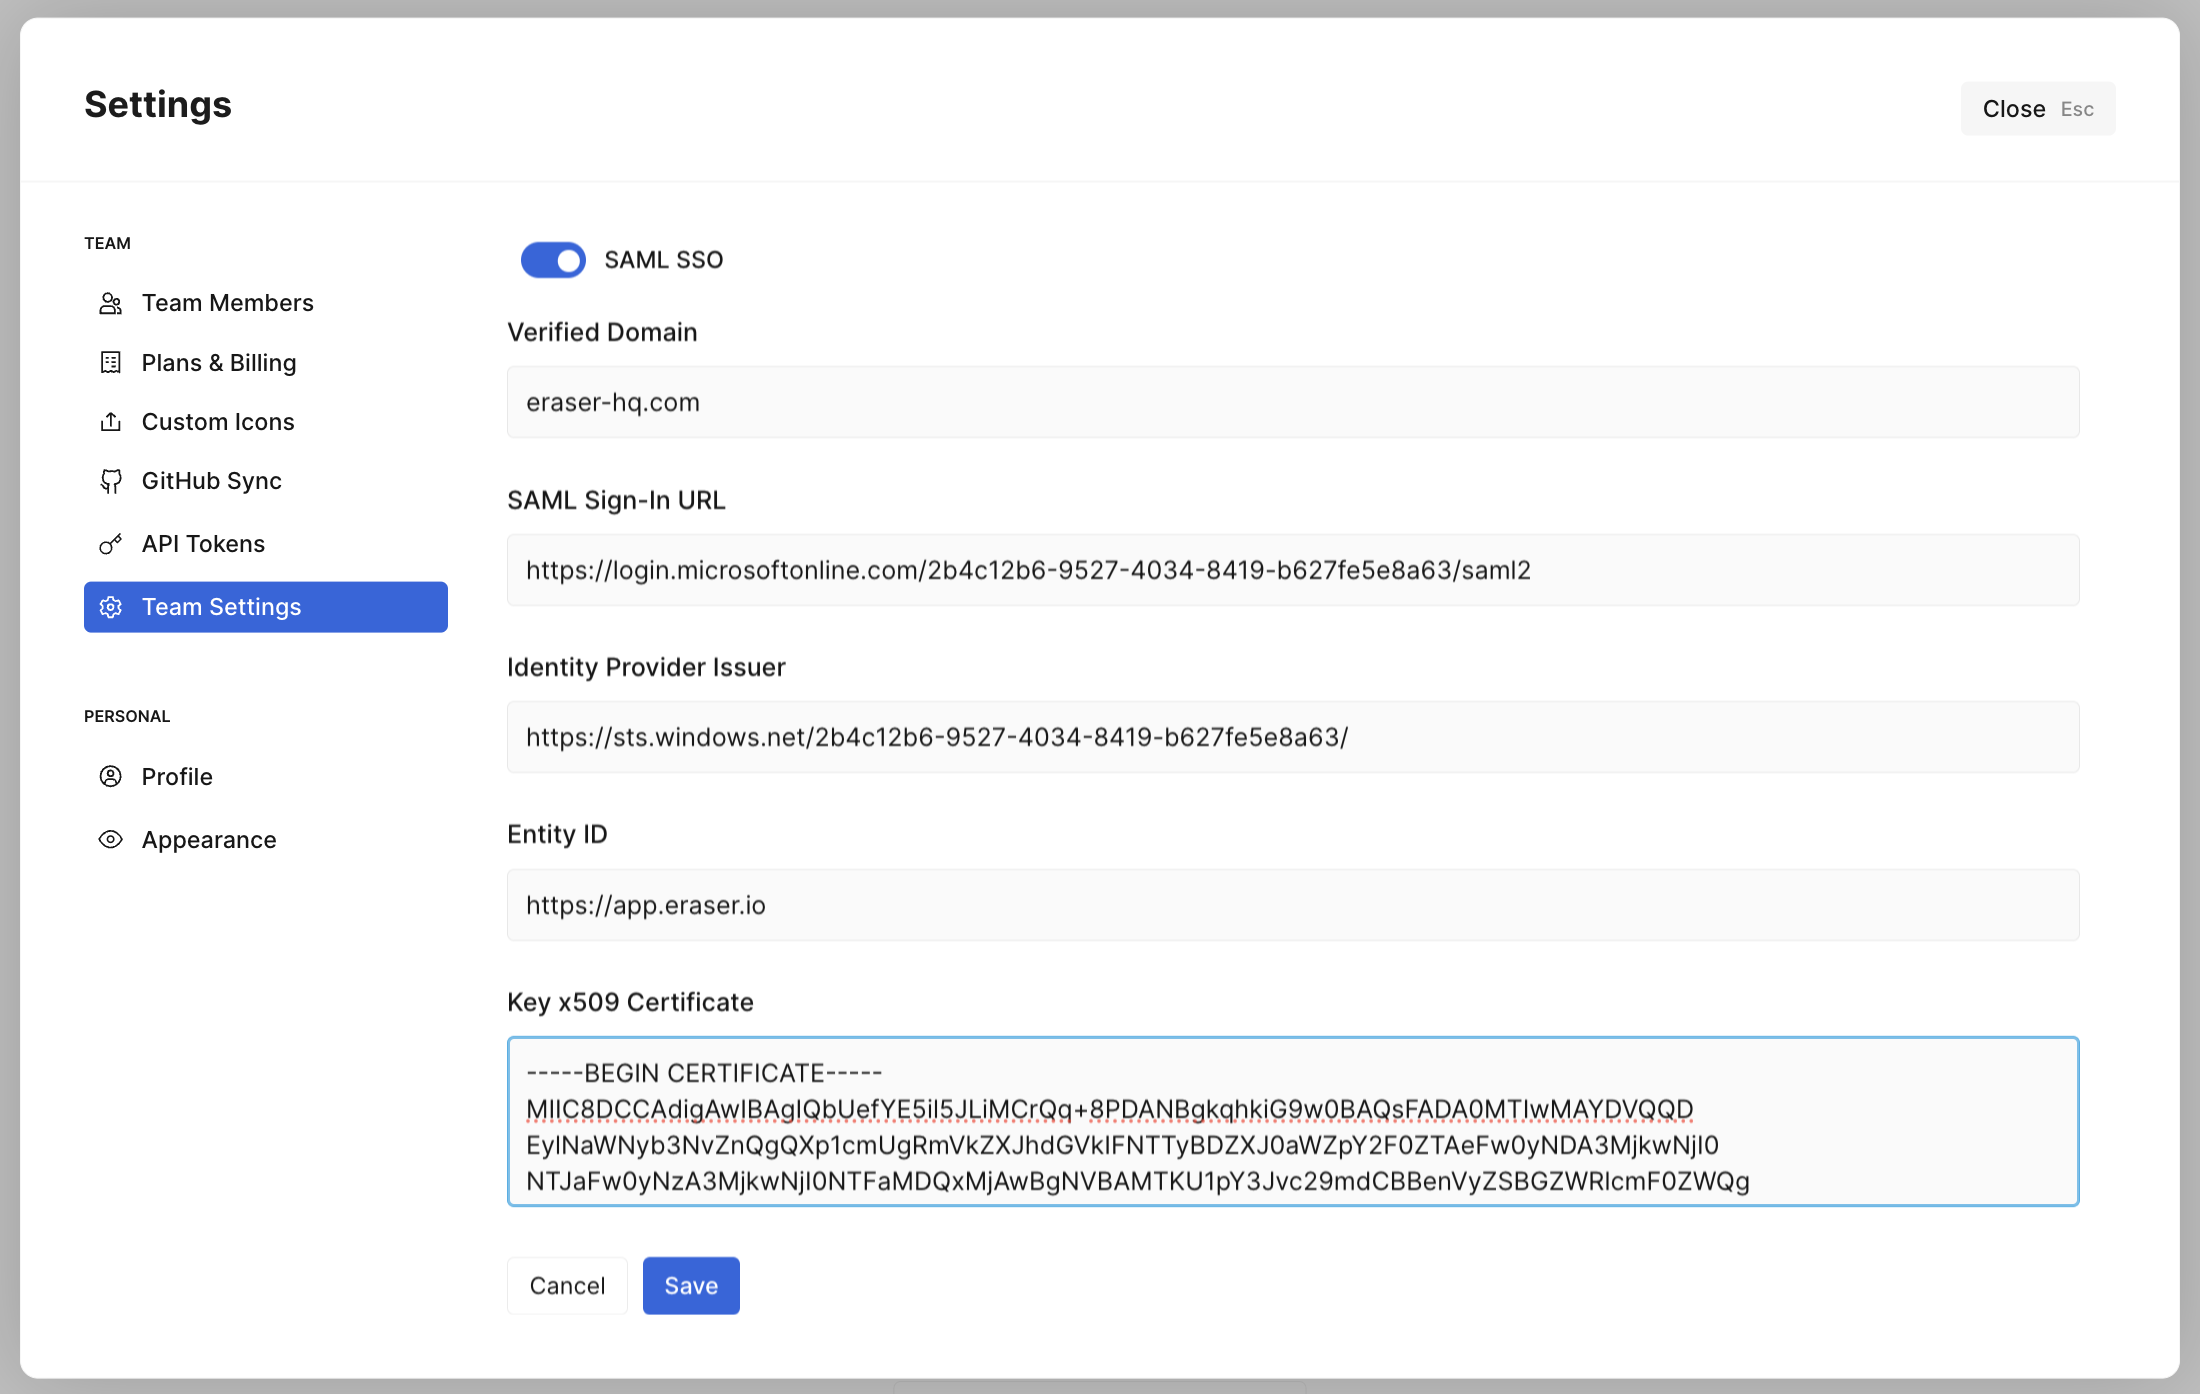
- Press "Save".
How to add users on Microsoft Entra
Required roleAn Entra admin needs to perform the below
Note that in order to grant a user access to Eraser, the user must be BOTH granted access to Eraser on Microsoft Entra AND sent a team invite in Eraser.
- Open the "Eraser" application profile in Microsoft Entra and click on "Assign users and groups"
- Click on "Add user/group"
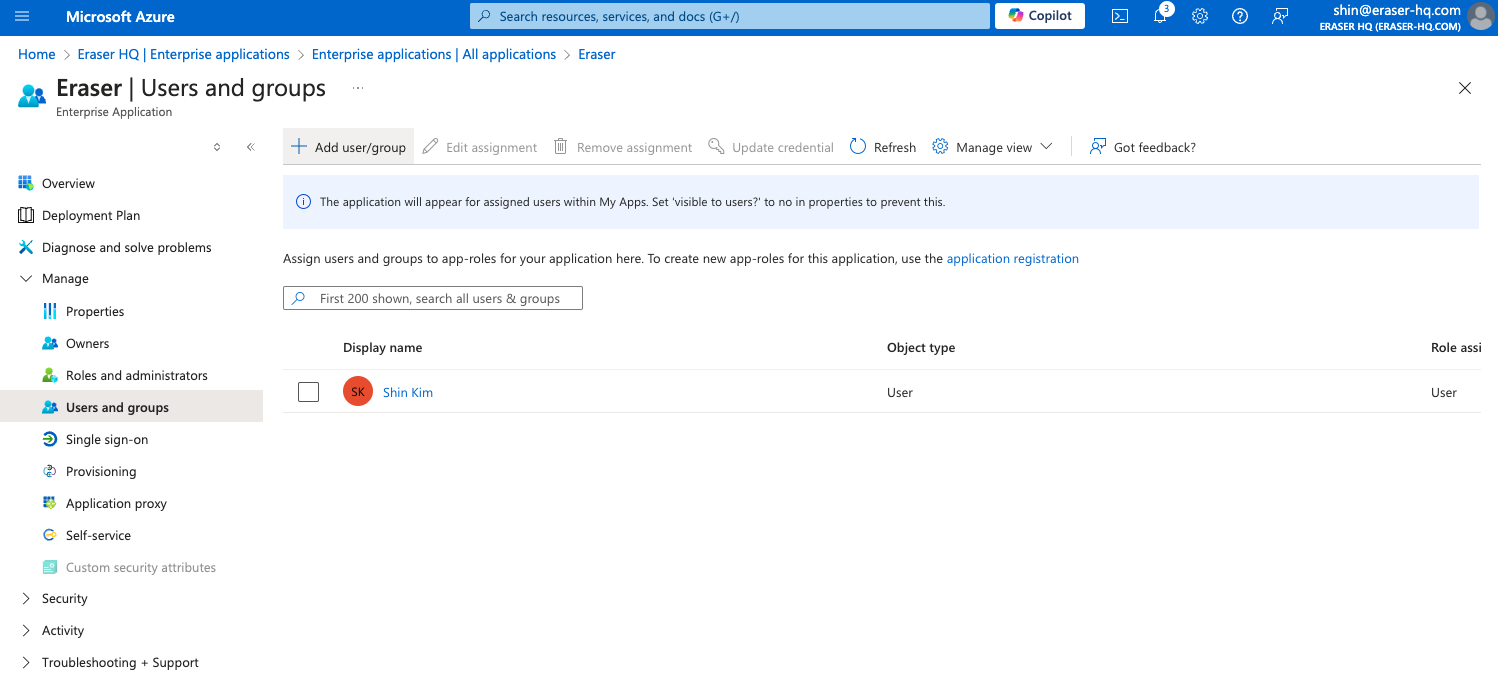
- Add users as necessary. Once completed, the added users should show on the screen from the previous step.
How to install Eraser on Okta
Configuring Okta
Required roleAn Okta admin needs to perform the below
- On your Okta dashboard, click on "Applications"
- Click on "Create App Integration"

- Select "SAML 2.0" and click "Next"

- Enter "Eraser" as the App Name
- Download this file to use as the logo. Upload the logo in Okta and click "Next"

- Fill in "Single sign-on URL" and "Audience URI (SP Entity ID)" with the below information
- Single sign-on URL:https://app.eraser.io/auth/callback/YOUR-DOMAIN.COM
- Replace YOUR-DOMAIN.COM with your actual domain. For example, if your domain is acme.com, it would be https://app.eraser.io/auth/callback/acme.com
- Audience URI (SP Entity ID):https://app.eraser.io
- Single sign-on URL:https://app.eraser.io/auth/callback/YOUR-DOMAIN.COM
- Make sure the following fields are correct:
- "Name ID format" is set to "Unspecified"
- "Application username" is set to "Okta username"
- Update application username on" is set to "Create and update"

-
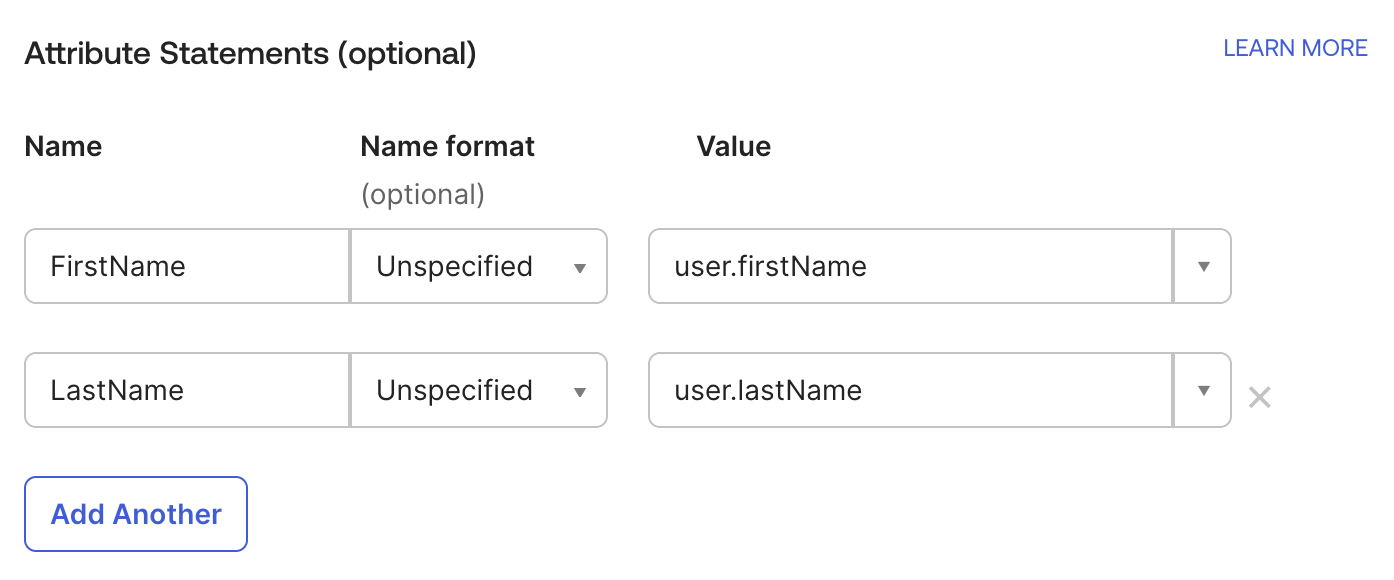
Add the following Attribute Statements:
FirstName:user.firstNameLastName:user.lastName
- Scroll down and click "Next", you'll see a questionnaire for Okta answering it is optional. Click "Finish" for the next step

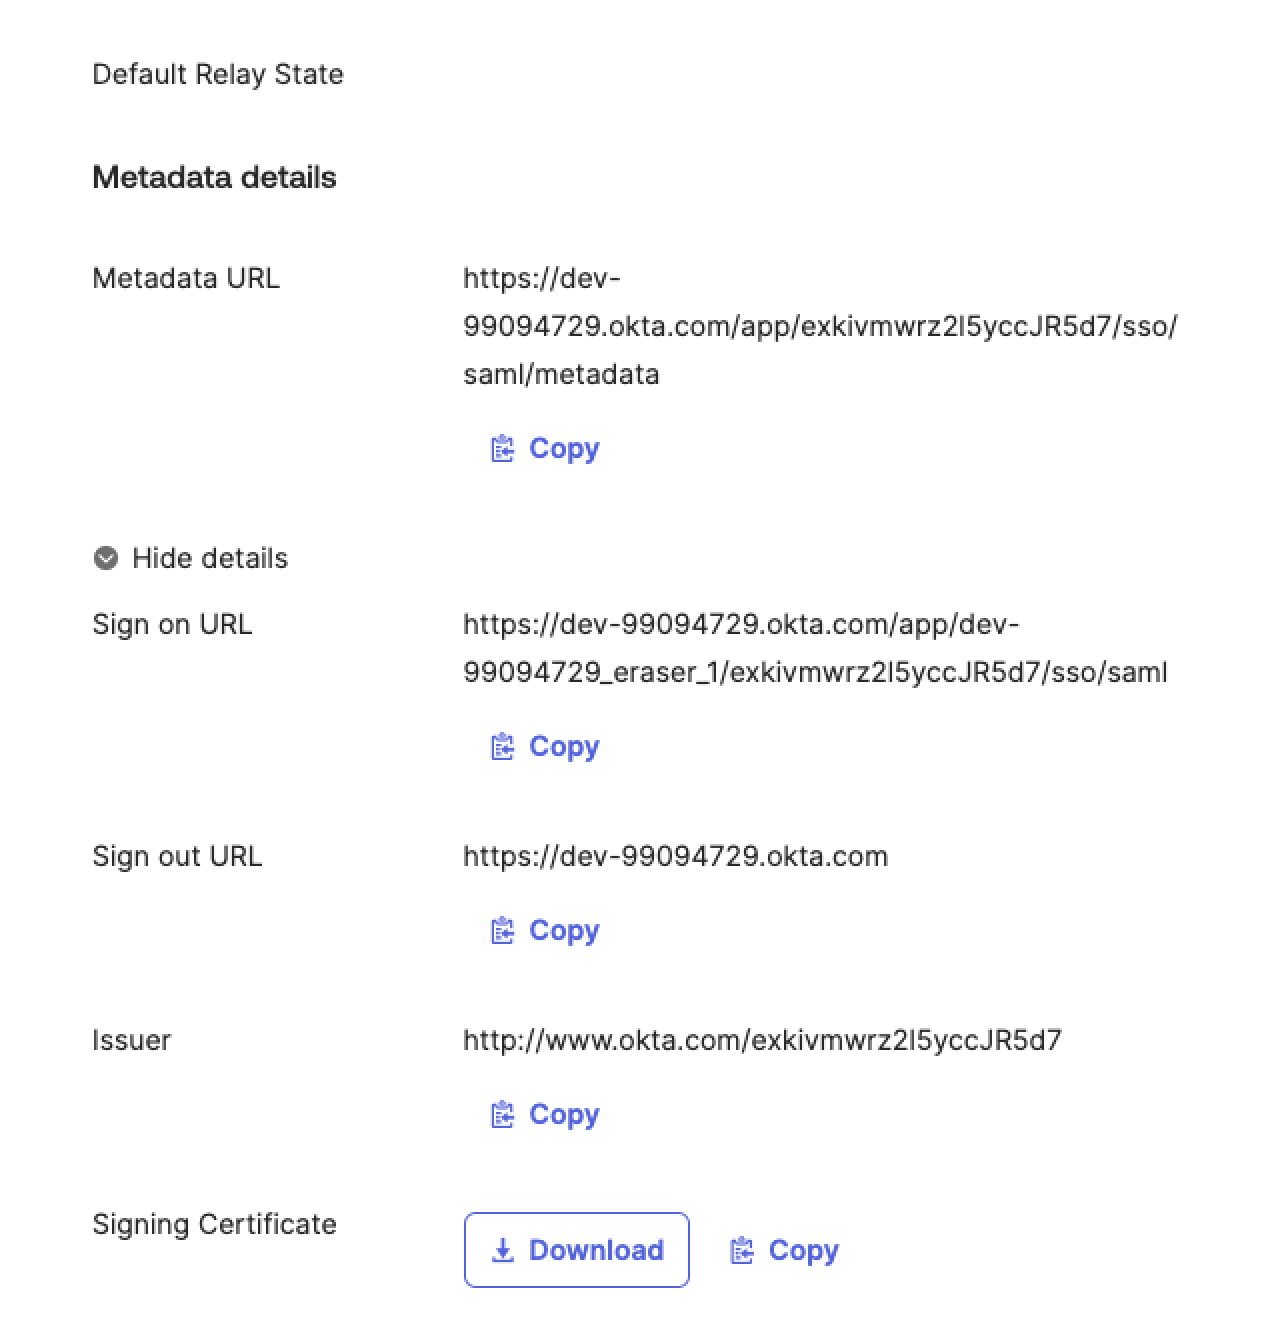
- Scroll down and click on "More Details"

How to enable SSO in Eraser for Okta
Required roleAn Okta admin needs to perform the below
-
In Eraser Under Settings > Team Settings , find the SAML SSO toggle and turn it on. Note that this toggle will only be available if you're on a Business Plan or Enterprise Plan.Verified Domain and Entity ID should already be filled out.
-
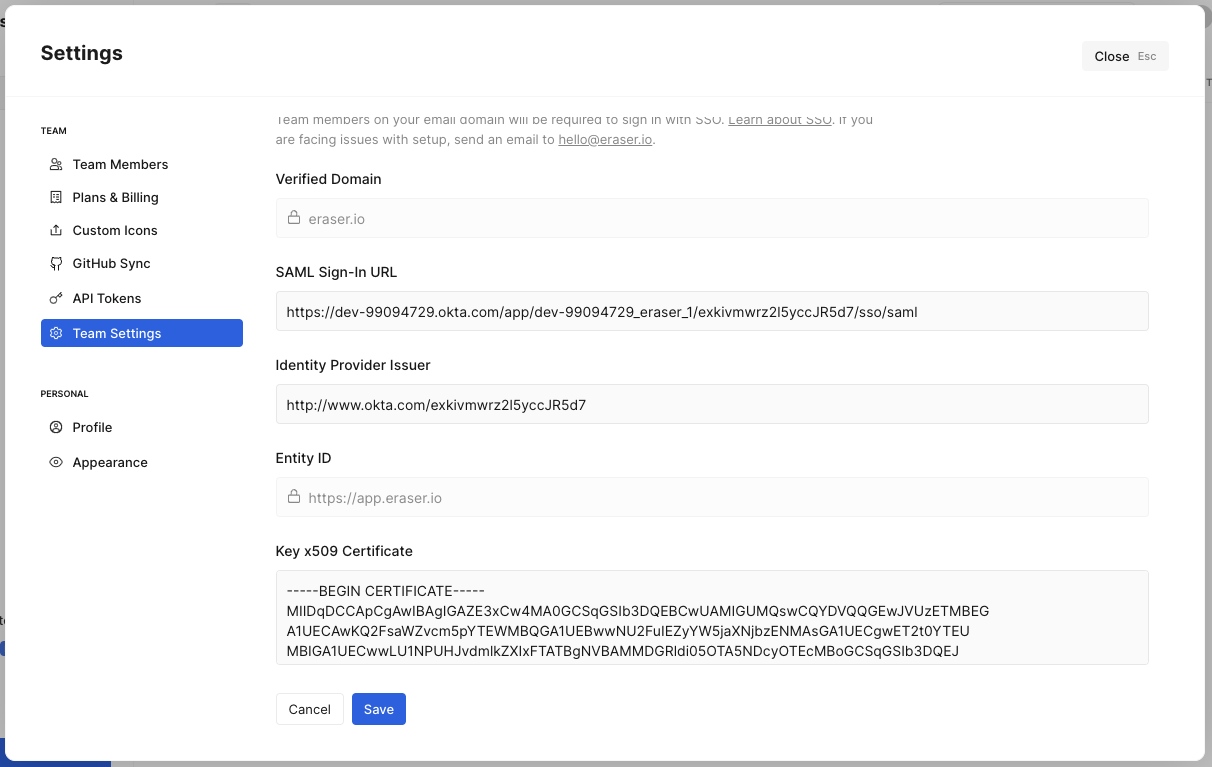
Copy "Sign on URL" from the Sign on page in Okta and paste it into in the "SAML Sign-In URL" field in the Eraser SAML SSO settings page .
-
Copy "Issuer" from the Sign on page in Okta and paste it into in the "Identity Provider Issuer" field in the Eraser SAML SSO settings page .
-
Download the Signing Certificate. Click the download button. Open the downloaded file in a text editor and copy the text content of the file.
-
Paste the certificate content copied from the previous step into the "Key x509 Certificate" field in the Eraser SAML SSO settings page .
-
Press "save"
How to add users on Okta
Required roleAn Okta admin needs to perform the below
Note that in order to grant a user access to Eraser, the user must be BOTH granted access to Eraser in Okta AND sent a team invite in Eraser.
-
In Okta click on the "Assignments" tab
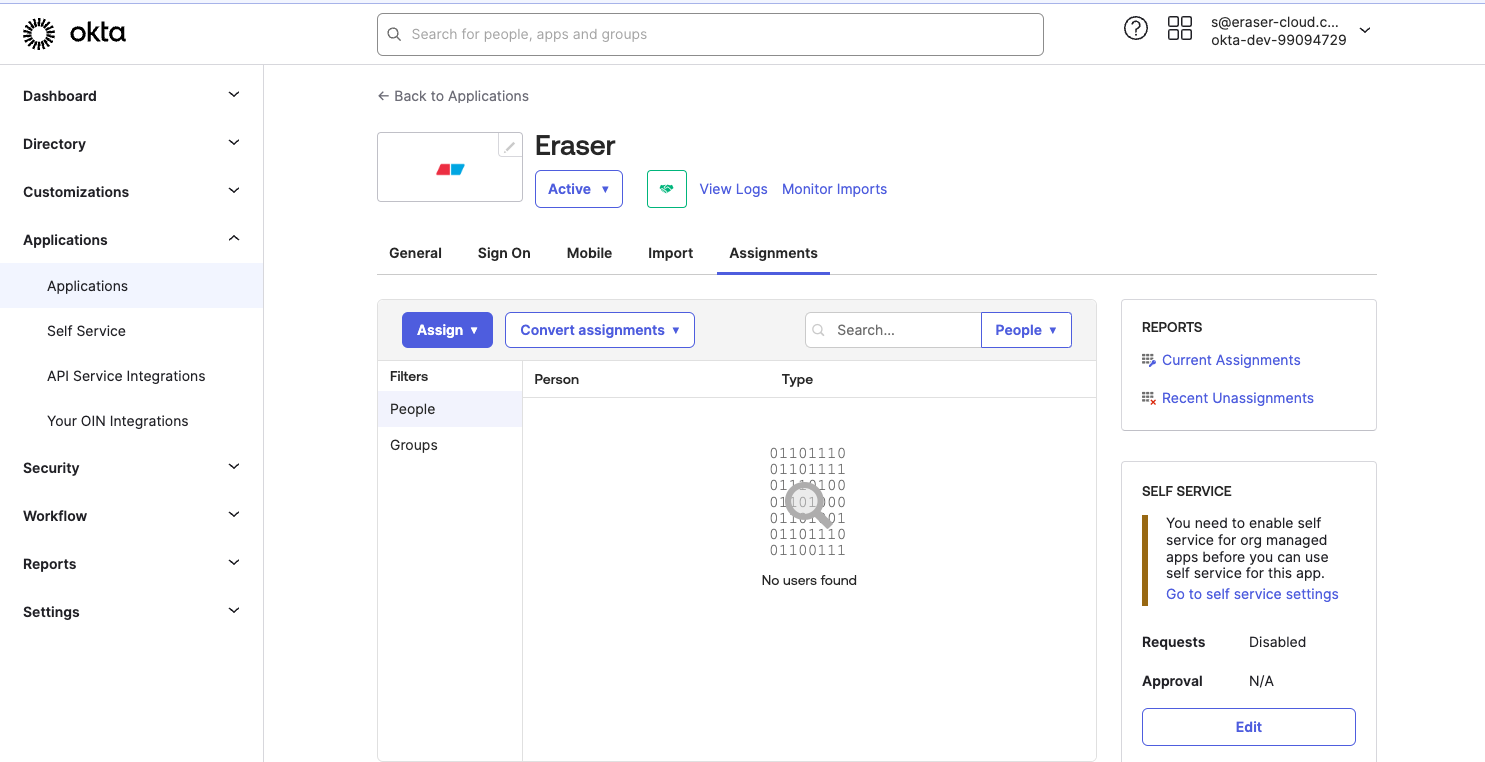
-
Click "Assign" and select "Assign to People"
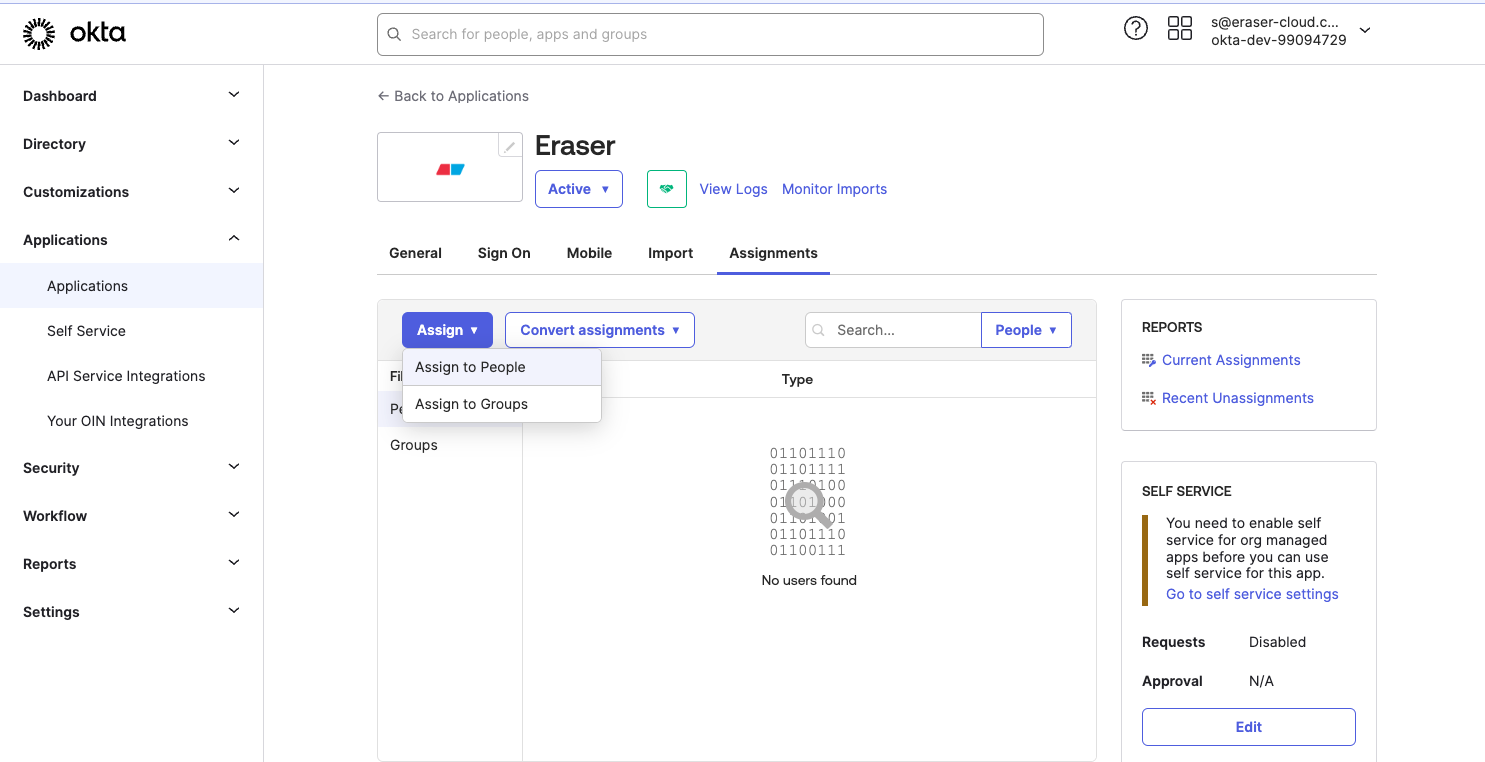
-
Find the individual you'd like to add and click "Assign"
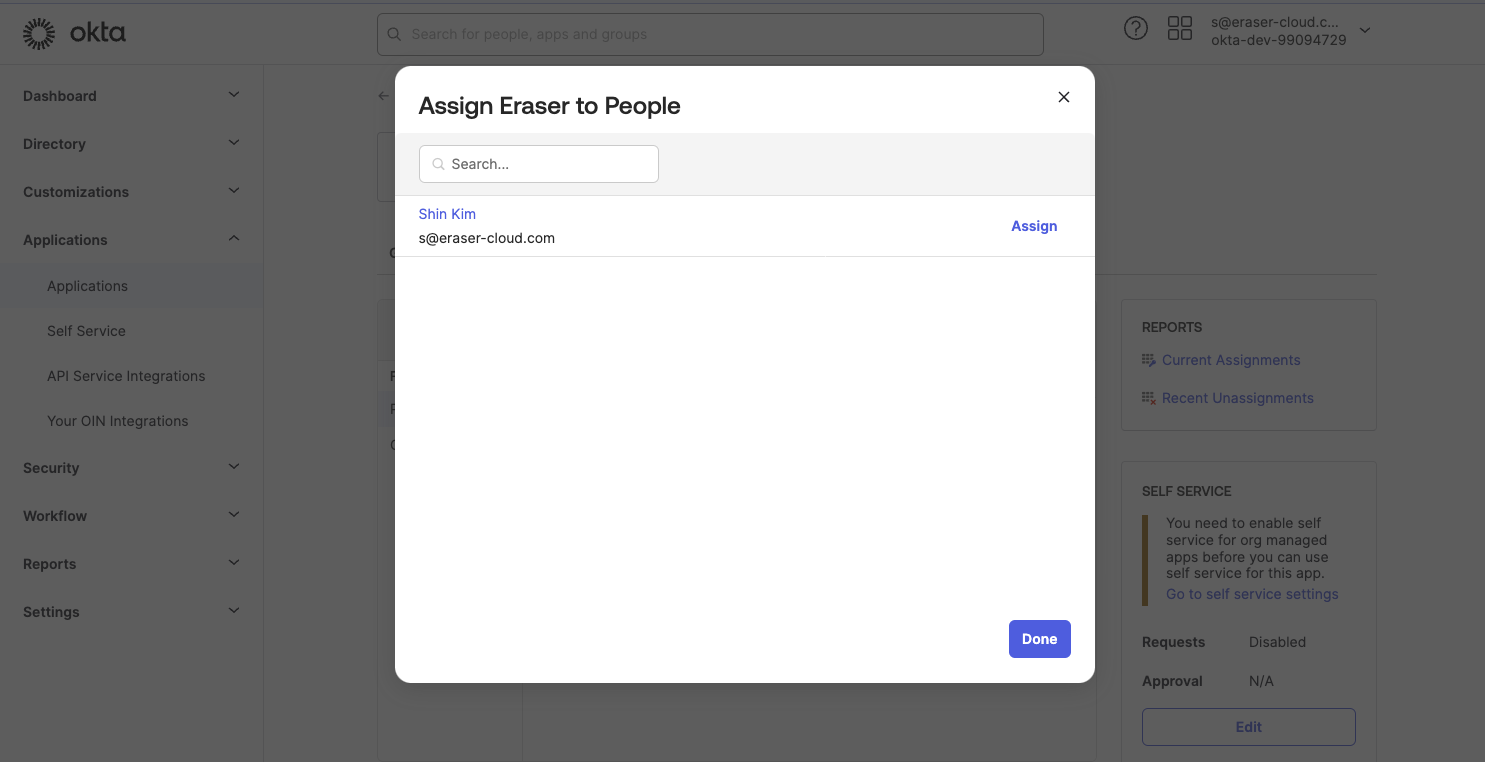
-
Confirm the new individuals username and click "Save and Go Back". You can select more individuals to add or if you are done you can click "Done"
How to send a team invite in Eraser
Required roleAn Eraser admin needs to perform the below
Note that in order to grant a user access to Eraser, the user must be BOTH granted access to Eraser on your IdP (i.e. Microsoft Entra or Okta) AND sent a team invite in Eraser, unless JIT provisioning is enabled.
- Open Settings > Team Members.
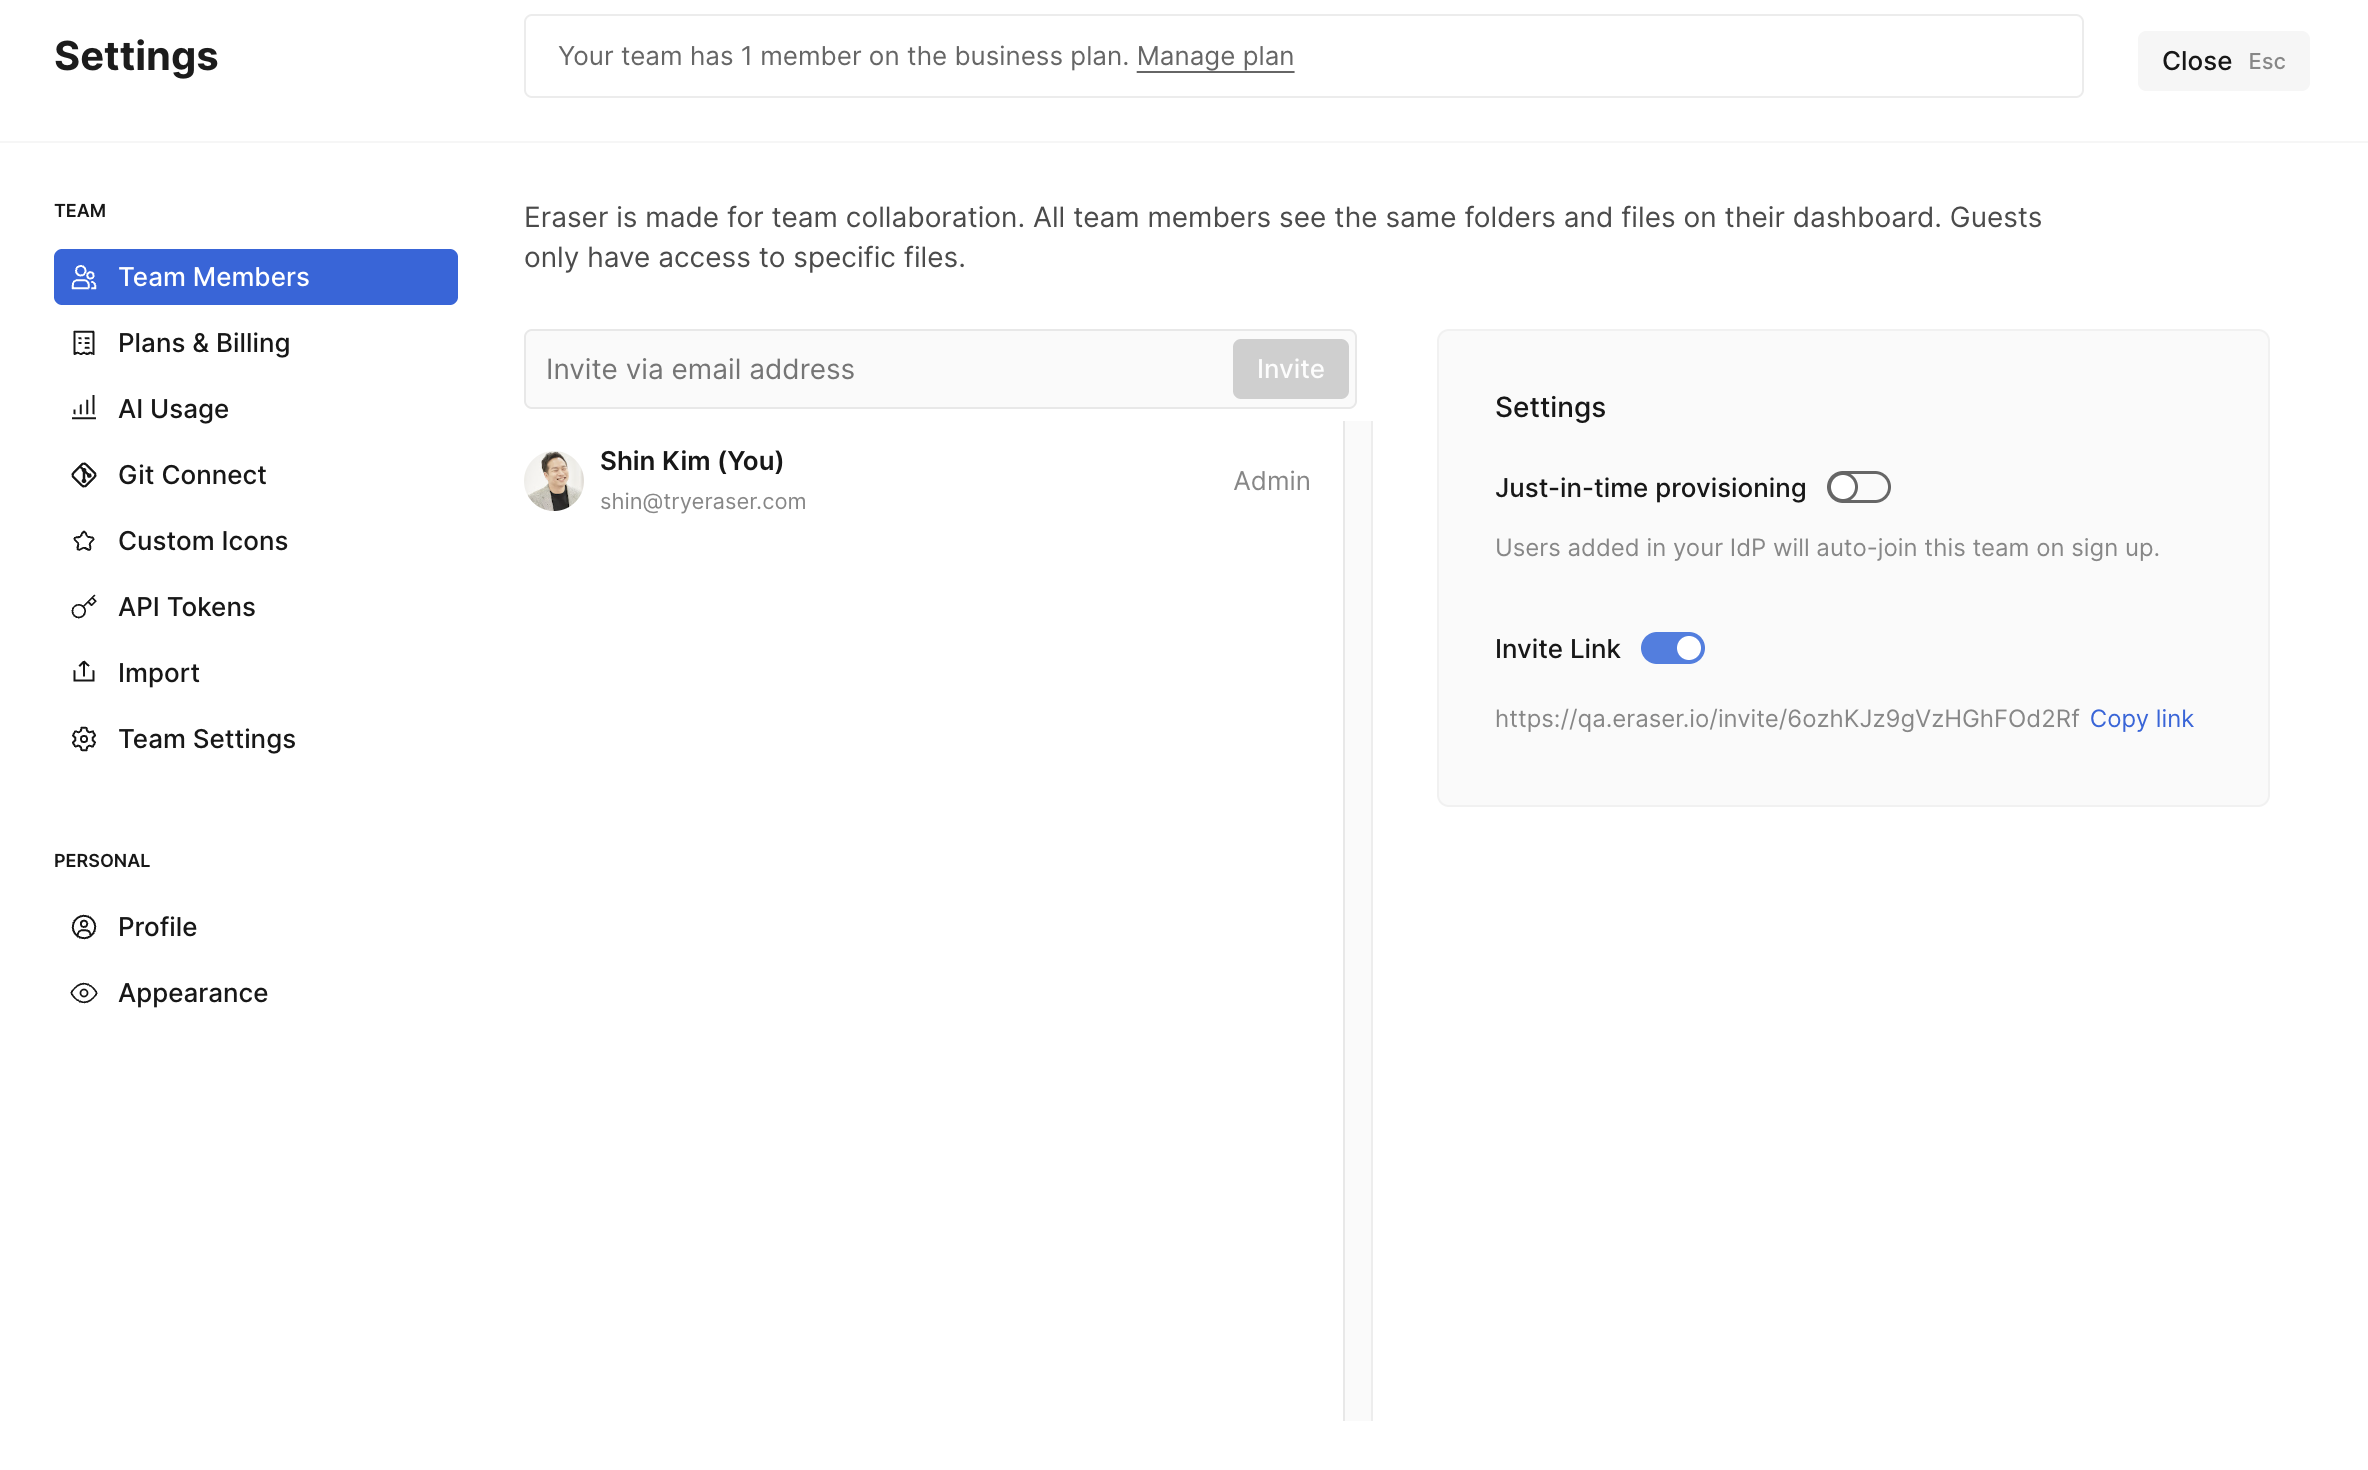
- Invite users as necessary.
- An invite email will be sent to the user to join the team.
- Note that the team will be billed for each team member.
Just-in-time (JIT) provisioning
Required roleAn Eraser admin can to perform the below
If just-in-time provisioning is enabled, the admin only needs to add the end user in the IdP without having to invite the user in Eraser as well. Once a user is added on the IdP by the admin, a user will be automatically added to the JIT-enabled team when signining up or signining in using SSO.
Here's how to enable just-in-time provisioning:
- Open Settings > Team Members.
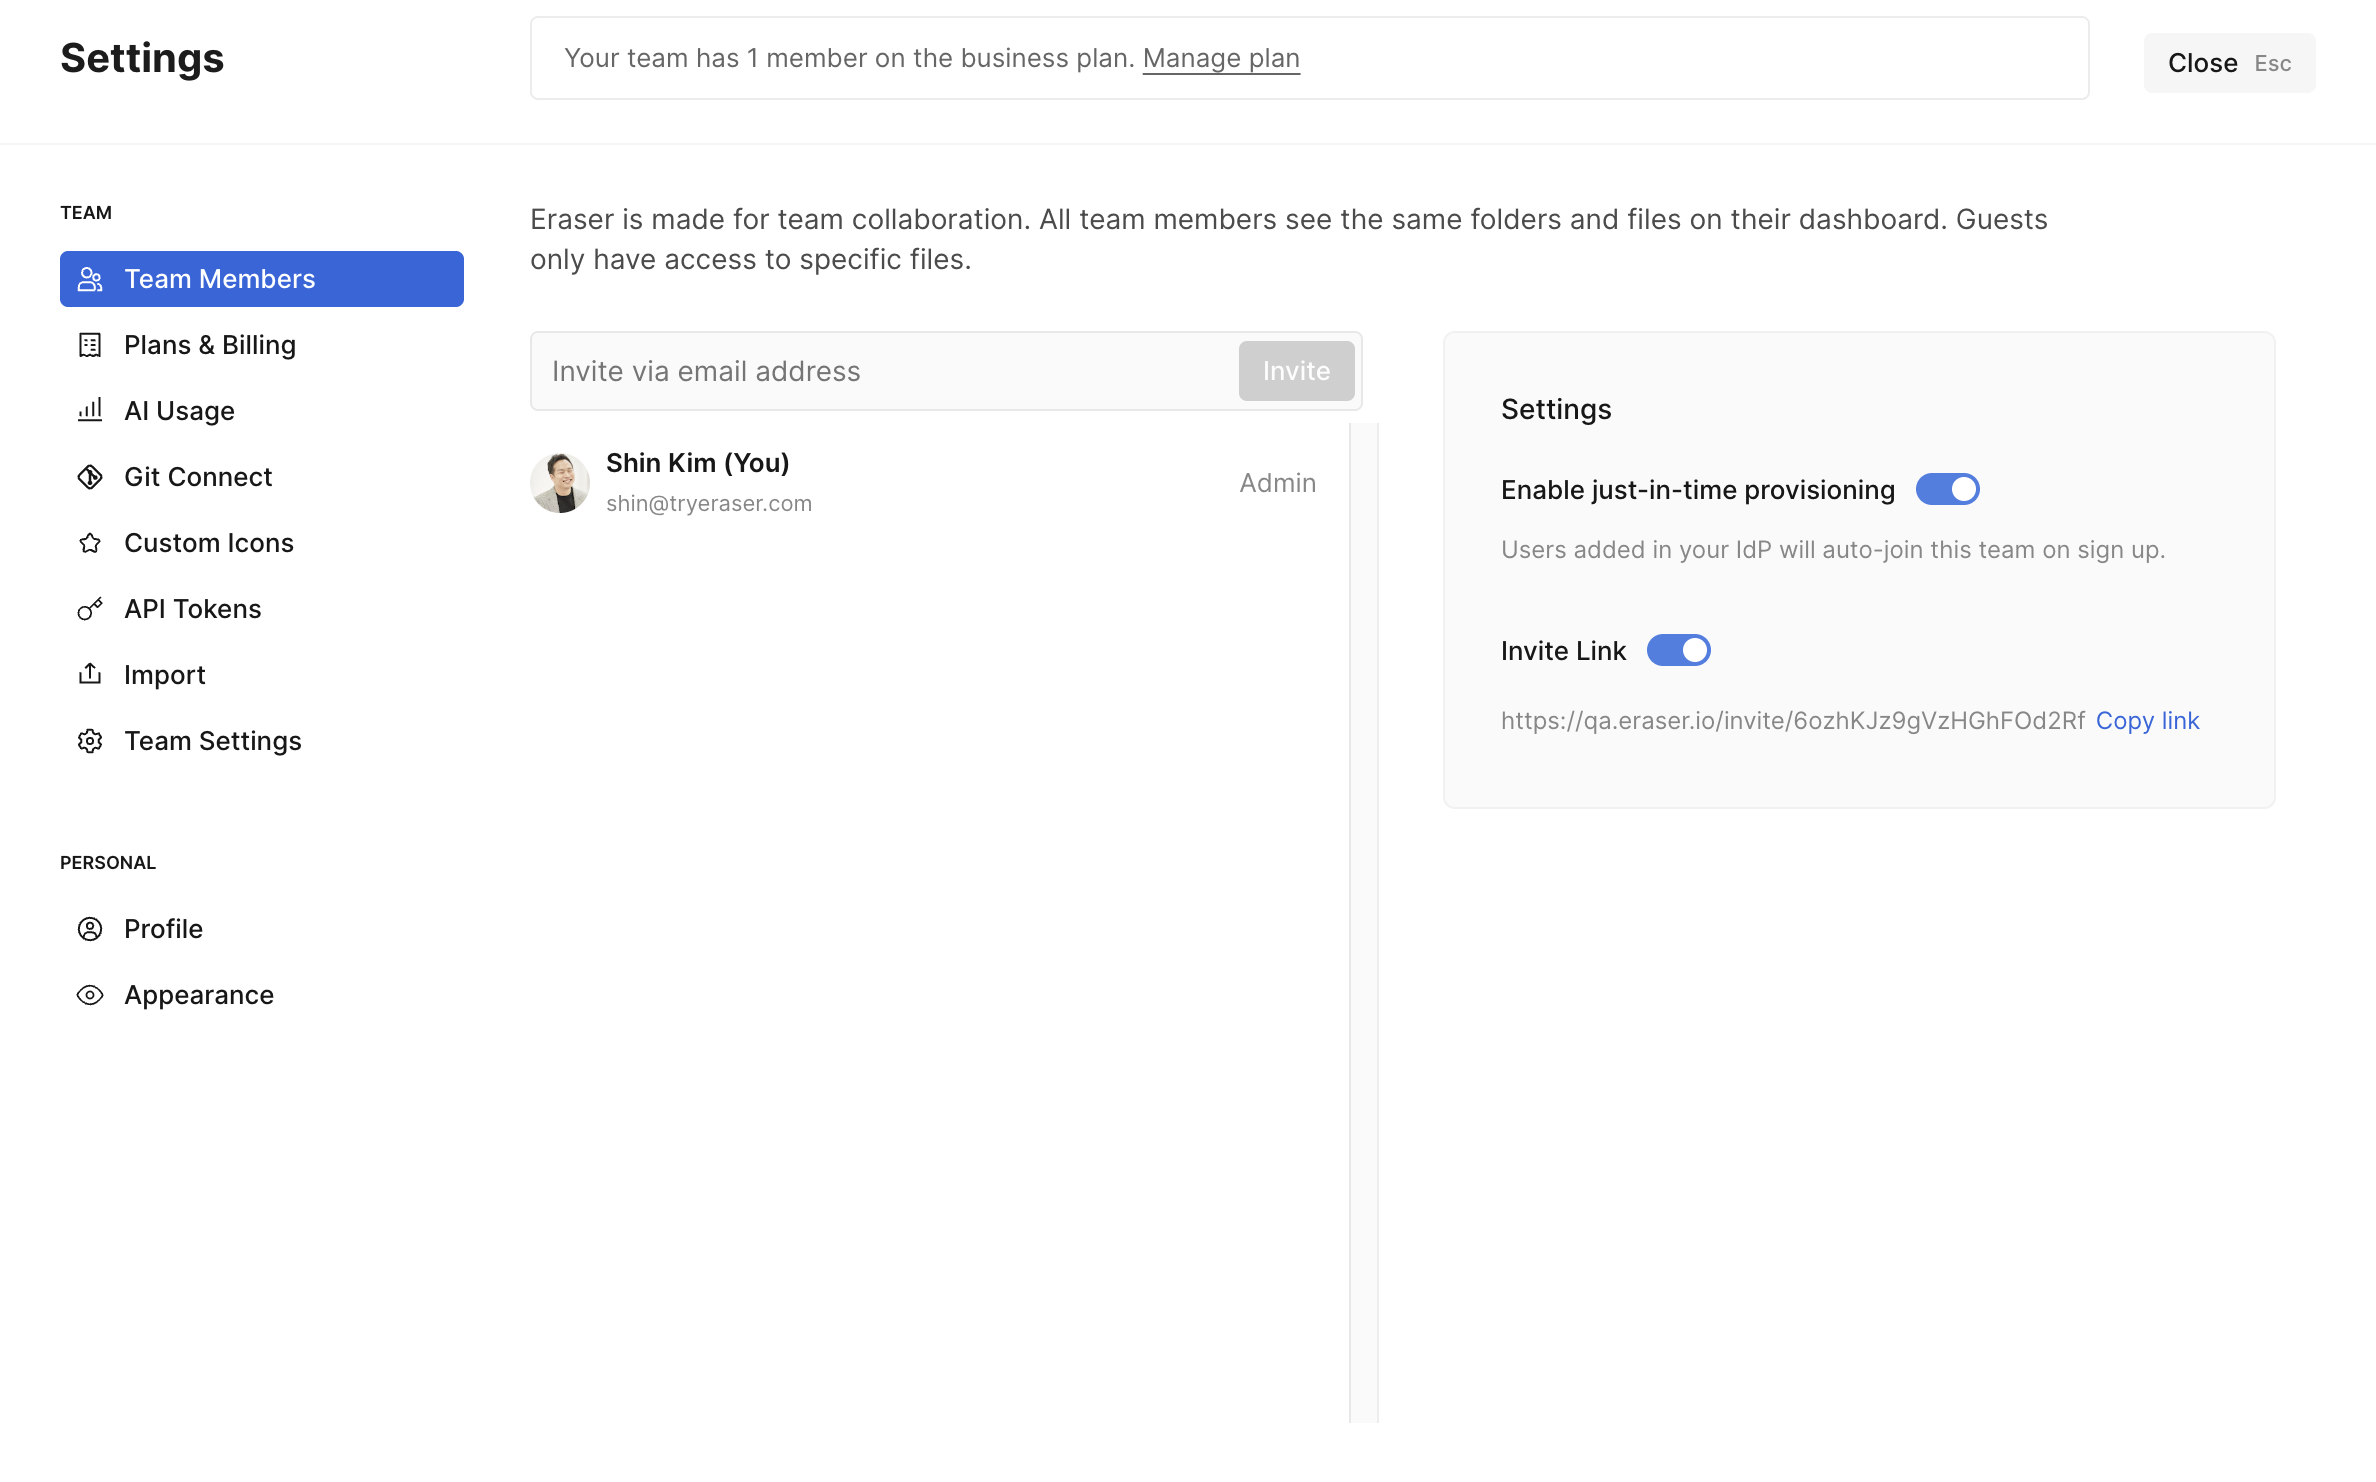
- Turn on the toggle "Enable just-in-time provisioning"
Updated 7 months ago