Connecting VMware
Connect VMware so Eraser can draw architecture diagrams of your virtual machines, hosts, clusters, and datastores. Upload an inventory export, or let Eraser read vCenter directly through an account that holds only vCenter’s Read-only role.
Everything below starts from Settings → Data Sources in Eraser.
Quick overview
Uploading a CSV
- Name the environment and upload the file (how-to)
Connecting to vCenter
What Eraser gets access to
A CSV upload gives Eraser only what is in the file. Nothing connects to your environment.
A vCenter connection reads inventory through an account you create, holding vCenter’s built-in Read-only role. Eraser checks the account’s privileges before it accepts the connection and before every scan, and refuses an account that can change anything. The password is stored encrypted and is never sent to AI.
Choose a source
Open Settings → Data Sources and pick VMware – from the list of data sources, or from Add connection once one is connected.
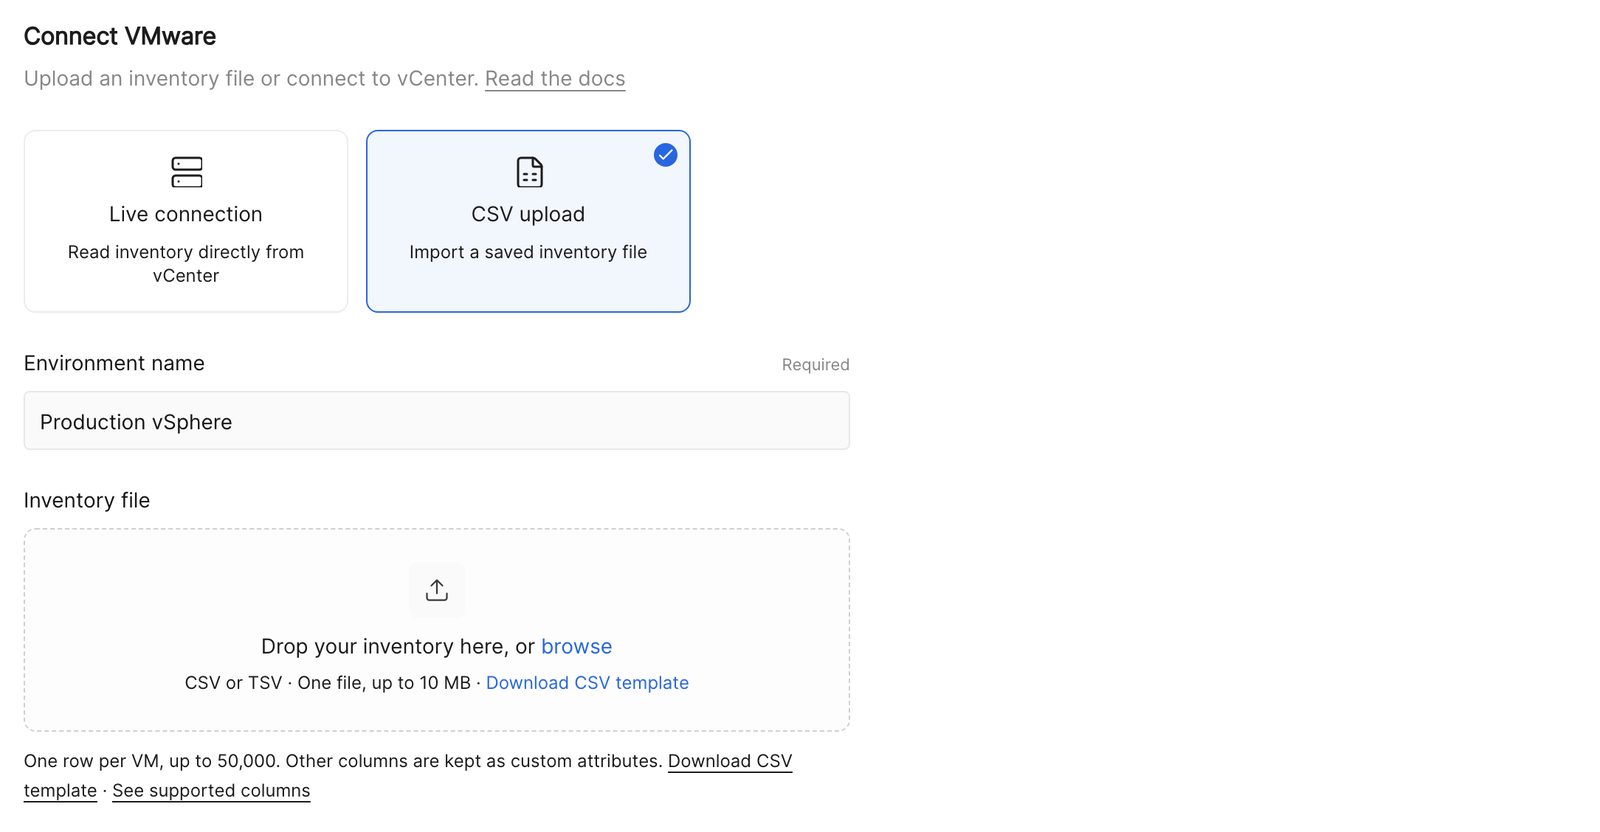
- CSV upload imports an inventory file, such as an RVTools vInfo export.
- Live connection reads vCenter directly, so scans pick up changes without a new export.
Uploading a CSV
Name the environment, then drop the file onto the upload area or browse for it. Use a CSV or TSV saved as UTF-8, with one row per VM – up to 50,000 VMs and 10 MB. An RVTools vInfo export works as is; to build a file by hand, start from the template linked below the upload area.
Choose Upload and scan.
Supported columns
Every row needs a VM name. Eraser reads the columns below, matching names regardless of capitalization, spaces, and punctuation. Any other column is kept as a custom attribute of the VM, except columns named like secrets or free-text notes, which are skipped.
| Field | Column names |
|---|---|
| VM name | VM, Name, VM Name |
| Instance UUID | UUID, Instance UUID, VM Instance UUID |
| BIOS UUID | VM UUID, BIOS UUID |
| Managed object ID | VM ID, MOID, MoRef, Managed Object ID |
| vCenter | vCenter, vCenter Server, VI SDK Server |
| Power state | Powerstate, Power State, Status |
| Configured OS | OS according to the configuration file, Configured OS, Guest OS, OS |
| VMware Tools OS | OS according to the VMware Tools, Tools OS, Reported OS |
| Primary IP address | Primary IP Address |
| IP addresses | IP Address, IP Addresses, IPs |
| CPUs | CPUs, CPU, vCPUs, CPU Count, Num CPUs |
| Memory (MB) | Memory, Memory MB, Memory MiB, Memory Size MB |
| NICs | NICs, NIC Count, Num Ethernet Cards |
| Disks | Disks, Disk Count, Num Virtual Disks |
| Template | Template, Is Template |
| Datacenter | Datacenter, Data Center |
| Cluster | Cluster, Cluster Name |
| Host | Host, ESXi Host, Host Name |
| Folder | Folder, VM Folder, Folder Path |
| Resource pool | Resource Pool, Resourcepool |
| vApp | vApp, vApp Name |
| Collected at | Collected At, Inventory Collected At, Collection Timestamp |
Connecting to vCenter
1. Create a read-only account
Create a user for Eraser, then assign it the built-in Read-only role at the top of the vCenter inventory, with Propagate to children ticked. Use the same account on every vCenter if you can.
2. Connect your vCenters
Choose Live connection, name the environment, and enter each vCenter’s hostname on its own line, with the account’s username and password.
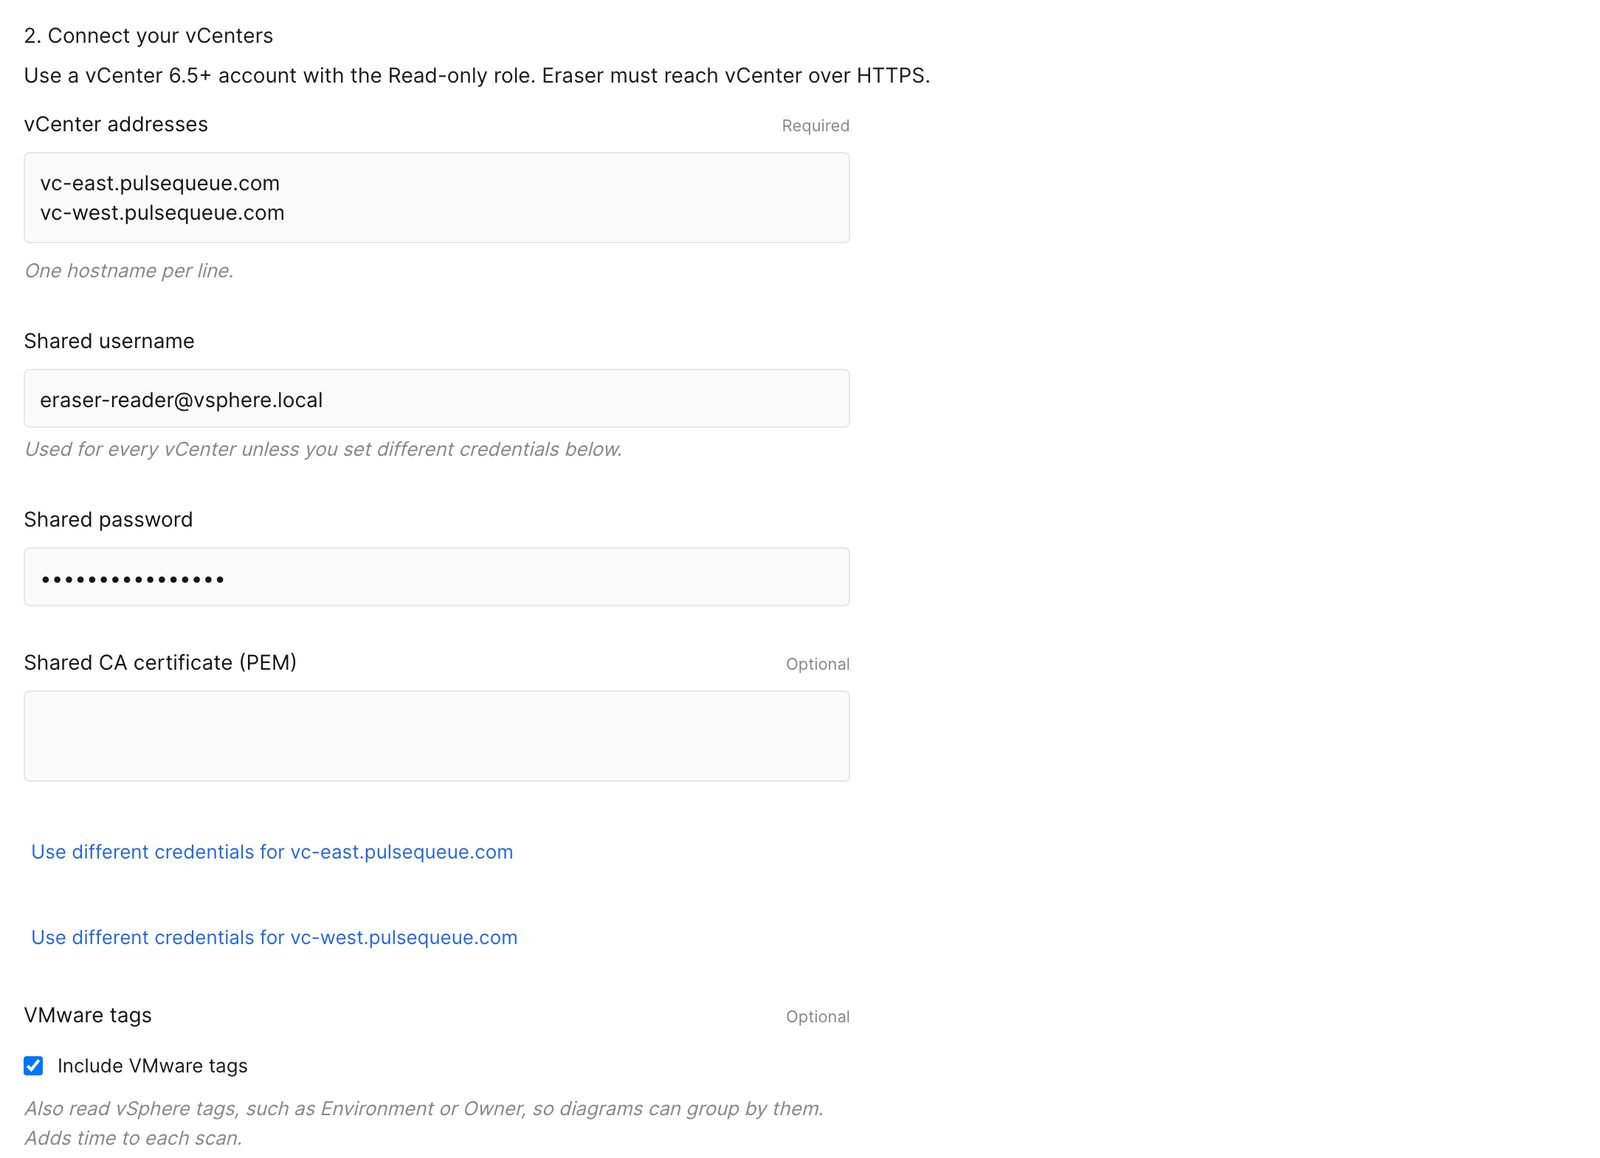
- Shared CA certificate is only needed when vCenter’s certificate is issued by your own certificate authority. Paste the authority’s certificate in PEM format.
- Use different credentials for … sets a separate account, or certificate, for one vCenter.
- Include VMware tags also reads the vSphere tags on each object, such as an Environment or Owner tag, so diagrams can group by them.
Choose Connect and scan.
After connecting
Each connection appears in Settings → Data Sources, showing its vCenters and when it last synced.
- Replace upload imports a new CSV in place of the current one. It replaces the whole environment, every vCenter included; if the new file fails, the previous inventory stays.
- Rescan reads vCenter again, for a live connection. There is no scheduled background scan – Eraser reads vCenter when you ask it to.
- Reconnect replaces the credentials of a live connection, keeping its history.
- Active lets Eraser scan the environment and use it as context in AI chat. Inactive stops both, without discarding the connection.
- Remove from Eraser disconnects and forgets the environment.
Removing a connection does not change anything in vCenter. To revoke access completely, also delete the account Eraser used.
Once a connection is active, anyone on the team can reference it in AI chat to generate architecture diagrams – see Cloud diagrams.
Troubleshooting
| What Eraser says | What it means |
|---|---|
| Malformed CSV or missing VM name column | The file has no VM, Name, or VM Name column, or its rows don’t split cleanly. Quote cells that contain the delimiter or line breaks. |
| Save the inventory as a UTF-8 CSV | The file is an Excel workbook or uses another encoding. Export it as CSV (UTF-8). |
| Row …: duplicate VM identity | Two rows describe the same VM. Remove the duplicate, or give the VMs distinct UUIDs or VM IDs. |
| Upload between 1 and 50,000 VM records | The file is empty or too large. Split it into separate environments. |
| The vCenter account must hold only the built-in Read-only privileges | The account can change something in vCenter. Assign it the Read-only role, as in step 1. |
| vCenter authentication failed | The username or password is wrong. Check them, or set different credentials for that vCenter. |
| Certificate verification failed | vCenter’s certificate isn’t trusted. Paste your certificate authority’s certificate, and use the hostname on the certificate. |
| Cannot reach the controller | Eraser can’t reach vCenter over the network. See the note at the start of Connecting to vCenter. |