Connecting AWS
Connect an AWS account, or an entire AWS organization, so Eraser can draw architecture diagrams from the infrastructure you actually have deployed. Eraser reads your account through an IAM role you create yourself, and that role holds nothing but AWS’s read-only SecurityAudit policy.
Everything below starts from Settings → Data Sources in Eraser – keep that tab open, since you’ll return to it to paste values from the AWS console.
Quick overview
Connecting a single account
- Launch the CloudFormation stack (how-to)
- Paste the Role ARN back into Eraser (how-to)
- Pick the accounts to import (how-to)
Connecting an AWS organization
- Enable trusted access for StackSets (how-to)
- Paste your organization root ID (how-to)
- Launch the stack in the management account (how-to)
- Paste the Role ARN back into Eraser (how-to)
- Pick the accounts to import (how-to)
What Eraser gets access to
The CloudFormation stack creates one IAM role, EraserCloudConnector, and attaches AWS’s managed SecurityAudit policy to it. That policy permits configuration metadata only – it does not grant access to the contents of your S3 objects, databases, or secrets.
No credentials are exchanged. Eraser assumes the role, and AWS issues a short-lived token each time.
Eraser checks the role before it accepts the connection, and refuses anything broader: a role holding any policy beyond SecurityAudit is rejected.
Choose a scope
Open Settings → Data Sources and pick AWS – from the list of data sources, or from Add connection once one is connected. The first thing the form asks for is how much you want Eraser to see.
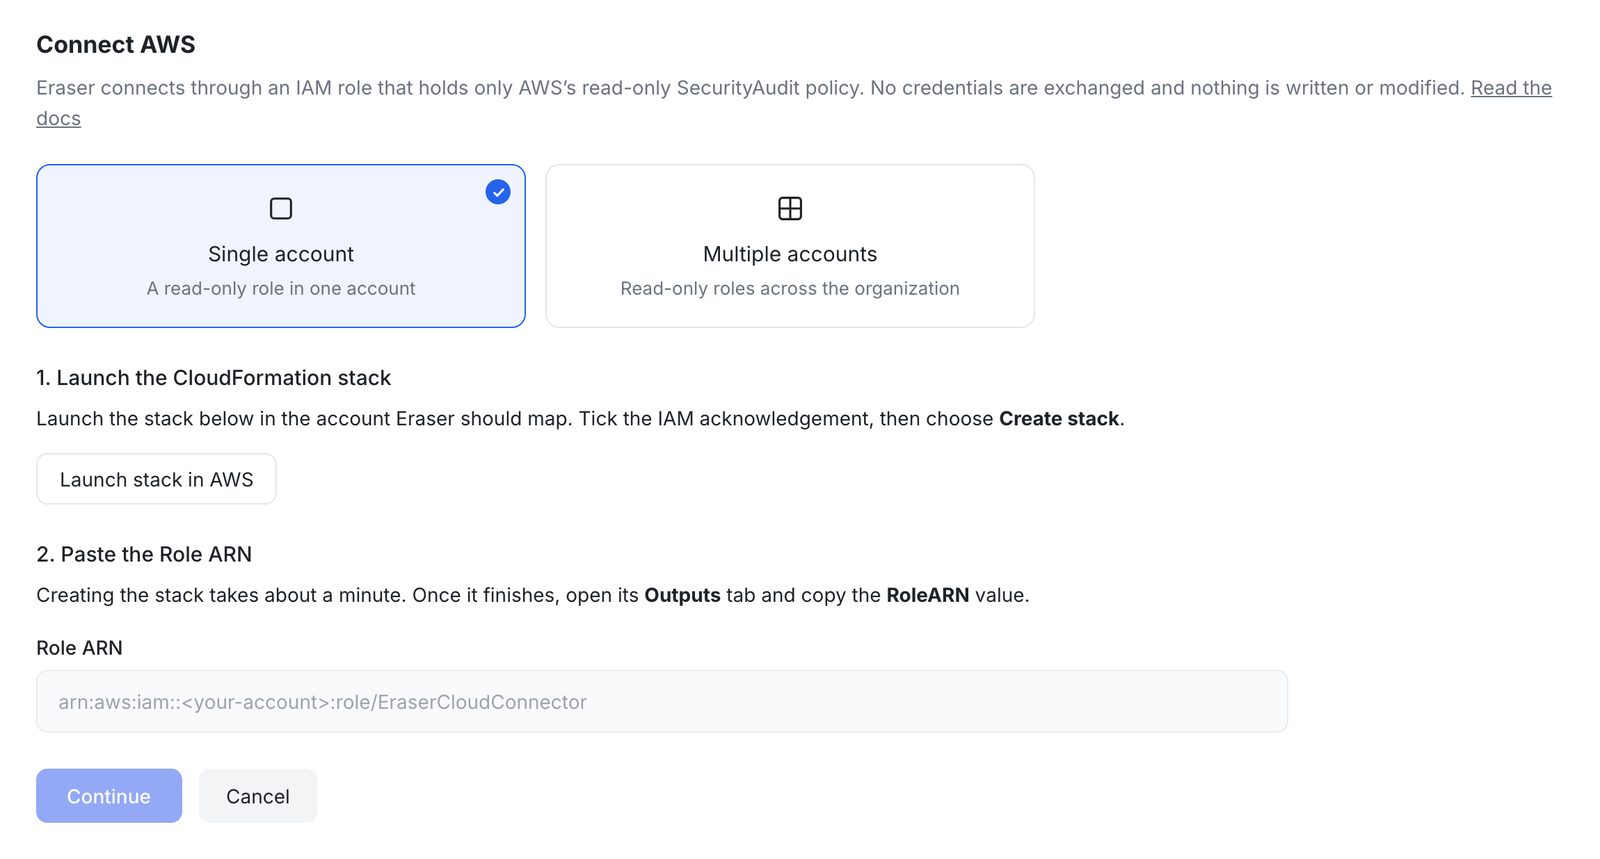
- Single account creates a read-only role in one account.
- Multiple accounts creates the same role across an AWS organization, including accounts that join later.
The steps differ from here, so follow the section that matches your choice.
Connecting a single account
1. Launch the CloudFormation stack
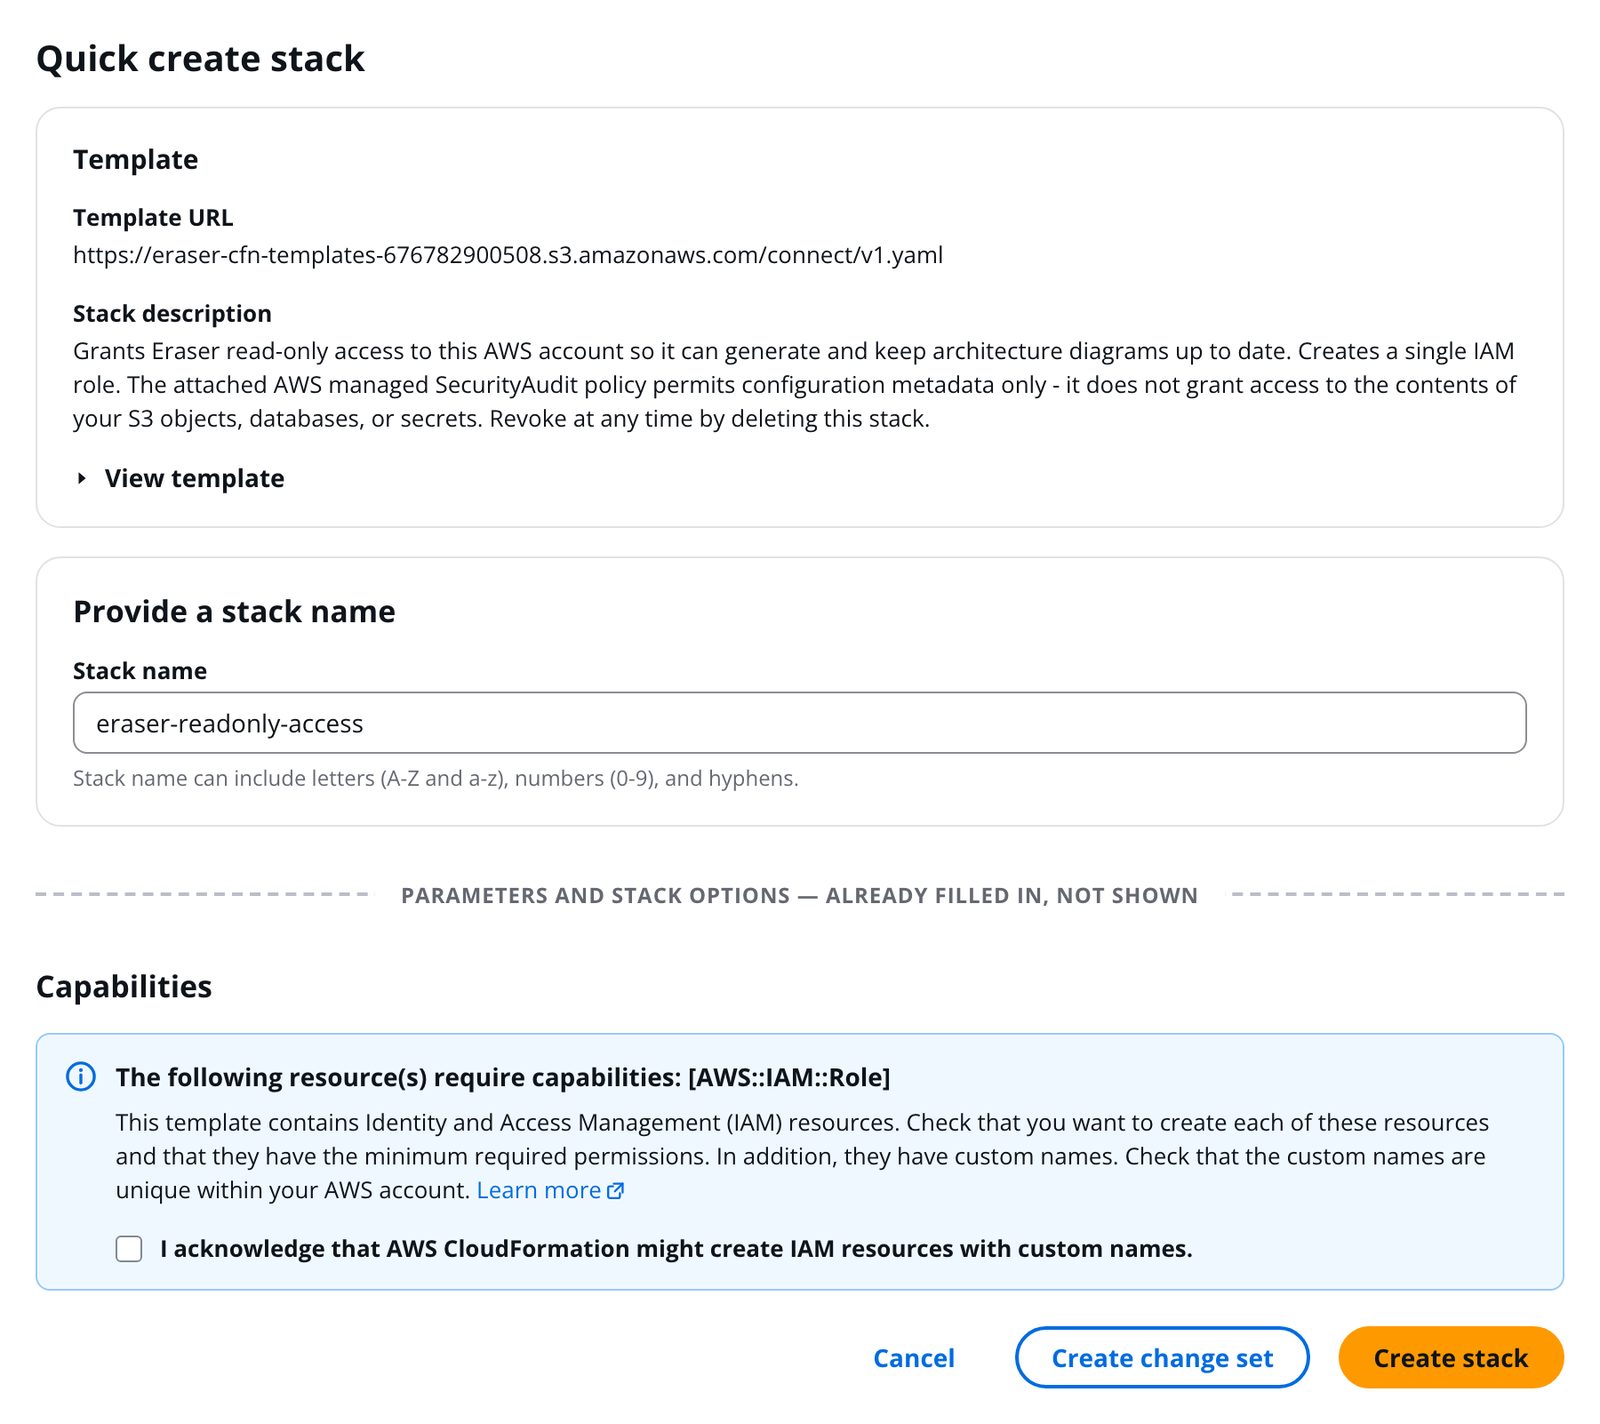
Choose Launch stack in AWS. The button opens CloudFormation’s quick-create page in your own console, in the account you are signed in to, with the template and the External ID already filled in.
Tick the IAM acknowledgement at the bottom, then choose Create stack.
2. Paste the Role ARN
Creating the stack takes about a minute. Once it finishes, open the stack’s Outputs tab and copy the RoleARN value.
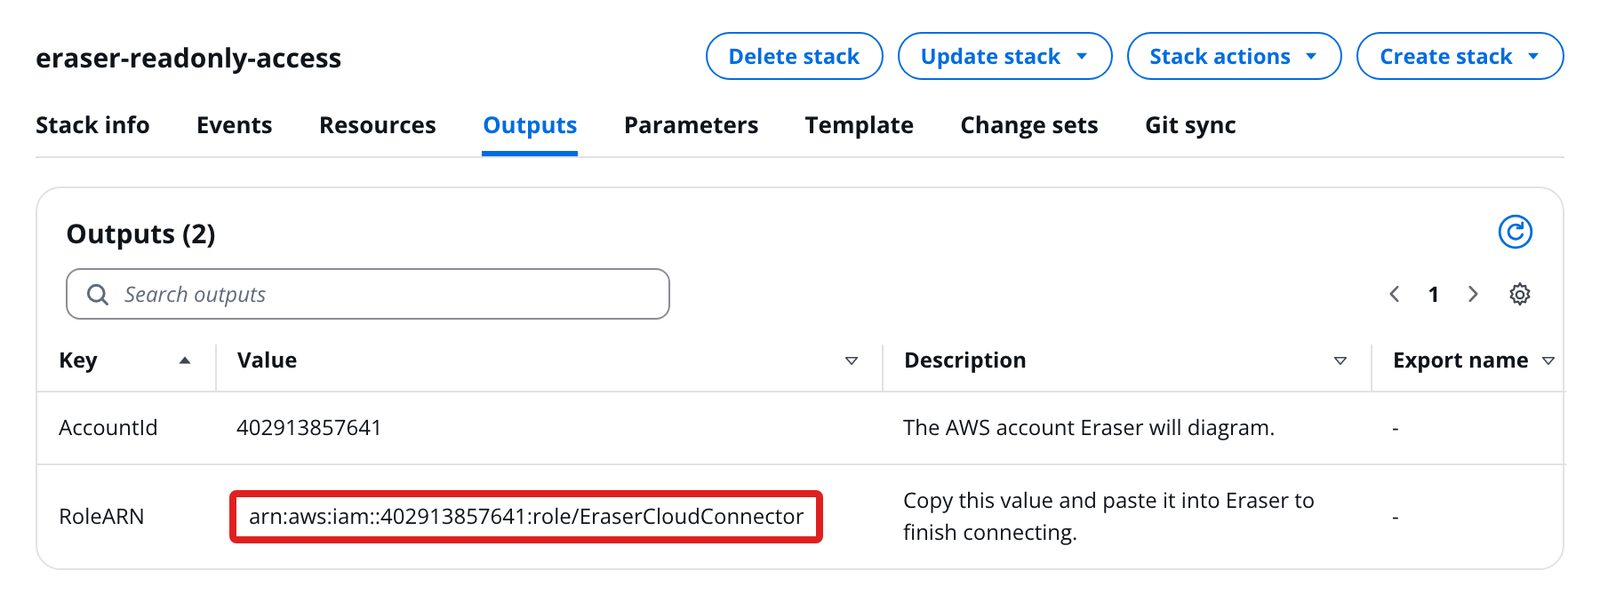
Paste it into the Role ARN field in Data Sources and choose Continue.
Connecting an AWS organization
Connecting at the organization level installs the same read-only role into every member account, so one setup covers your whole estate – including accounts created after you connect.
1. Enable trusted access
In the management account, open CloudFormation → StackSets and choose Activate trusted access in the banner at the top. This is what lets StackSets deploy across the organization.

No banner? It’s already enabled – skip this step.
2. Paste your organization root ID
Open the AWS Organizations console and copy the ID beside Root at the top of the account list. It starts with r-.
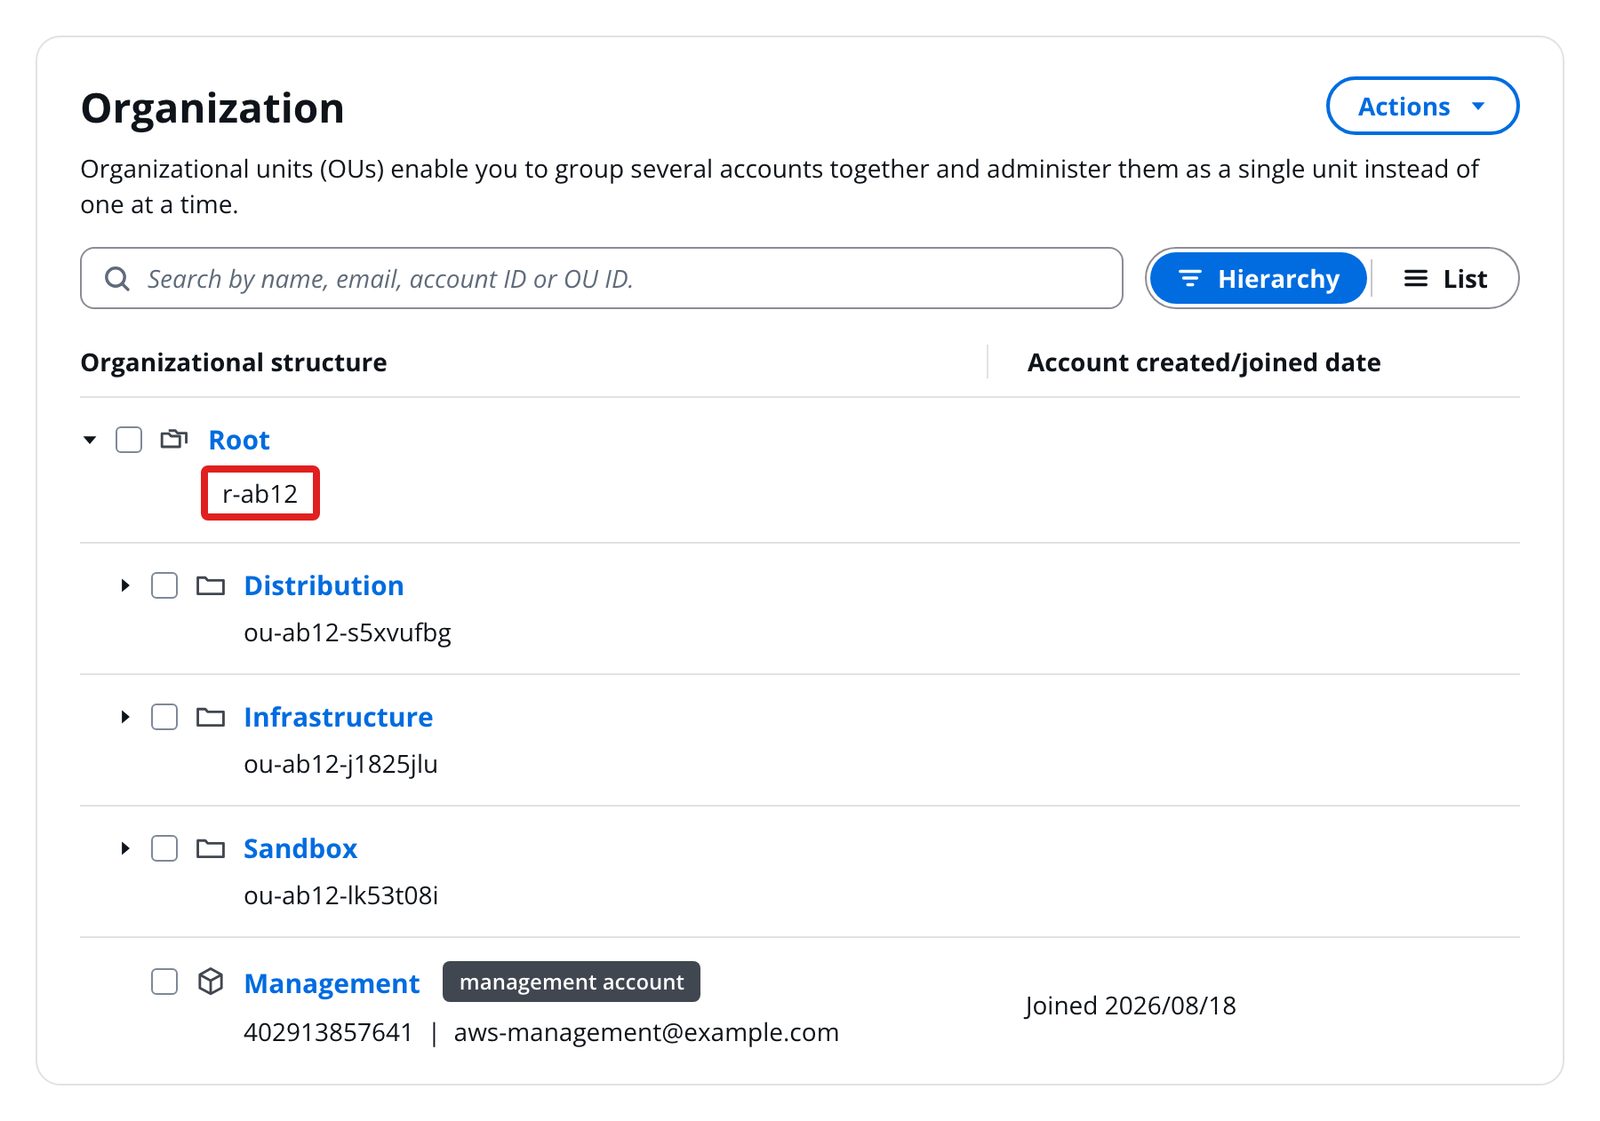
Paste it into the Organization root ID field in Eraser.
3. Launch the stack in the management account
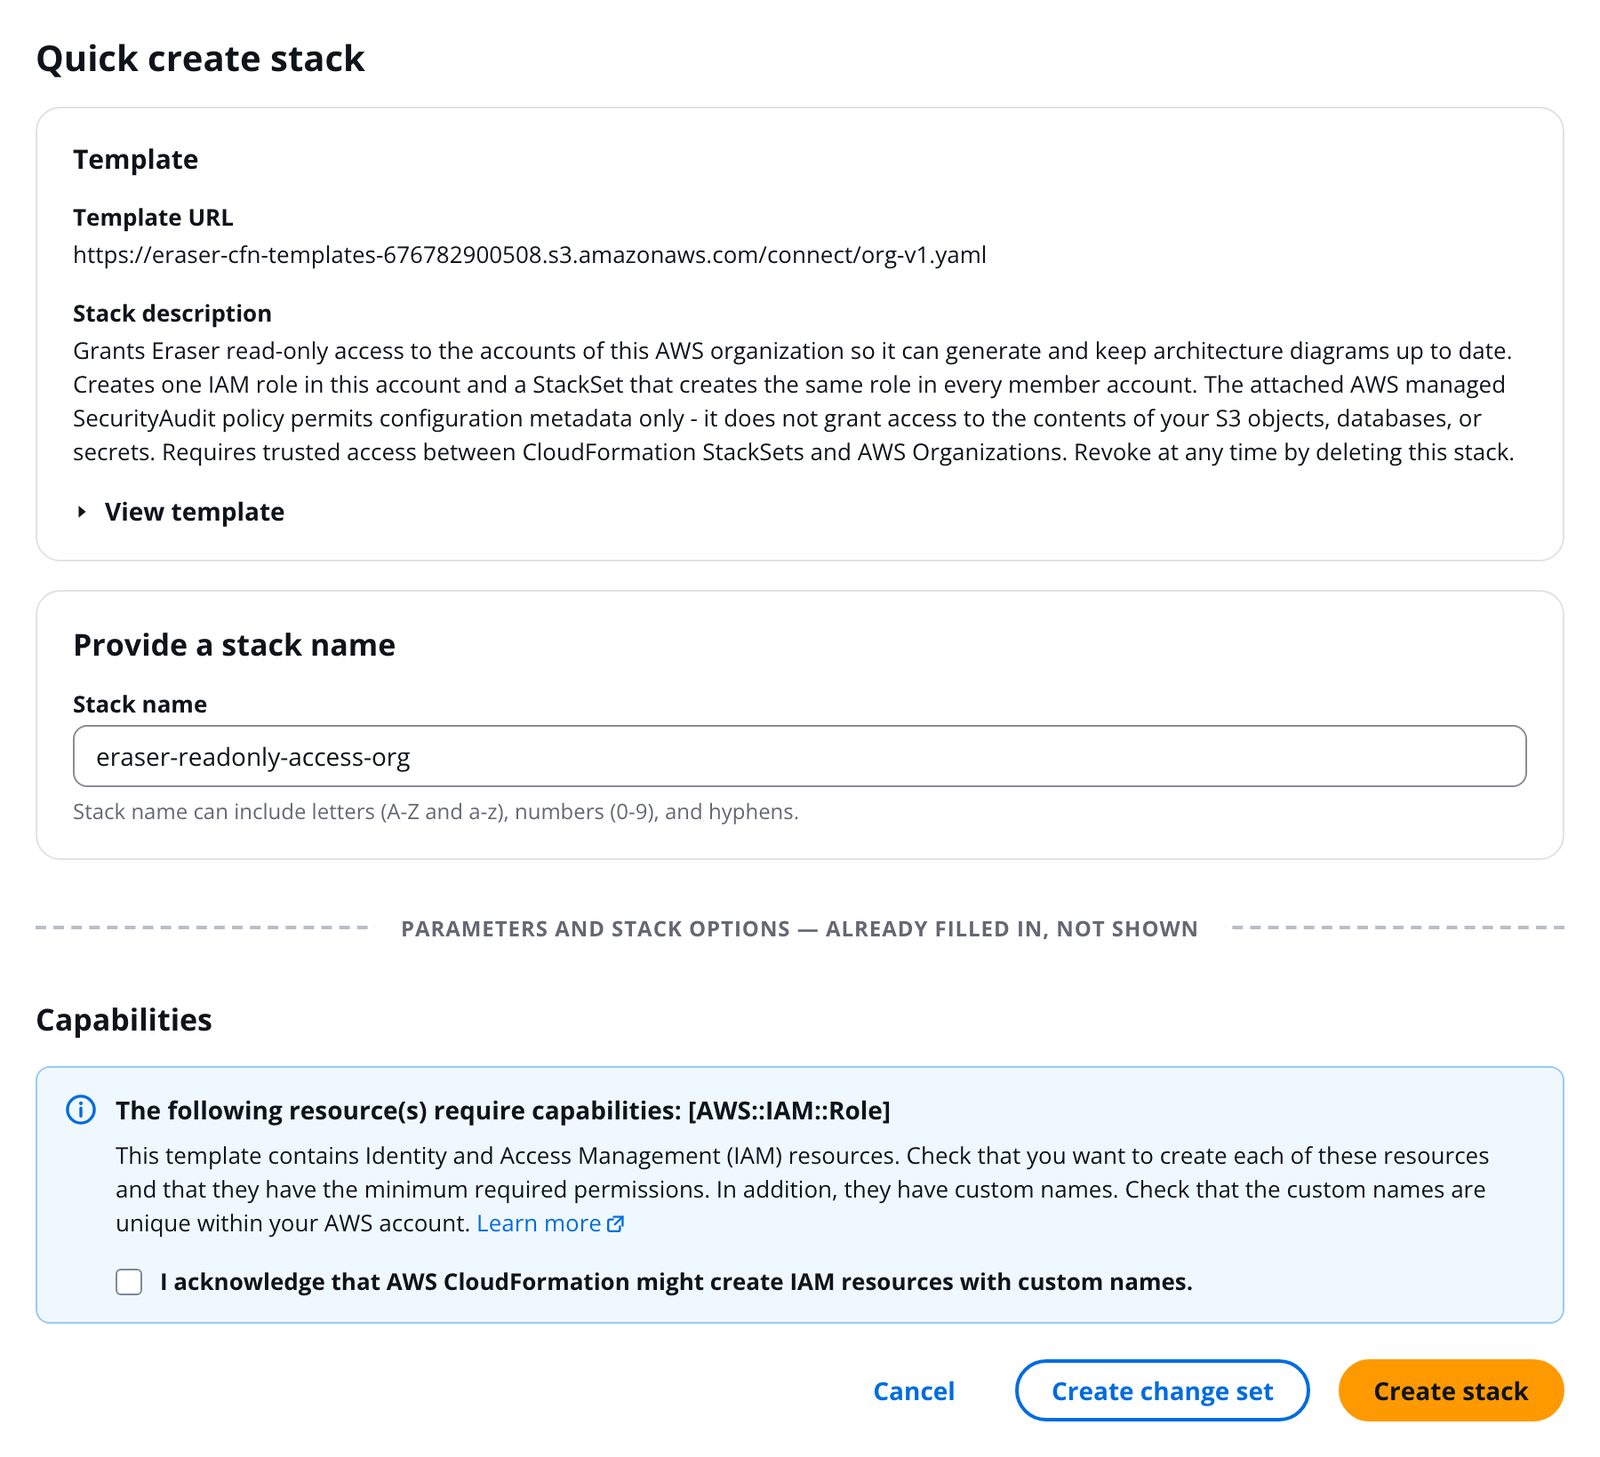
Still in the management account, choose Launch stack in AWS. Every field arrives pre-filled, including the root ID you just pasted.
Tick the IAM acknowledgement, then choose Create stack. The stack creates one read-only role in the management account, plus a StackSet that installs the same role into every member account.
4. Paste the Role ARN
Open the stack’s Outputs tab and copy the RoleARN value.
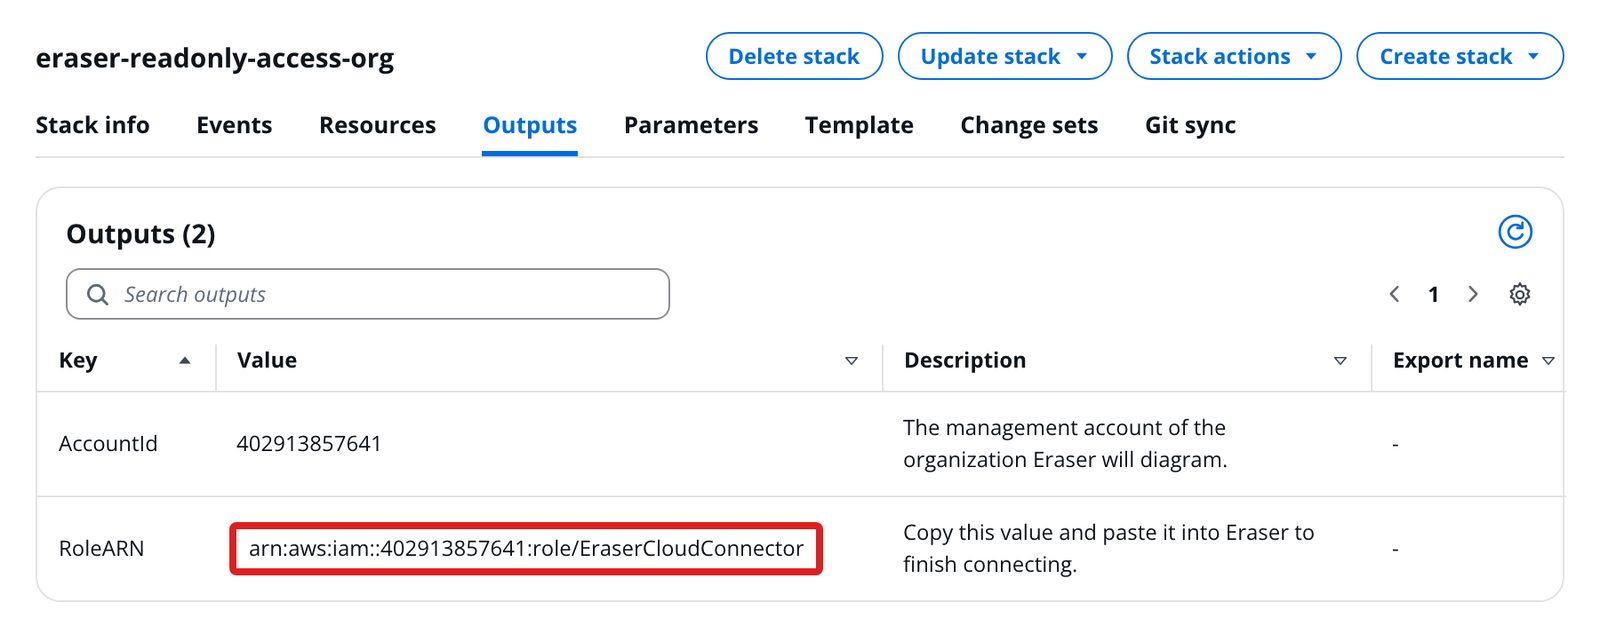
Paste it into the Role ARN field in Eraser and choose Continue.
Pick the accounts to import
Eraser now shows every account the role can see. Tick the ones it should import.
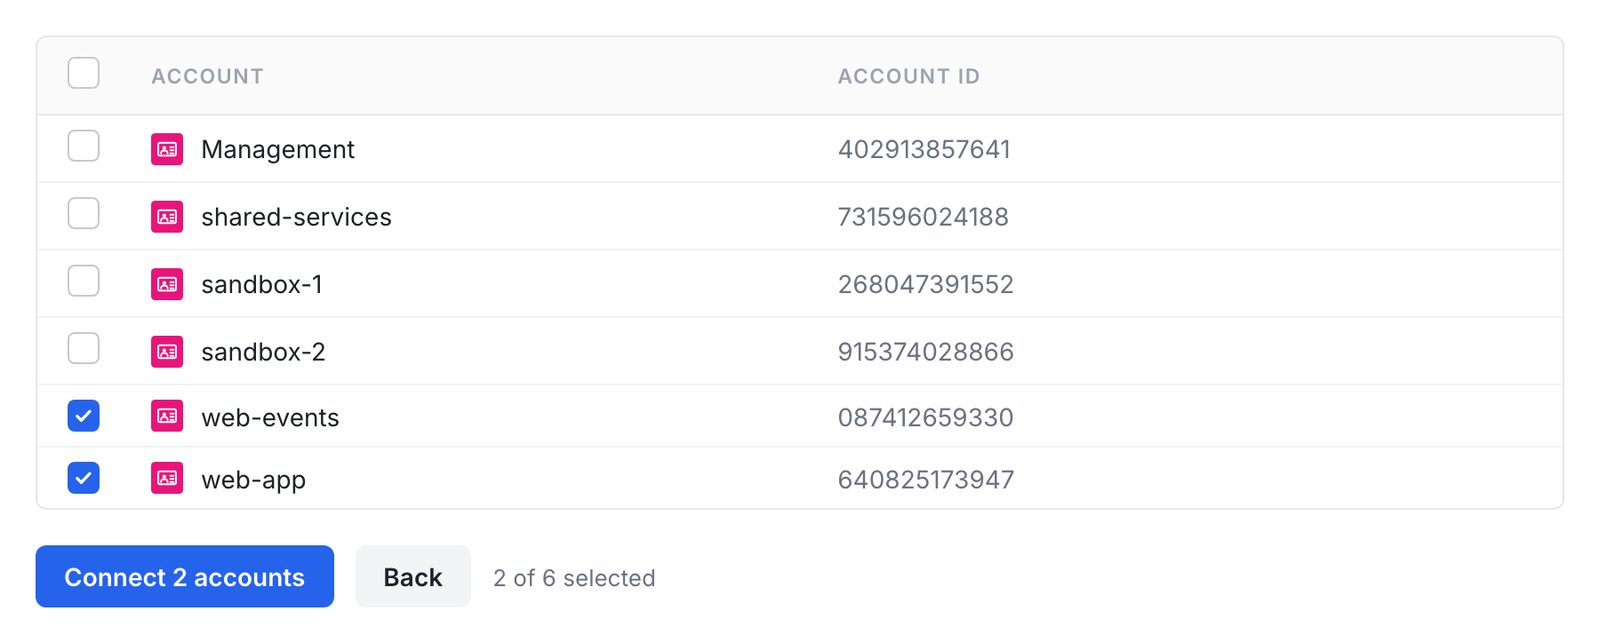
Choose Connect, and Eraser runs its first scan. You can widen the selection later by reconnecting.
After connecting
Each connection appears in Settings → Data Sources, showing the account it covers and when it last synced.
- Rescan reads the account again. Do this after you deploy something new, or before generating a diagram that should reflect today’s state. There is no scheduled background scan – Eraser reads your account when you ask it to.
- Active lets Eraser scan the account and use it as context in AI chat. Inactive stops both, without discarding the connection.
- Remove from Eraser disconnects and forgets the account.
Removing a connection does not delete anything in AWS. To revoke access completely, also delete the CloudFormation stack – which is the only thing the setup created.
Once a connection is active, anyone on the team can reference it in AI chat to generate architecture diagrams of that environment – see Cloud diagrams.
Troubleshooting
| What Eraser says | What it means |
|---|---|
| That does not look like a role ARN | The pasted value isn’t an ARN. Copy the RoleARN output from the stack, not the stack ID or the account number. |
Expected an EraserCloudConnector role | The ARN points at some other role in the account. Copy the RoleARN from the Eraser stack’s Outputs tab. |
| Could not assume that role | Usually the stack is still creating. Wait for it to finish; if it still fails, launch the stack again from Eraser. |
| This role’s trust policy does not require the External ID | The ExternalId condition is missing from the trust policy. Re-run the CloudFormation stack. |
| The connector role holds policies beyond SecurityAudit | Something attached an extra policy to the role. Eraser refuses write-capable access – detach them and keep only SecurityAudit. |
| The role was assumed but could not read the account | The SecurityAudit policy is missing or was replaced. Re-run the stack to restore it. |