Connecting Cisco
Connect Cisco Meraki Dashboard or Catalyst Center so Eraser can draw network diagrams from the devices your controller has already discovered and how they are linked. Eraser reads with read-only access, and never starts discovery or changes a device.
Everything below starts from Settings → Data Sources in Eraser.
Quick overview
Connecting Meraki Dashboard
Connecting Catalyst Center
- Prepare a read-only user (how-to)
- Enter the controller details (how-to)
- Pick the sites to import (how-to)
What Eraser gets access to
Eraser reads devices, sites or networks, and the links between devices – nothing else. The API key or password is stored encrypted and is never sent to AI.
Choose a controller
Open Settings → Data Sources and pick Cisco – from the list of data sources, or from Add connection once one is connected.
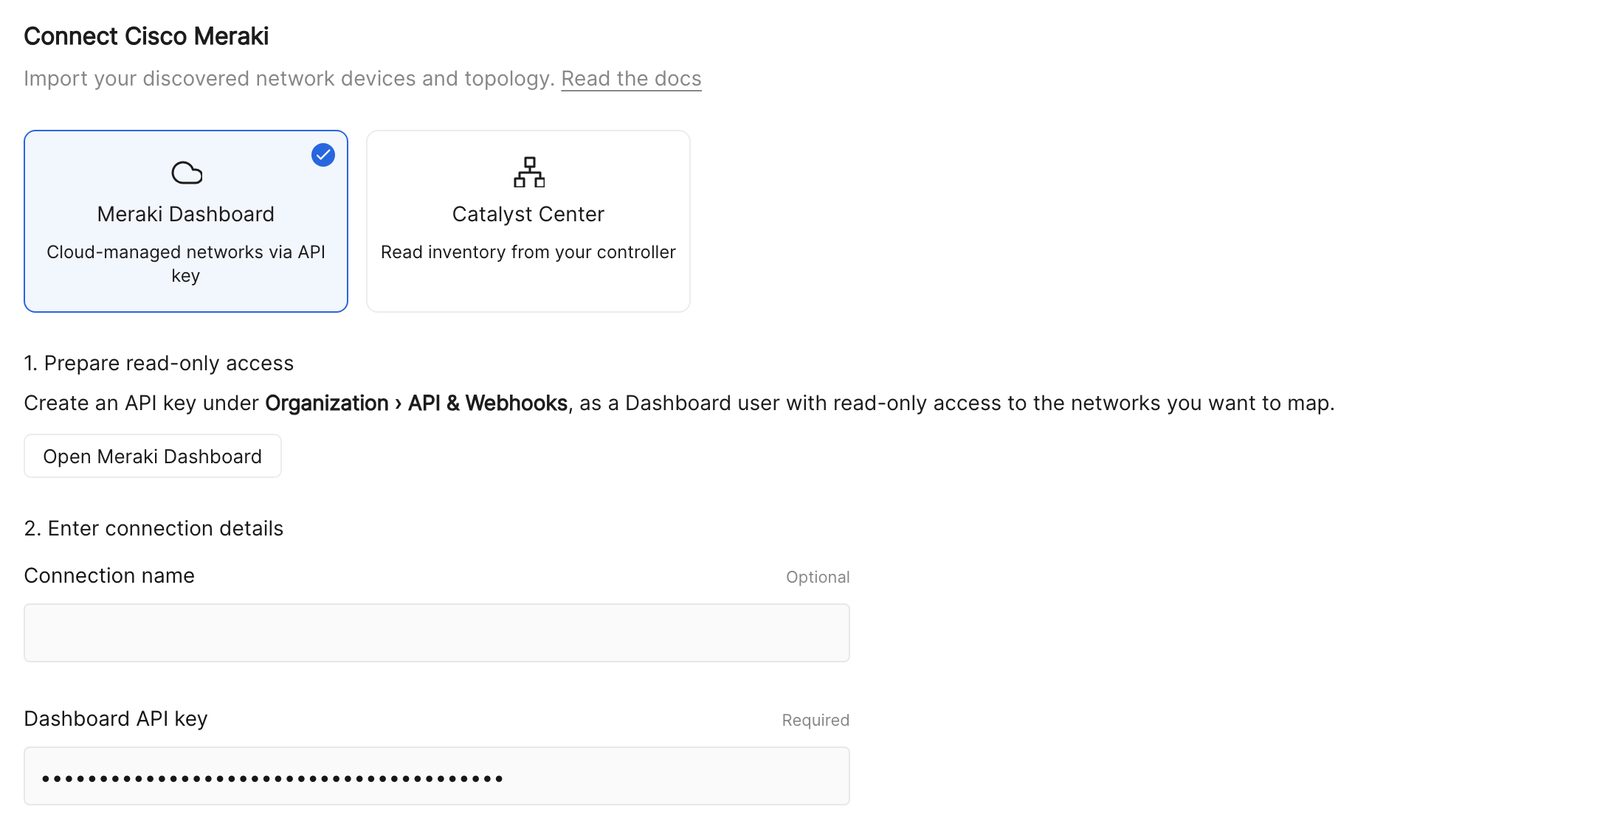
- Meraki Dashboard connects cloud-managed Meraki networks with an API key.
- Catalyst Center connects to your Catalyst Center controller with a username and password.
Meraki Dashboard
1. Create a read-only API key
Choose Open Meraki Dashboard, then Organization → API & Webhooks, and generate an API key. Copy it right away – Dashboard shows it only once.
2. Enter the API key
Paste the key into Dashboard API key in Eraser and choose Continue to networks.
3. Pick the networks to import
Eraser now shows every network the key can see. Tick the ones it should import.
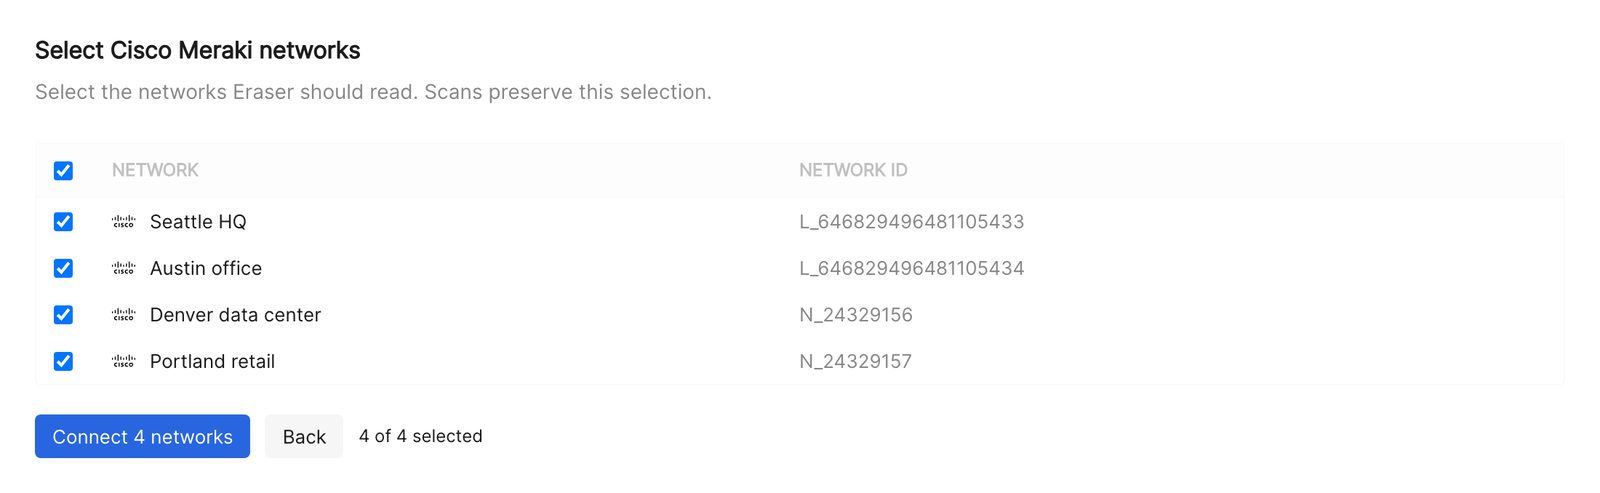
Choose Connect, and Eraser runs its first scan.
Catalyst Center
1. Prepare a read-only user
Create a Catalyst Center user for Eraser with the built-in Observer role.
2. Enter the controller details
Choose Catalyst Center, then enter the controller’s hostname and the user’s username and password.
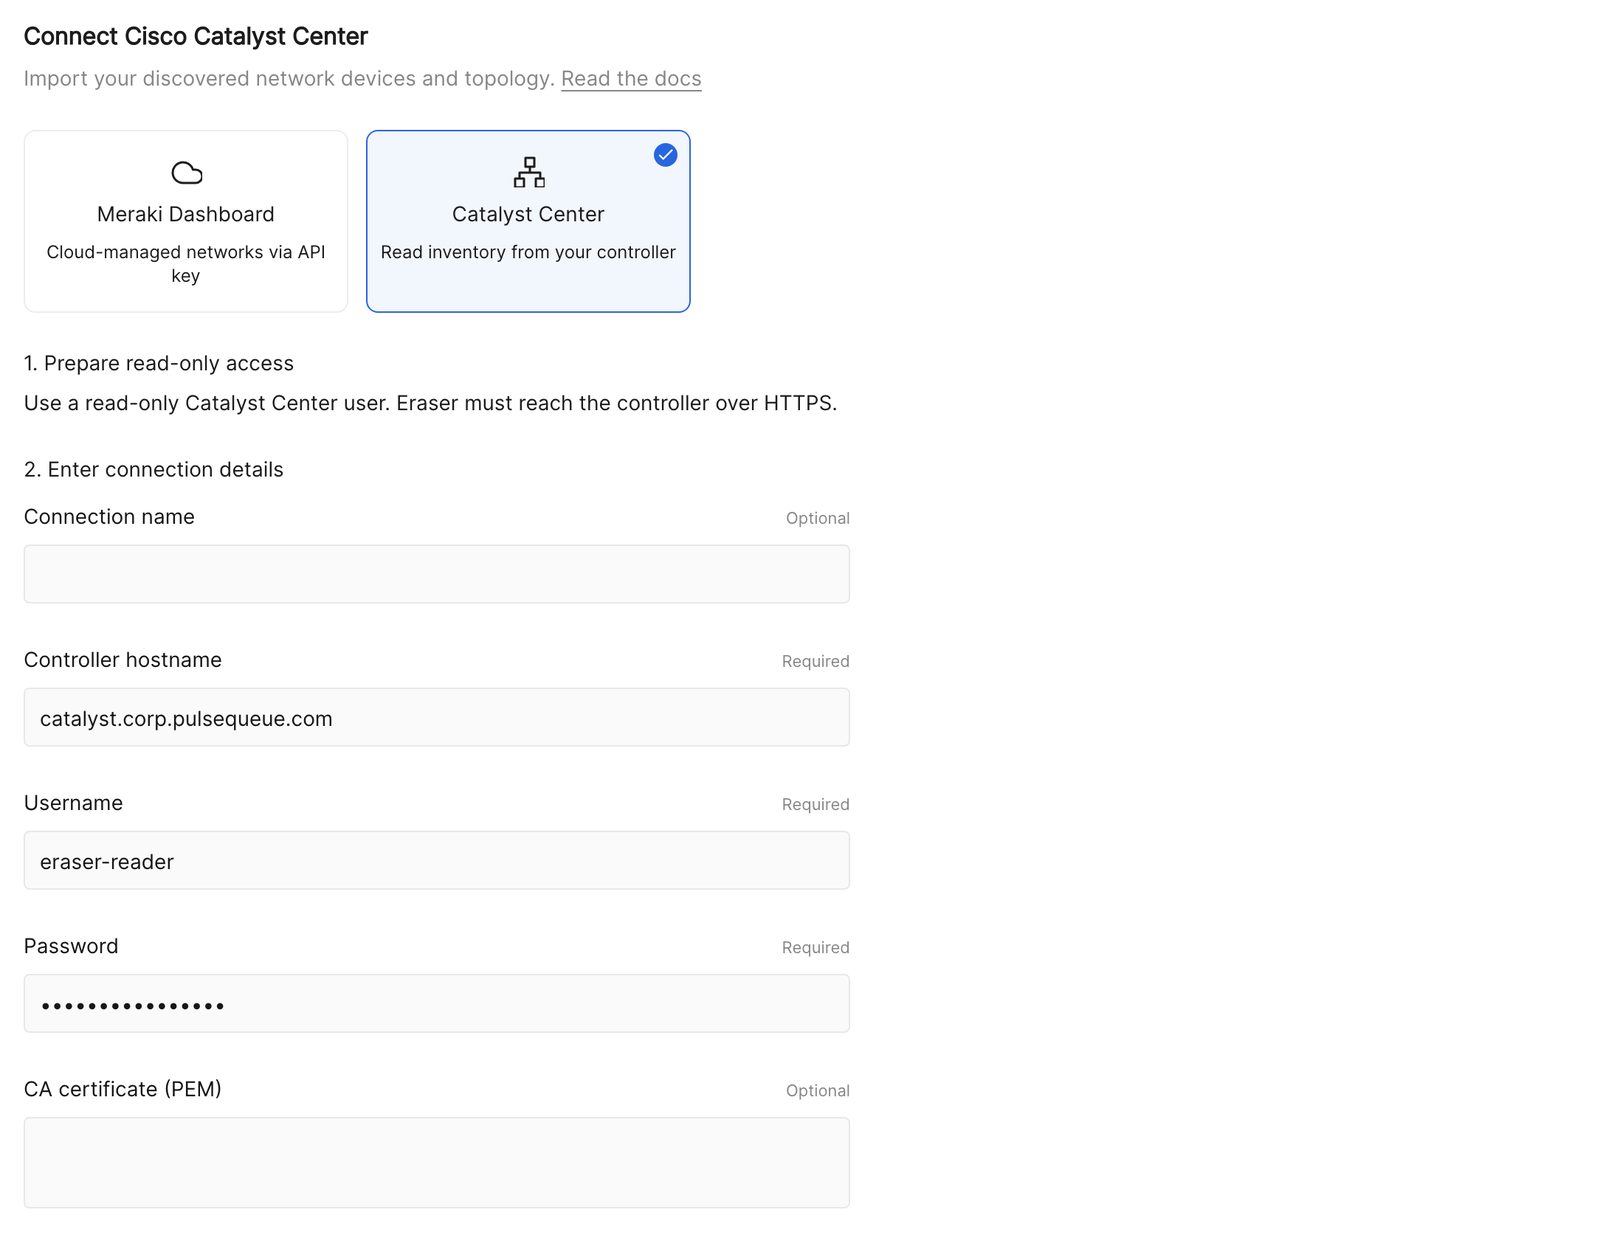
CA certificate is only needed when the controller’s certificate is issued by your own certificate authority. Paste the authority’s certificate in PEM format.
Choose Continue to sites.
3. Pick the sites to import
Eraser shows the sites the user can see. Tick the ones it should import – a building includes its floors, and an area includes everything beneath it. Choose Connect, and Eraser runs its first scan.
After connecting
Each connection appears in Settings → Data Sources, showing its networks or sites and when it last synced.
- Rescan reads the controller again. There is no scheduled background scan – Eraser reads your network when you ask it to.
- Reconnect replaces the API key or password, keeping the connection’s history.
- Active lets Eraser scan the connection and use it as context in AI chat. Inactive stops both, without discarding the connection.
- Remove from Eraser disconnects and forgets the connection.
Removing a connection does not change anything in Cisco. To revoke access completely, also revoke the API key or delete the Catalyst Center user.
Once a connection is active, anyone on the team can reference it in AI chat to generate network diagrams – see Cloud diagrams.
Troubleshooting
| What Eraser says | What it means |
|---|---|
| Authentication check failed (HTTP 401) | The API key or password was rejected. Check it, or choose Reconnect to replace it. |
| Meraki returned no topology nodes for the selected network | The network has no MX or MS device, so it has no topology to draw. Leave it out of the selection. |
| Catalyst Center must report a supported release | The controller runs a release Eraser does not support yet. Use 2.3.7.5, 2.3.7.9, or 3.1.6. |
| Certificate verification failed | The controller’s certificate isn’t trusted. Paste your certificate authority’s certificate, and use the hostname on the certificate. |
| Cannot reach the controller | Eraser can’t reach Catalyst Center over the network. See the note at the start of Catalyst Center. |