Connecting Google Cloud
Connect a Google Cloud project, or every project under an organization or folder, so Eraser can draw architecture diagrams from the infrastructure you actually have deployed. Eraser reads your projects through a service account you create yourself, and that account holds only read roles.
Everything below starts from Settings → Data Sources in Eraser – keep that tab open, since you’ll return to it to paste values from the Google Cloud console.
Quick overview
- Choose the host project (how-to)
- Create the connector service account (how-to)
- Grant read access, per project or on an organization or folder (how-to)
- Let Eraser use the account (how-to)
- Enable the APIs (how-to)
- Pick the projects to import (how-to)
Only step 3 changes depending on how much you want Eraser to see. The rest is the same either way.
What Eraser gets access to
You create a service account and grant it three roles on the projects Eraser should read: Cloud Asset Viewer, Browser, and Compute Viewer. Together they allow listing resources and reading their configuration – they do not grant access to the contents of your buckets, databases, or secrets.
No key file is created. Instead, you grant Eraser’s scanner the Service Account Token Creator role on the account, and Google Cloud issues a short-lived token at scan time.
Eraser checks the account before it accepts the connection, and refuses anything broader than read access – including write permissions inherited from a folder or the organization.
Choose a scope
Open Settings → Data Sources and pick GCP – from the list of data sources, or from Add connection once one is connected.
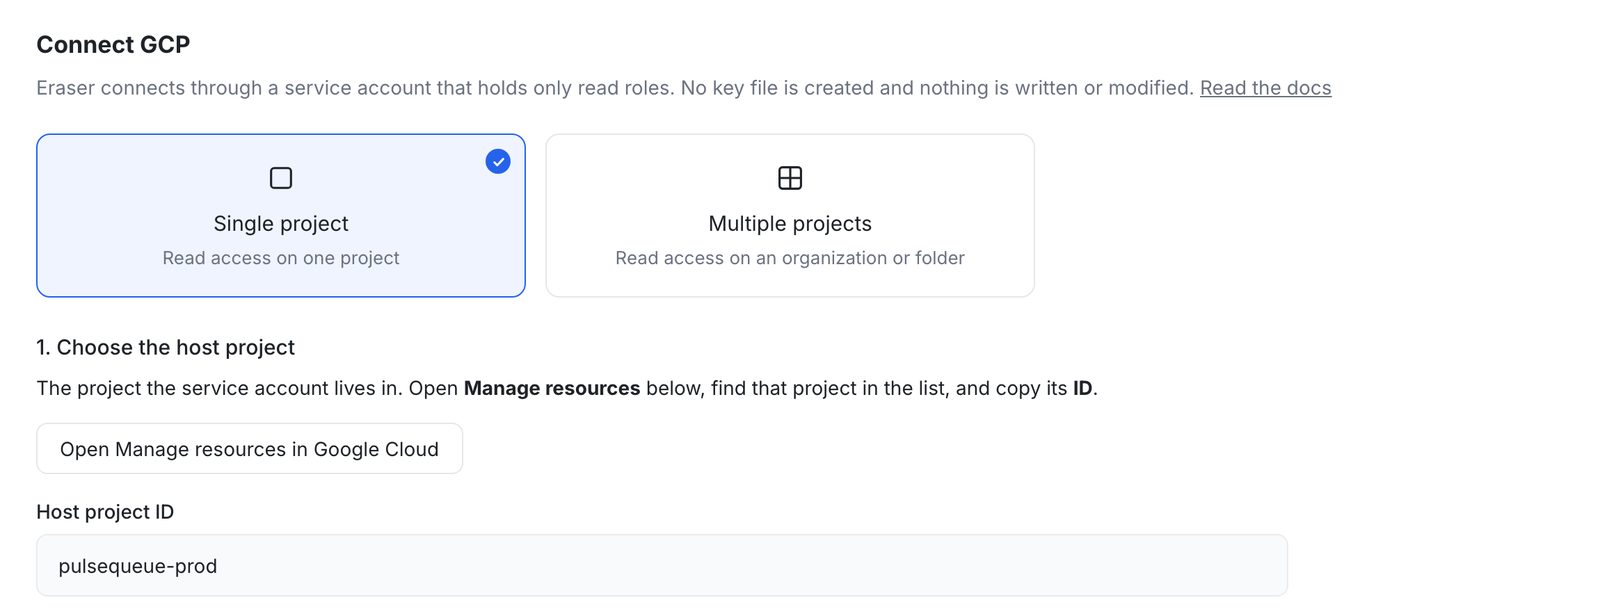
- Single project grants read access on one project at a time.
- Multiple projects grants read access once on an organization or folder, which covers every project beneath it.
1. Choose the host project
The host project is where the service account will live. It does not decide what Eraser can read – that is decided by the access you grant in step 3.
Choose Open Manage resources in Google Cloud, find the project in the list, and copy its ID.
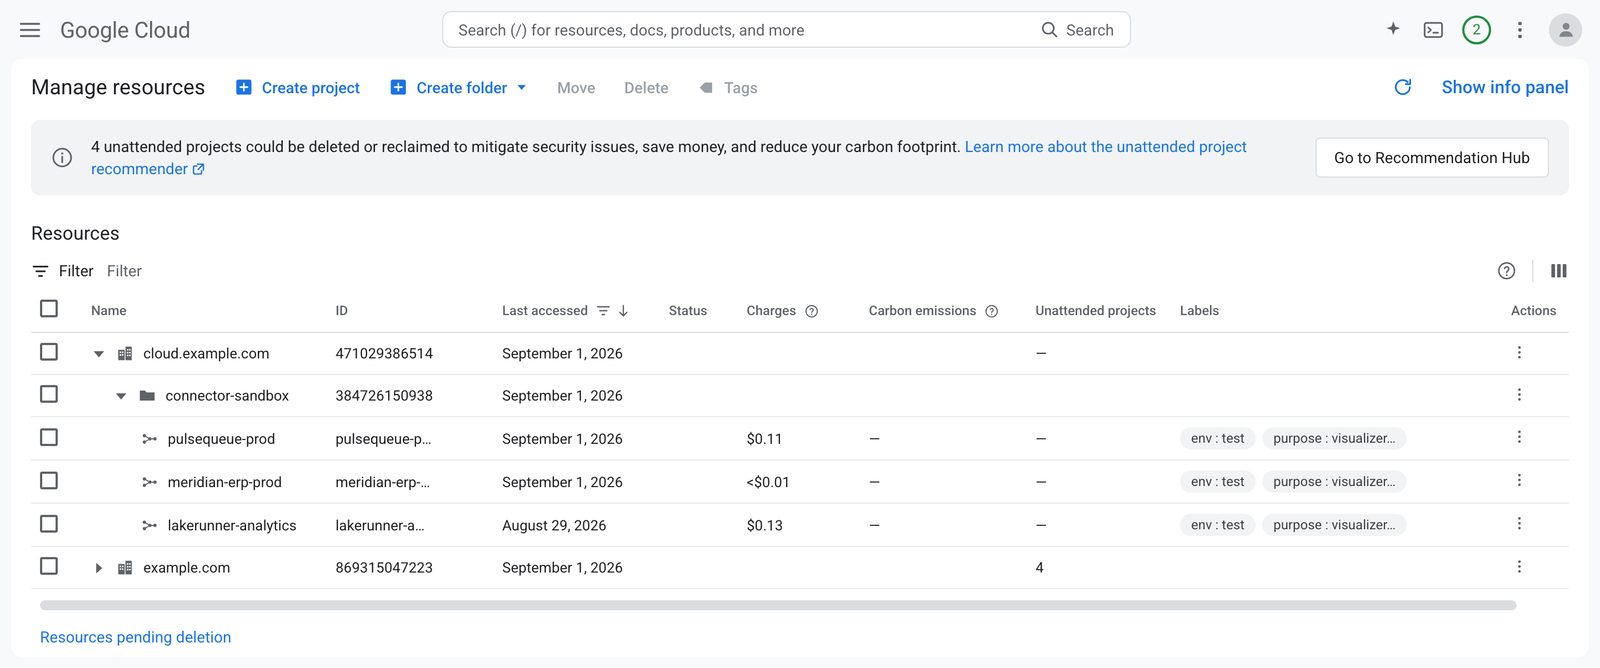
Paste it into the Host project ID field in Data Sources.
2. Create the connector service account
Eraser gives you two values for the new account:
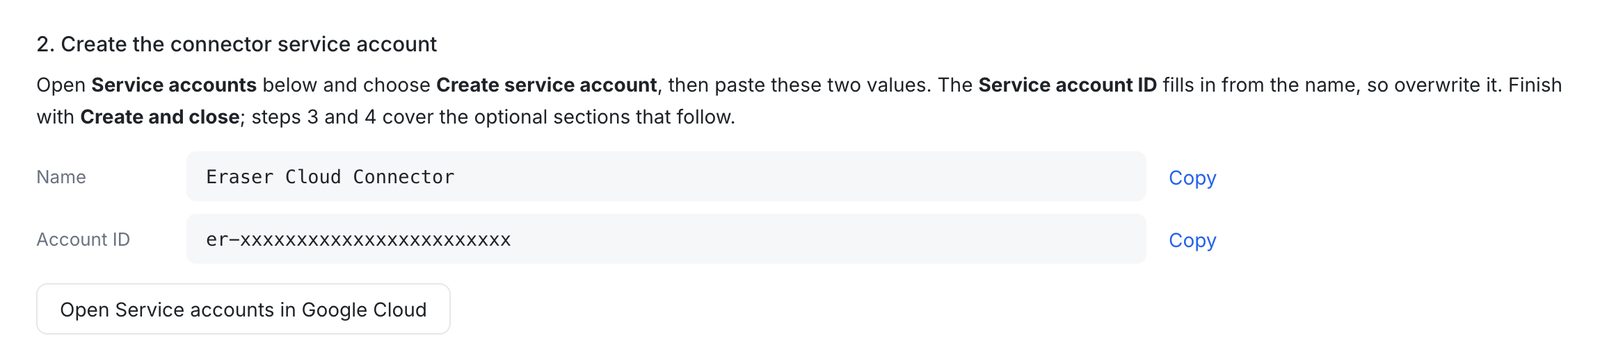
Choose Open Service accounts in Google Cloud, then Create service account. Paste the Name, then paste the Account ID over the Service account ID field.
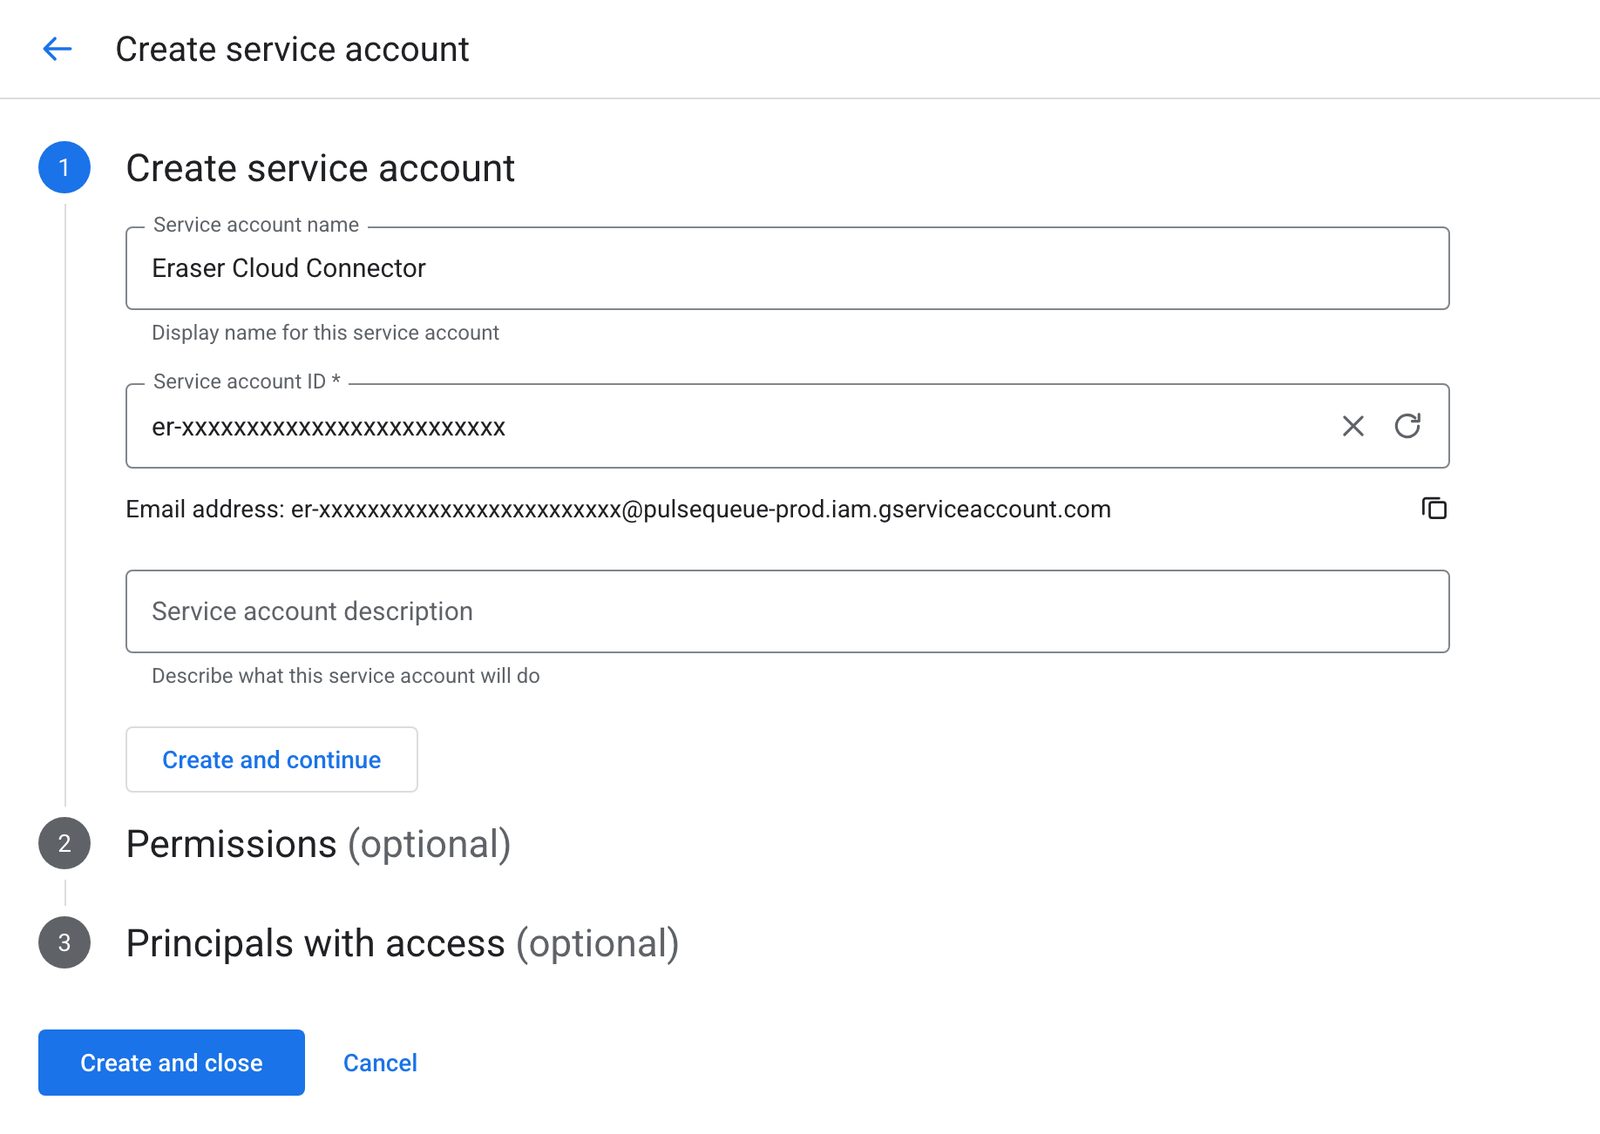
Choose Create and close. Skip the optional Permissions and Principals with access sections – steps 3 and 4 cover them.
3. Grant read access
Once the host project ID is in place, Eraser shows the account’s full email address:

Choose Open the IAM page. The resource picker at the top of that page opens this dialog, listing the organization, its folders, and their projects. Whichever row you pick is the level the grant lands on.
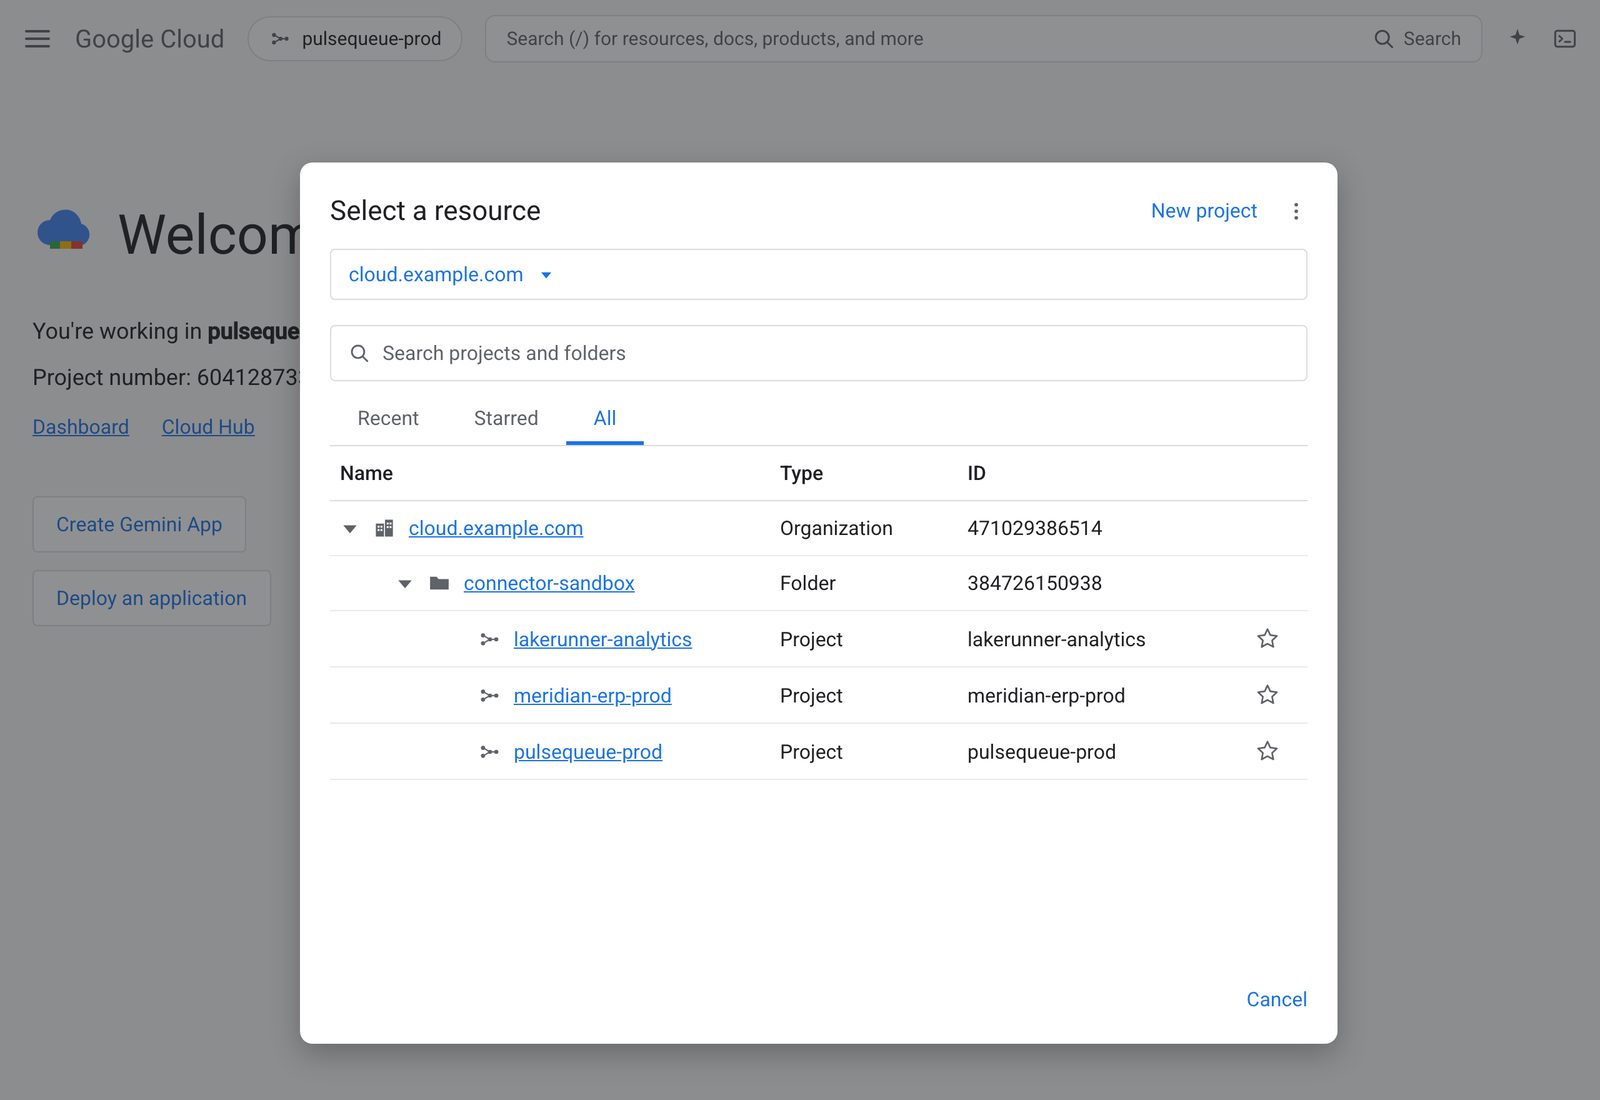
Follow whichever section matches the scope you picked.
On each project
In the picker, choose a project Eraser should read, then choose Grant access.
Paste the email under New principals, then add three roles: Cloud Asset Viewer, Browser, and Compute Viewer. Choose Save.
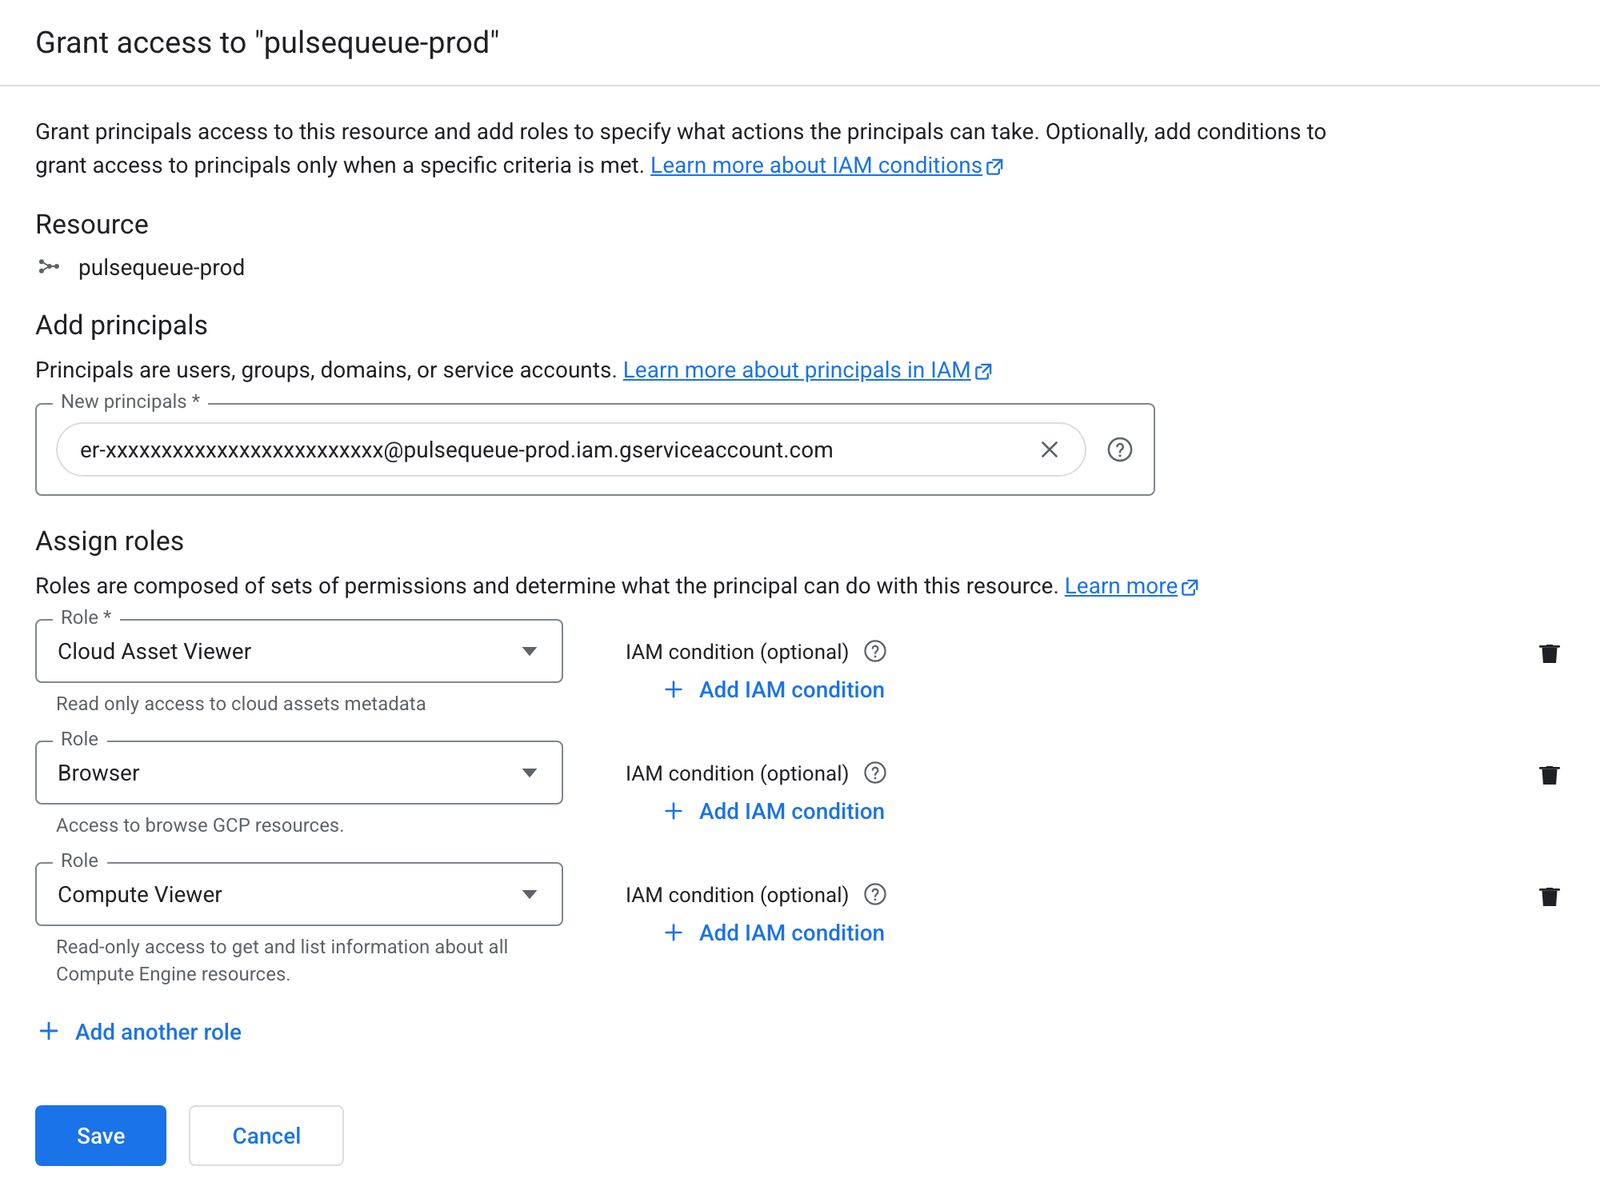
Repeat for every project Eraser should map. You choose which of them to import in step 6.
On an organization or folder
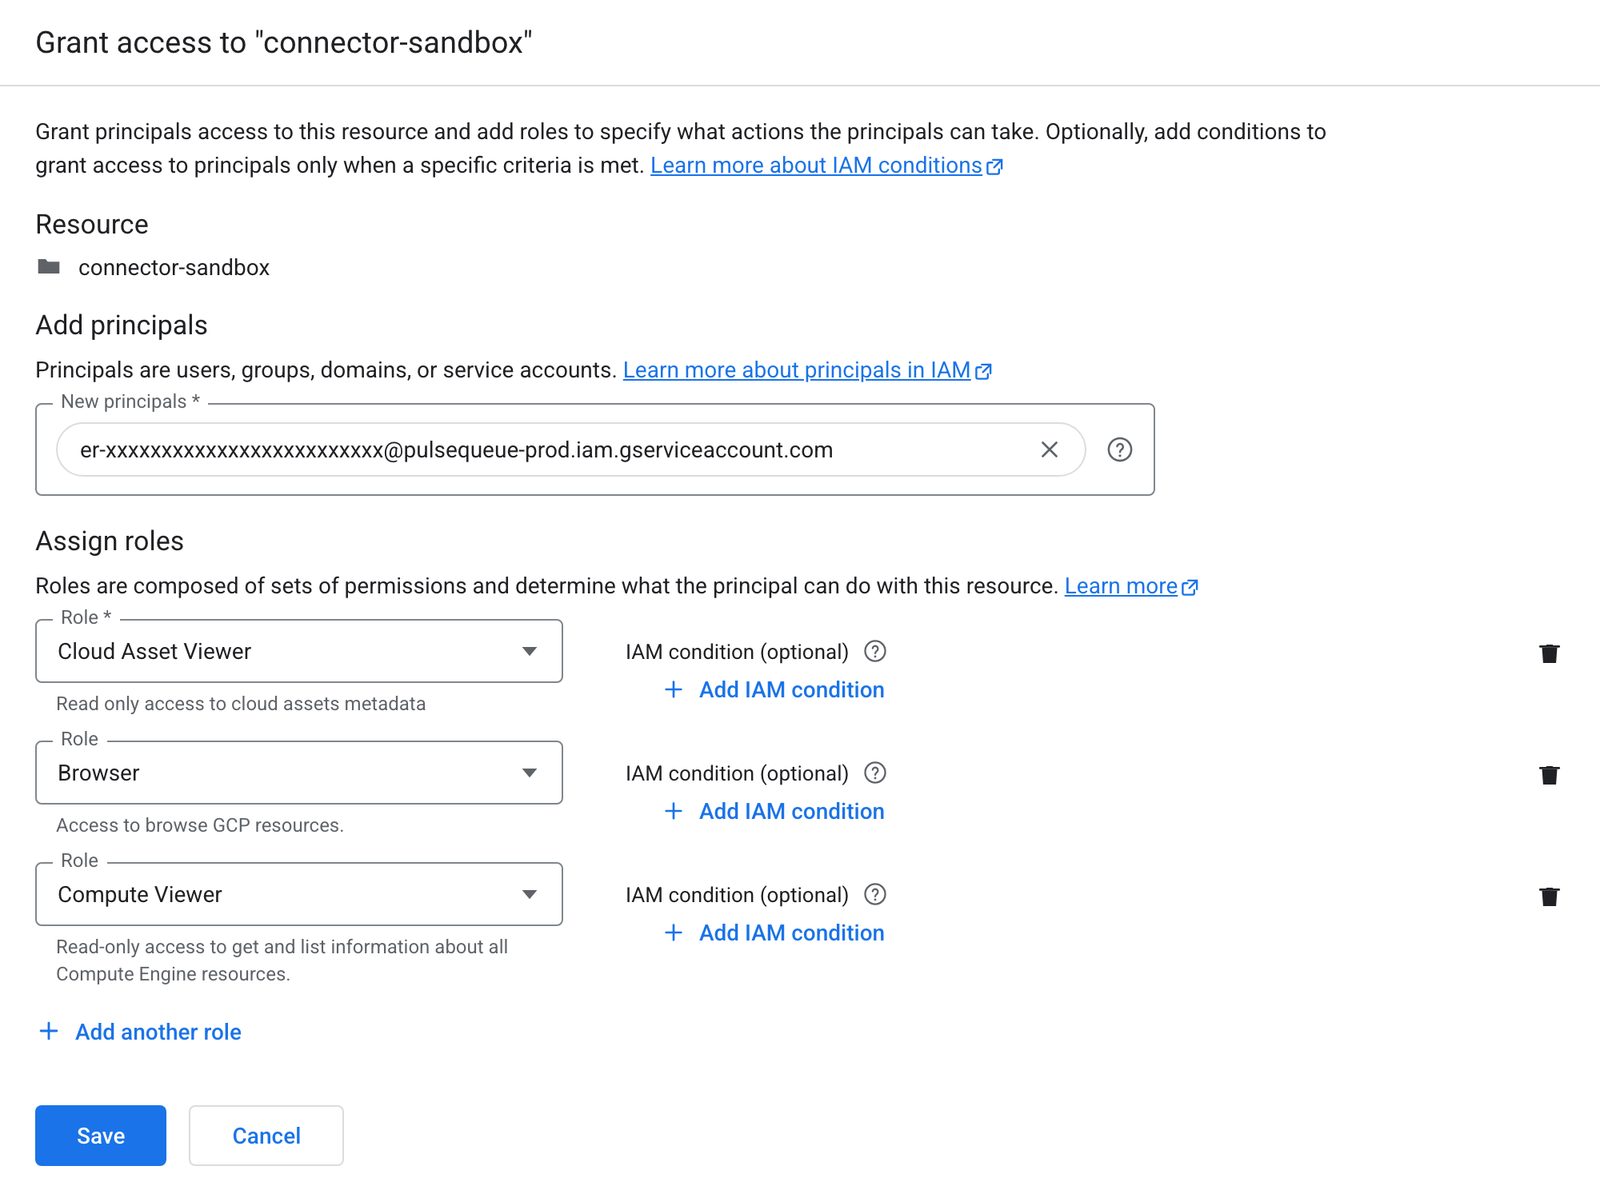
In the picker, choose the organization or folder, then choose Grant access.
Paste the email under New principals, then add the same three roles: Cloud Asset Viewer, Browser, and Compute Viewer. Choose Save.
4. Let Eraser use the account
Eraser gives you the principal to add:

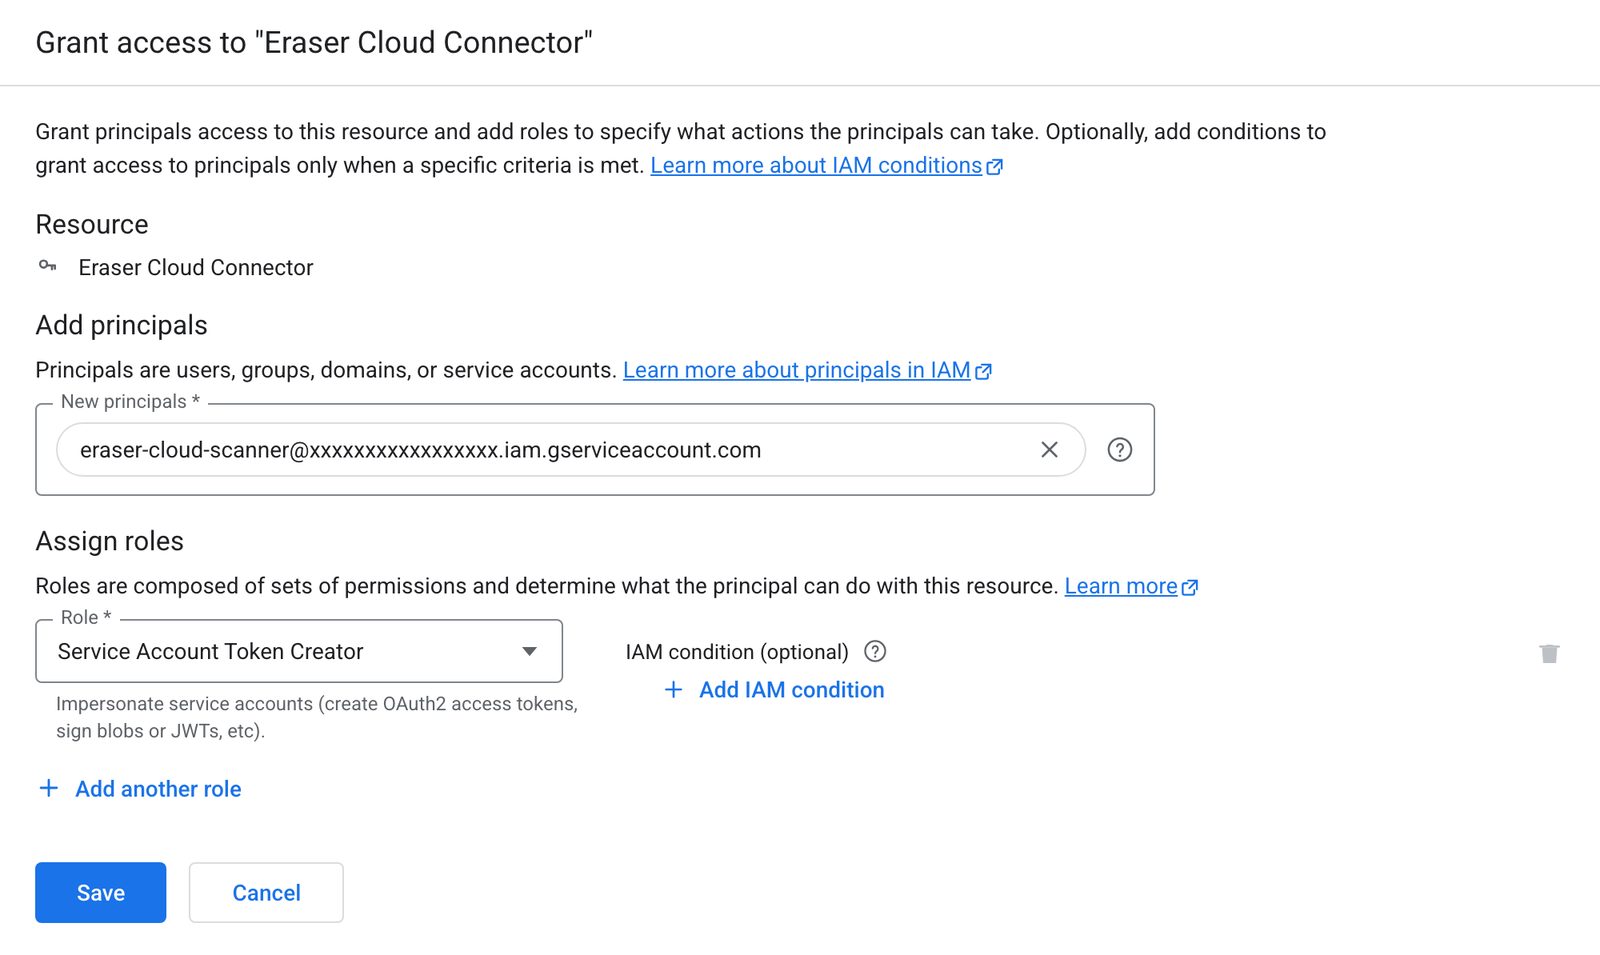
Choose Open Service accounts in Google Cloud, open the connector account, and select its Principals with access tab.
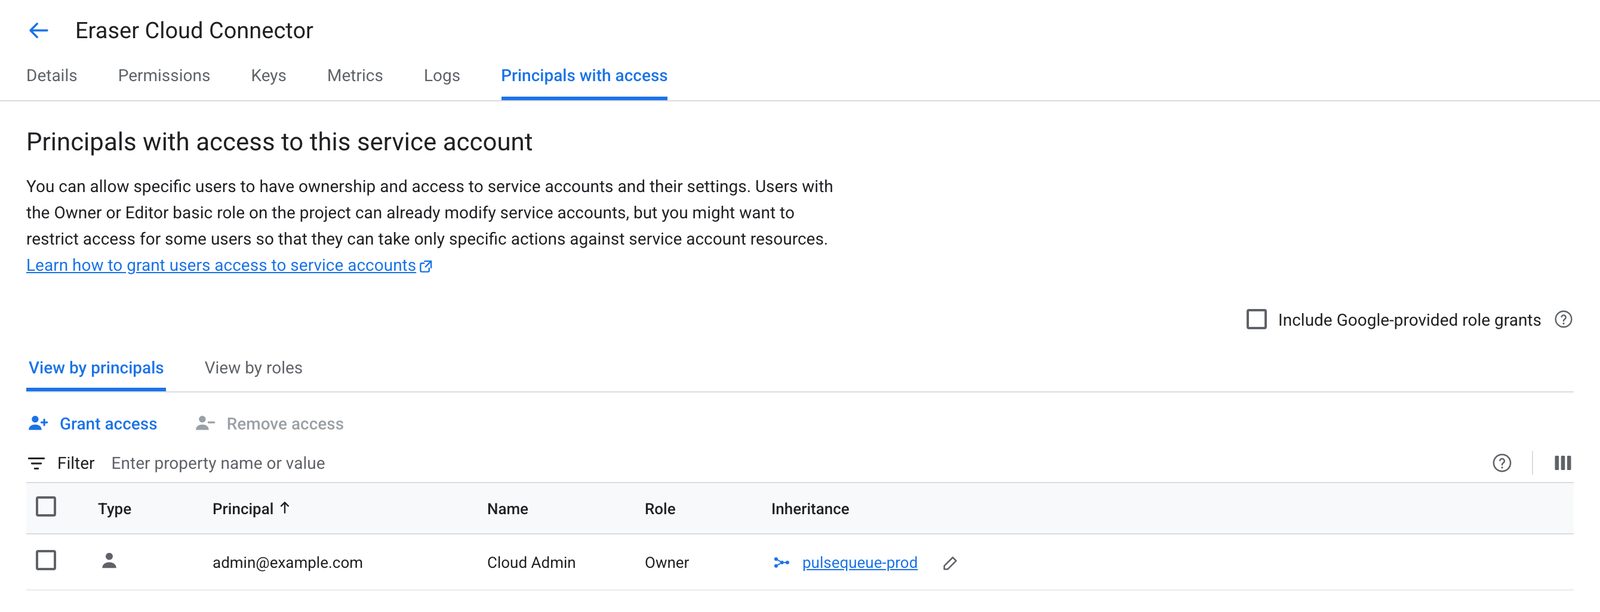
Choose Grant access, paste the principal, and add one role: Service Account Token Creator. Choose Save.
5. Enable the APIs
Eraser reads project inventory through two APIs that must be enabled in the host project: the Cloud Asset API and the Cloud Resource Manager API.
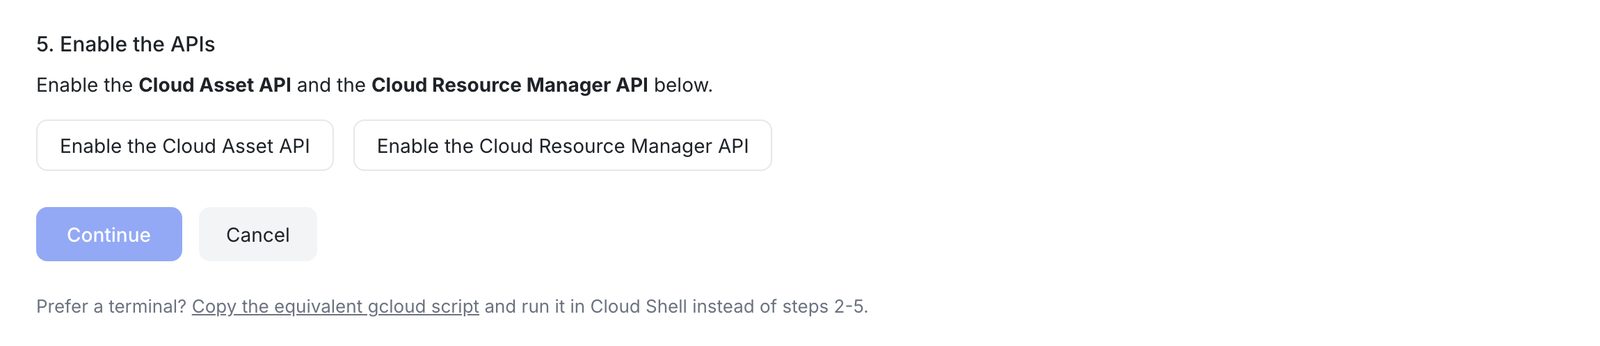
Each button opens that API’s page in the host project. Choose Enable on each, then return to Eraser and choose Continue.
6. Pick the projects to import
Eraser now shows every project the connector account can see. Tick the ones it should import.
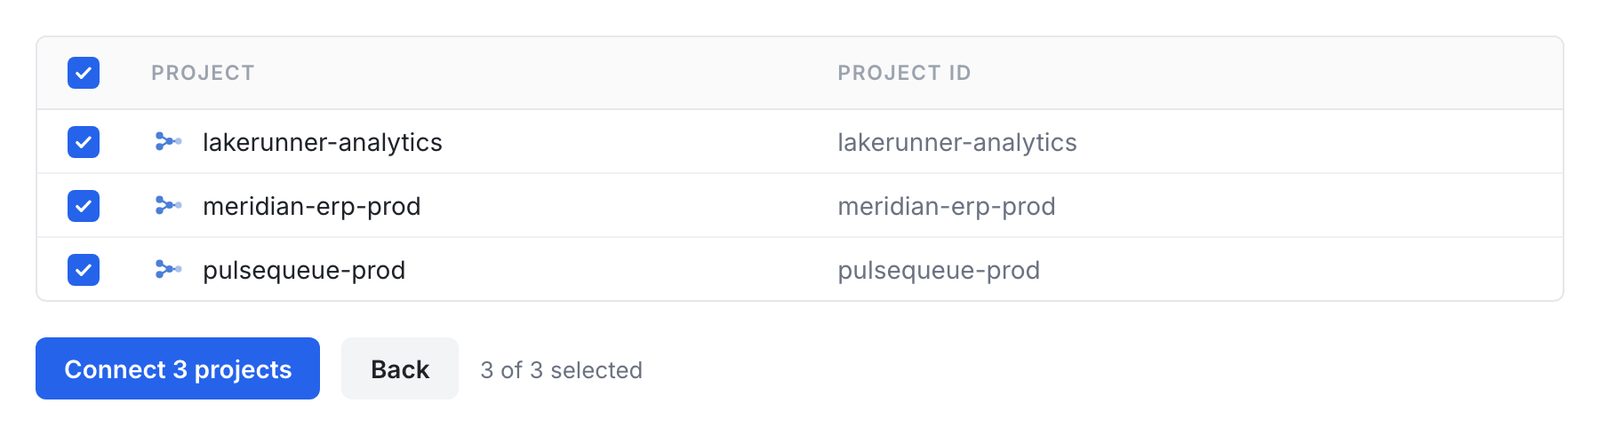
Choose Connect, and Eraser runs its first scan. Granting the account access on another project or folder later, then reconnecting, adds more.
Prefer the command line?
The connect form can hand you an equivalent gcloud script that performs steps 2 to 5 in Cloud Shell. Look for Copy the equivalent gcloud script at the bottom of the form.
After connecting
Each connection appears in Settings → Data Sources, listing the projects it covers and when it last synced.
- Rescan reads the projects again. There is no scheduled background scan – Eraser reads your environment when you ask it to.
- Active lets Eraser scan the connection and use it as context in AI chat. Inactive stops both, without discarding the connection.
- Remove from Eraser disconnects and forgets the connection.
Removing a connection does not delete anything in Google Cloud. To revoke access completely, also delete the connector service account.
Once a connection is active, anyone on the team can reference it in AI chat to generate architecture diagrams of that environment – see Cloud diagrams.
Troubleshooting
| What Eraser says | What it means |
|---|---|
| Could not authenticate to Google Cloud | Usually step 4. Check that the Service Account Token Creator grant is on the connector account’s Principals with access tab, and that the account’s ID matches the one Eraser gave you. |
| The connector service account cannot see any project | The step 3 grant is missing, or it landed on a different resource. Grant Cloud Asset Viewer, Browser, and Compute Viewer on the projects Eraser should read. |
| The connector service account cannot read the project inventory | Cloud Asset Viewer is missing on that project. Add it, as in step 3. |
| The Cloud Asset API is not enabled in that project | Enable it from step 5, then try again. |
| The Cloud Resource Manager API is not enabled in the host project | Enable it from step 5, then try again. |
| The connector service account holds write permissions | Something granted a write role – Editor, Owner, or similar – directly or through a folder or the organization. Eraser refuses write-capable access. Remove it and keep only the three read roles. |